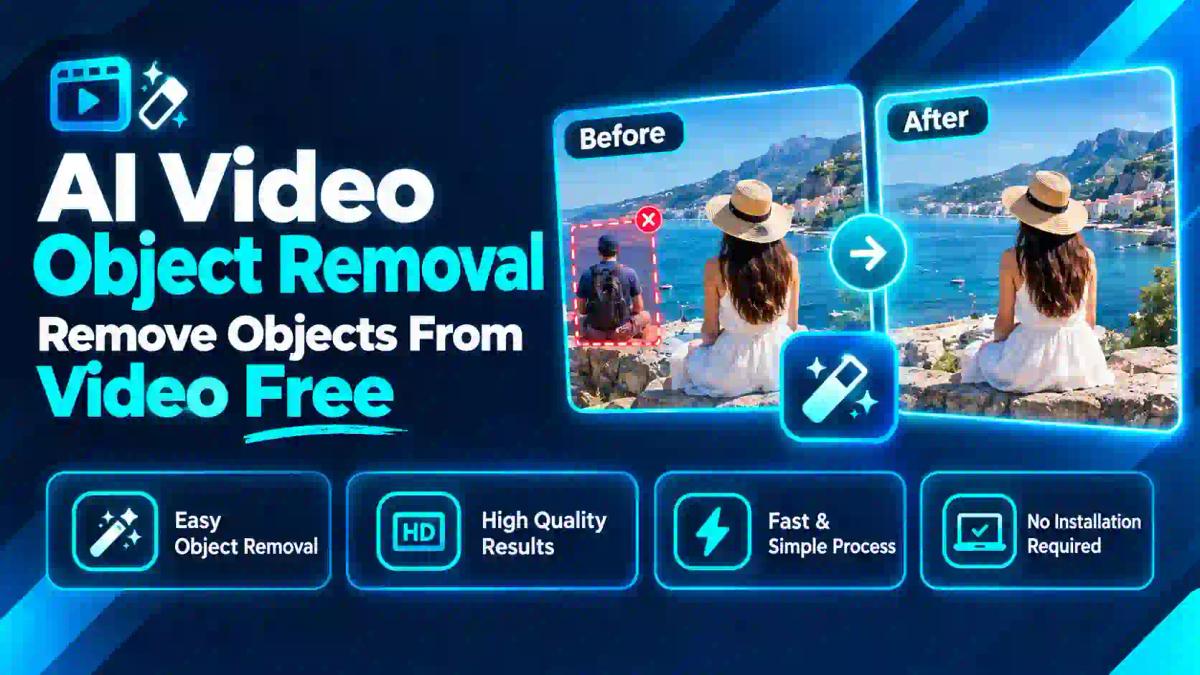
AI Video Object Removal: Remove Objects From Video Free
AI video object removal, also called video inpainting, is the process of deleting something from a clip and filling the gap so it looks like the object was never there.
Think of it like removing a stain from a printed photo and painting in the missing pattern. The difference is that a video has hundreds of frames, and the "painting" must look consistent across all of them. If it doesn't, you see flicker, ghosting or a wobbling patch.
The Four Stages Behind the Scenes
Selection. You brush over, click or describe the object you want removed.
Mask generation. The AI builds a segmentation mask, a precise outline of the object in every frame.
Tracking. Motion tracking and optical flow follow the object (and the camera) as they move.
Reconstruction. The model fills the masked area using information from surrounding pixels and nearby frames.
Step 4 is where quality is won or lost. We explain it next.
How Video Inpainting Works (In Plain English)
You don't need a computer science degree to use these tools, but understanding the logic helps you predict results.
Borrowing From Other Frames
If a person walks across a lawn, the grass behind them is visible in the frames before and after they pass. A good model propagates that clean grass into the frames where the person blocks it. This is called temporal propagation.
Research systems such as E2FGVI and ProPainter are built around this idea. They use optical flow, which estimates how pixels move between frames, to carry real background information into the hole.
Inventing Missing Pixels
Sometimes no frame shows what was behind the object. Imagine a parked truck that never moves. There is nothing to borrow. Here the AI must generate plausible texture, like a generative fill. This is where results get less reliable, and where blur or odd patterns appear.
Selecting the Object Smartly
Segmentation models, including Meta's Segment Anything Model (SAM), made one-click selection much easier. You click on a person, and the model outlines them. Many consumer tools use similar technology under the hood, though we can't say which model any specific app uses.
A Useful Mental Model
| Situation | What the AI relies on | Typical result |
|---|---|---|
| Object moves, camera still | Real background from other frames | Usually excellent |
| Object still, camera still | Generated texture | Hit or miss |
| Object moves, camera moves | Flow estimation plus propagation | Good to mixed |
| Object fills most of the frame | Almost entirely generated | Often poor |
Keep this table in mind. It predicts your outcome better than any feature list.
Why Removing Objects from Video Matters
People use this skill for far more than vanity edits. Here are the most common reasons:
- Cleaner storytelling. A stranger walking through your travel shot pulls attention away from your subject.
- Brand polish. Business owners remove stray signage, competitors' logos or messy background items.
- Privacy. Removing a bystander's face or a visible license plate can protect people.
- Salvaging a good take. A boom mic dip or a camera operator's reflection can ruin an otherwise perfect shot.
- Saving reshoots. Time and travel costs add up quickly.
Used responsibly, object removal is a practical clean-up skill. We come back to responsible use near the end.
Quick Summary: Types of Free Tools You Can Use
We'll avoid promising specific free-plan terms here, since they change constantly. Instead, here are the main categories and what to expect from each.
1. Browser-Based AI Video Erasers
You upload a clip, brush over the object and download the result. These need no install and work on any computer. The trade-offs are upload limits, processing queues and privacy considerations, because your footage goes to a server.
2. Mobile Video Editing Apps
Popular editors such as CapCut include AI-assisted features on phones and desktops. What is free, and which removal features are available, varies by app version and region. Verify inside the app or on the official help pages.
3. AI Creative Platforms
Platforms such as Runway offer AI video editing tools with generative features. Free tiers and credits change often, so check the current pricing page before planning a project around them.
4. Professional Desktop Software
Adobe documents a Content-Aware Fill workflow in After Effects for removing objects from video. It is powerful, but it usually requires a paid subscription, so it falls outside "free," apart from any trial period.
5. Open-Source Research Models
Models like ProPainter and E2FGVI are published with code for people comfortable with Python and a capable graphics card. They cost nothing but demand technical setup. They are also research tools, not polished apps, and results vary by clip.
Which Category Should You Pick?
| Your situation | Best starting point |
|---|---|
| Short clip, no software installed | Browser-based AI eraser |
| Editing on your phone | Mobile editing app |
| Need maximum control | Desktop software or open-source models |
| Tight on time, simple object | Any one-click tool |
| Sensitive or private footage | Local software, not cloud upload |
Step-by-Step: How to Remove Objects from a Video Free with AI
These steps work across most AI video erasers, whatever the brand. Interfaces differ, but the logic is the same.
Step 1: Prepare Your Clip Before You Upload
Preparation decides half your result.
Trim first. Cut the clip to just the section that needs fixing. Shorter clips process faster and often fit free-plan limits.
Keep the original. Save an untouched copy before any editing.
Check resolution and format. MP4 files in common codecs work most widely. If a tool rejects your file, a converter such as FFmpeg can re-encode it.
Note the object's path. Know when it enters and leaves the frame.
Practical tip: If your free plan limits clip length to a few seconds, split the video into segments and process them separately. Then rejoin them in your editor.
Step 2: Upload Your Video Clip
Open your chosen tool and upload the trimmed clip. Wait until the preview loads fully before you start selecting anything. Rushing here causes lag later when you scrub through frames.
Before you proceed, check whether the tool processes files on your device or on its servers. If your footage includes private moments, children or confidential business material, prefer an option that works locally or has a clear privacy policy.
Step 3: Highlight the Object
Most tools offer one of three selection methods:
- Brush. Paint over the object manually.
- Click to select. Click once and let the AI outline the object.
- Text prompt. Type a description such as "the person in the red jacket."
For best results:
- Paint slightly outside the object's edge, not exactly on it. Including a thin margin covers shadows and soft edges.
- Don't forget shadows and reflections. The AI removes what you mask, so an unmasked shadow will remain and give the game away.
- If the object moves, check the mask at several points in the timeline.
Step 4: Let the AI Inpaint the Frames
Start the processing. Time depends on clip length, resolution and server load. A short clip may finish in a minute or two, while longer or higher-resolution files can take much longer.
While you wait, don't refresh or close the tab unless the tool says it's safe.
Step 5: Preview Carefully
Never export on the first glance. Scrub through the clip frame by frame at the places that matter most:
- The moment the object enters the frame
- The moment it leaves
- Any frame where it crosses a hard edge, such as a doorway, fence or horizon
- Frames where the camera moves
Look for three telltale problems: a blurry patch, a flickering patch and ghost outlines.
Step 6: Export in the Best Quality Available
Choose the highest resolution your free plan allows. If the export shows a watermark or caps your resolution, decide whether the clip is good enough for your purpose, or whether to use another tool.
Then do a final playback on a larger screen than a phone. Problems that hide on a small display often appear on a monitor.
Real-World Use Cases (and How to Handle Each)
Use Case 1: Removing a Person from a Video
This is the most common request. Whether it's a passer-by or a photobomber, the approach is the same.
Works best when: The person walks across the frame while the camera stays still, so the background is revealed in other frames.
Struggles when: The person stands still in the middle of the shot for the entire clip, because the AI has to invent everything behind them.
If you have photos from the same scene, our guides on removing a person from a photo without blur and removing multiple people from a photo explain the same logic on still images. You can also try the AI people remover and AI person remover pages on still frames.
Use Case 2: Removing Text, Captions and Timestamps
Burned-in text is tricky because it sits on top of moving footage and often has high contrast edges.
- Static text over a plain area is usually easy.
- Moving text or text over busy scenes is harder.
- Date stamps in a corner are often simple to hide.
For a full walkthrough, see how to remove text from video and how to remove words from video. For stills, the AI text remover and date stamp remover are helpful.
Use Case 3: Removing a Logo from Your Own Footage
A logo on your own product, your own sign or footage you own is a normal editing job. Read our guide on removing a logo from video without blurring, which explains why logos can leave smudges and how to reduce them.
You can also explore the logo remover tool.
Use Case 4: Removing QR Codes and Small Overlays
Small graphics are easier than people expect because the masked area is tiny. Our post on removing a QR code from video shows how.
Use Case 5: Background Clutter
Power lines, signs, bins, cables and stray cups are classic distractions. Thin objects like wires are surprisingly easy if the background is a plain sky, but tricky against trees or buildings.
Experience-based tip: For thin lines, mask a tight, continuous strip rather than many small dabs. Gaps between dabs cause patchy fills.
Tips for Clean Results Without Blur or Flicker
This is where most free-tool users lose quality. Here is how to fix the common problems.
Problem 1: Blurry Patch Where the Object Was
Cause: The AI had nothing to borrow, so it smoothed the area.
Fixes:
- Mask the smallest area you can.
- Use a shorter segment where the background is actually revealed.
- Run the finished clip through a sharpening step. See our AI blur remover and image sharpener for still frames, and the guide on sharpening a blurry image online free.
Problem 2: Flickering or Shimmering
Cause: Each frame was filled slightly differently, which breaks temporal consistency.
Fixes:
- Use a tool that processes the clip as a sequence, not frame by frame.
- Slightly extend the mask so the edge doesn't "breathe."
- Apply light denoising or a gentle motion blur to hide small inconsistencies.
Problem 3: Ghost Outlines or Shadows
Cause: You masked the object but not its shadow or reflection.
Fix: Redo the mask and include the shadow, the reflection in glass or water and any soft edge.
Problem 4: Camera Moves and the Fill Slides
Cause: The tool lost track of camera motion.
Fixes:
- Stabilize the clip first, then remove the object, then restore the motion if needed.
- Split the clip at big camera moves.
Problem 5: Audio Drops Out
Cause: Some tools export video only.
Fix: Keep your original audio track and re-attach it in your editor.
A Quick Pre-Export Checklist
- [ ] Mask includes shadow and reflection
- [ ] Entry and exit frames look clean
- [ ] No flicker at normal playback speed
- [ ] Audio is in sync
- [ ] Resolution matches the original
- [ ] Original file saved separately
When Free Is Enough
- Social posts and short clips
- Personal projects and family videos
- Testing whether a technique works for your footage
When to Consider Paid or Professional Tools
- Client work with strict quality requirements
- Long clips or 4K footage
- Complex scenes with moving cameras
- Footage you can't upload to a cloud service
A Smart Hybrid Workflow
Many editors combine methods:
Let AI do the heavy lifting.
Fix leftover problem frames by hand.
Crop slightly if an edge artifact remains.
Add a subtle grain layer to blend the patch with the rest of the shot.
This is faster than doing everything manually and cleaner than trusting AI alone.
Mobile Walkthrough: Removing Objects from Video on Your Phone
Many people edit on a phone. It works, with some limits.
What Works on Mobile
- Short clips of a few seconds
- Simple objects on simple backgrounds
- Quick social media fixes
Step-by-Step on a Phone
Trim the clip to the shortest useful segment.
Open your editing app or a browser-based tool.
Import the clip and wait for it to load.
Select the object using the brush or tap-to-select feature.
Run the removal and keep the app open while it processes.
Preview at full screen and scrub slowly.
Export at the highest quality available.
Mobile Limitations
- Smaller screens hide artifacts
- Heavy processing drains battery and may overheat the phone
- Some features are limited to desktop versions
If you edit with CapCut, see our guide on removing the CapCut watermark to make sure your export is clean. For social platforms, our guides on removing an Instagram watermark from a Reel and removing watermarks from Facebook may help with your own content.
Why Choose RemoverHub for Video Cleanup Workflows?
Video object removal rarely stops at one step. You may need to clean a still frame, remove a logo, fix blur or prepare a thumbnail. That is where a broad toolkit saves time.
Why choose RemoverHub:
- Many cleanup jobs in one place. Browse the full tools library, including the AI object remover, watermark remover and shadow remover.
- Guides written from hands-on testing. Our blog library covers video and image cleanup in plain language.
- Frame-level cleanup. Pull a problem frame, clean it with an image tool and use it as a reference for your edit. Our remove object from photo guide shows the method.
- Honest limits. We tell you when a technique has trade-offs instead of overselling it.
Explore advanced RemoverHub tools for tasks beyond this guide, or contact our team with questions. For a broader look at which tools hold up under testing, see best AI watermark removers, tested and ranked.
How to Learn Video Cleanup Skills (Free and Paid Resources)
If you want to move beyond one-click tools, here is a practical learning path.
Free Resources
- Official documentation. Adobe's Content-Aware Fill documentation explains professional workflows.
- Research papers. Read the abstracts of the ProPainter paper and E2FGVI paper to understand how modern inpainting works.
- Computer vision basics. The OpenCV site offers tutorials on tracking and video processing.
- Benchmarks. The DAVIS challenge site shows the datasets researchers use to test video segmentation.
- Command-line video tools. FFmpeg documentation teaches trimming, converting and stabilizing clips.
Paid or Structured Options
- Online courses on video editing and visual effects
- Professional software with built-in tutorials
- Community workshops focused on VFX
A Simple Practice Plan
Week 1: Remove one small, simple object from a still clip.
Week 2: Try a moving object against a plain background.
Week 3: Work with a moving camera.
Week 4: Combine AI with manual cleanup on a harder shot.
Practice on your own footage. It's the fastest way to learn what the tools can and can't do.
Career and Skill Outlook: Why This Skill Is Worth Learning
Cleanup and retouching skills sit inside a broader field: video editing and visual effects (VFX). We aren't going to quote salary numbers here, since pay varies widely by country, experience and employer, and we can't verify a single reliable figure. Instead, here is what we can say honestly.
- Demand drivers: Social video, advertising, e-commerce and online education all need clean footage.
- Where cleanup skills help: Freelance editing, social media management, product video, real estate video and small-agency production.
- How AI changes the job: It speeds up routine fixes, so the value moves toward judgment, taste and quality control.
- Skills that stay valuable: Spotting artifacts, knowing when to reshoot and combining tools well.
If you want to see real market data, check job listings and professional association surveys in your region instead of relying on generic figures.
Responsible Use: Ethics, Rights and Privacy
A short section here protects you and your audience.
Edit Footage You Own or Have Permission to Edit
Removing a stray bystander from your own travel video is routine. Removing a creator's watermark from someone else's video to reuse it is a different matter and may break platform rules or copyright law. We aren't lawyers, and this isn't legal advice, but the principle is simple: edit what is yours or what you're allowed to edit.
Don't Mislead People
Removing objects can change what a video appears to show. If your edit changes meaning, for example in news, evidence, product reviews or documentation, disclose it. Many platforms ask creators to label altered or AI-generated media.
Protect Privacy
- Avoid uploading sensitive footage to unknown services.
- Read the tool's privacy policy to learn whether files are stored or used for training.
- Consider local software for confidential material.
Respect Provenance Marks on AI Video
Some AI-generated videos carry visible or invisible provenance markers. Our guides on removing watermarks from AI-generated content, the Sora 2 watermark and the Veo 3 watermark cover what those marks are and the trade-offs of editing them. When you publish AI video, label it honestly.
Related Cleanup Skills Worth Knowing
Once you can remove objects, these related skills come naturally:
- Green screen work. Our guides on removing green screen from video online free, the best free green screen remover, CapCut green screen removal and fixing green screen spill are good next steps. For more advanced compositing, see After Effects chroma key.
- Background removal for stills. See best background remover tools in 2026.
- Format choices. Our JPEG vs PNG guide helps when you export frames.
- Platform-specific downloads and cleanup. See TikTok watermark remover and removing watermarks from YouTube video for your own content.
Frequently Asked Questions
Can AI remove objects from a video?
Yes. AI detects the object you select, builds a mask and reconstructs the background across the affected frames. Quality depends on object movement, camera movement and background complexity.
Is there a free AI tool to remove objects from video?
Several tools offer free tiers or trials, but limits on clip length, resolution, exports and output watermarks are common. Check each provider's current pricing page, because free plans change often.
Can AI remove a moving person from a video?
Yes, often with good results when the camera is steady and the person walks across the frame. The background is revealed in other frames, so the AI can borrow real pixels. Results drop when the person stays in one place or the camera moves a lot.
How do I remove an object without cropping the video?
Use AI inpainting instead of cropping. Mask the object, including its shadow, let the AI fill the area and review the result frame by frame. Cropping only works if the object sits near an edge.
Does removing objects reduce video quality?
It can. The reconstructed area may look softer than the rest of the frame, and exporting at a lower resolution reduces quality. Mask tightly, process short segments and export at the highest resolution available.
Why does my result flicker?
Flicker happens when the AI fills each frame slightly differently, which breaks temporal consistency. Try a tool that treats the clip as a sequence, extend the mask slightly and apply light smoothing.
Can I remove objects from a video on my phone?
Yes, for short clips and simple objects. Phones have limits on battery, screen size and available features, so complex scenes are often better on a computer.
Can AI remove text or logos from a video?
Yes, especially static text or logos over simple backgrounds. Moving text over busy footage is harder. Only remove logos from footage you own or have permission to edit.
Is AI object removal better than manual editing?
It is faster and needs less skill, but manual editing gives more control for difficult shots. Many editors combine both.
Is it safe to upload my video to an online tool?
It depends on the tool. Read the privacy policy, avoid uploading sensitive footage and use local software for confidential material.
Conclusion:
Removing objects from video with AI is no longer a specialist skill. With the right clip and a careful workflow, you can get clean results for free. The key is knowing what the AI is actually doing and helping it succeed.
Here is your action plan:
Trim and back up your original clip first.
Choose a free tool that fits your device and privacy needs, and verify its current limits.
Mask carefully, including shadows and reflections, with a small margin around the object.
Preview frame by frame, especially where the object enters and leaves.
Fix problems with shorter segments, tighter masks, sharpening or a hybrid manual touch-up.
Export at the best quality available and check the result on a large screen.
Edit responsibly: use your own footage, protect privacy and disclose changes that affect meaning.
Start with a ten-second test clip today. It will teach you more than any tutorial. When you're ready to go further, book a seat at Advance Free Tools offered by RemoverHub and explore the full toolkit.