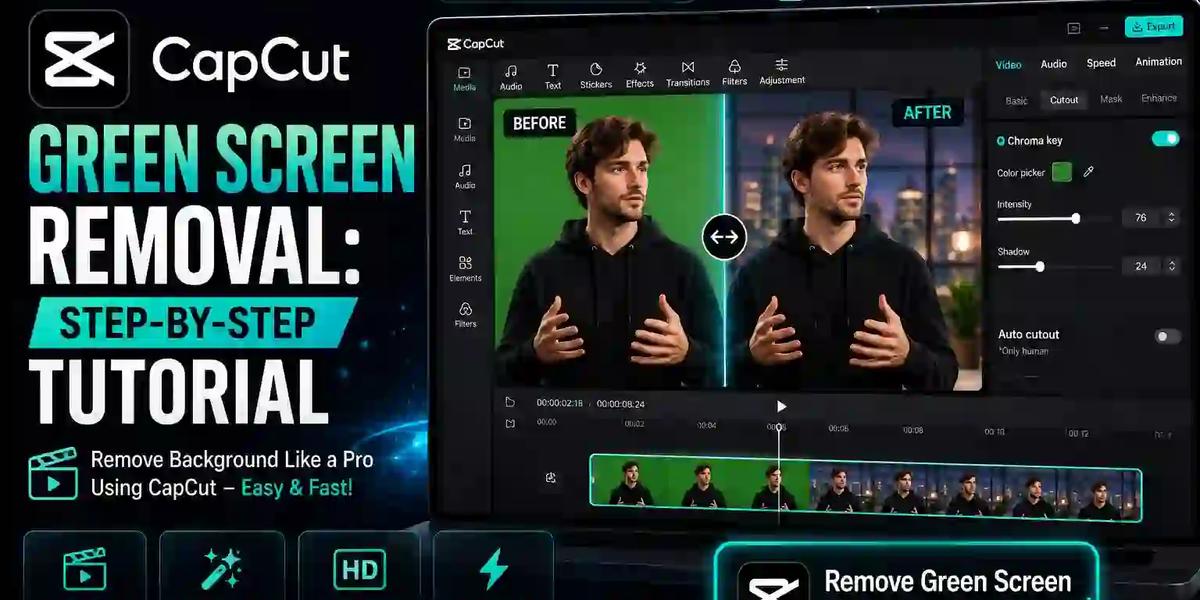
CapCut Green Screen Removal: Step-by-Step Tutorial
If you've filmed footage against a green screen and need to swap in a new background using CapCut, the process is more straightforward than it looks once you know where the right settings live. To remove a green screen in CapCut, import your clip, add the chroma key effect from the video/effects panel, select the green color to remove using the eyedropper tool, and adjust the intensity and shadow sliders until the background disappears cleanly, then layer a new background clip underneath. The whole process takes just a few minutes once you know where each setting lives, though the exact menu location differs slightly between CapCut's mobile and desktop (PC) versions.
This tutorial walks through both versions step by step, plus how to fix common problems like leftover green spill and rough edges.
What Is Chroma Key, and How Does CapCut Handle It?
Chroma key is the technical term for removing a specific color, green in this case, from footage and replacing it with something else. CapCut offers this as a built-in effect rather than requiring any external plugin, which is part of why it's become such a popular free option for creators without access to professional editing software.
It's worth knowing upfront that CapCut actually offers two distinct ways to remove a background:
Chroma Key, the traditional method that specifically detects and removes a solid color (usually green) from your footage.
AI-based background removal, a newer feature that uses image segmentation to remove any background, even without an actual green screen, by identifying the subject directly.
These are genuinely different tools solving similar problems, and mixing them up is one of the most common points of confusion for CapCut users, especially anyone searching for how to remove a background without a real green screen.
How to Remove Green Screen in CapCut (Mobile)
Import your green screen clip into a new CapCut project.
Add your background clip first, placing it on the timeline below your green screen footage, then add your green screen clip on the layer above it.
Tap your green screen clip, then select Cutout from the bottom toolbar, followed by Chroma Key.
Use the eyedropper tool to tap directly on the green color in your footage, telling CapCut exactly which color to remove.
Adjust the Intensity slider to control how aggressively the green is removed, too low and green remains visible; too high and you risk removing parts of your subject too.
Adjust the Shadow slider to fine-tune how soft or hard the resulting edge looks.
Preview the result, checking edges around hair or fine detail specifically, and adjust sliders further if needed.
How to Remove Green Screen in CapCut (PC/Desktop)
The desktop version follows a similar logic, though the interface is laid out differently:
Import both your green screen footage and your intended background clip into the project.
Place the background clip on a lower track, and your green screen footage directly above it on the timeline.
Select your green screen clip, then open the Video panel and look for Chroma Key (sometimes labeled under a keying or cutout section, depending on your CapCut version).
Use the color picker/eyedropper to select the green shade you want removed.
Adjust Intensity and Shadow settings, the same core controls as mobile, until the background is cleanly removed.
Play back the timeline to confirm your new background shows through correctly, then export.
Since CapCut updates its interface periodically, exact menu labels can shift slightly between versions, if a specific button name doesn't match exactly what you see, look for "Cutout," "Keying," or "Chroma Key" nearby, since these terms are sometimes grouped or renamed in different CapCut releases.
Why Isn't Chroma Key Working Properly in CapCut?
A few common issues account for most chroma key problems:
- Uneven lighting on the original green screen. If your source footage has shadows or bright spots on the screen, CapCut's chroma key struggles to detect a single consistent color to remove.
- Intensity set too low or too high. Too low leaves visible green residue; too high starts eating into your subject's edges, particularly hair or semi-transparent material.
- Wrong color selected with the eyedropper. If you tap a slightly different shade than the screen's actual dominant color, the key won't catch the full background evenly.
- Compressed or low-quality source footage. Heavy compression can blur the clean edge between subject and background, making accurate keying more difficult regardless of how you adjust the sliders.
How Do I Fix Green Spill After Using Chroma Key in CapCut?
Green spill, the faint green tint that clings to hair or shoulders even after chroma key removal, comes from light bouncing off the green screen onto your subject during the original filming. Within CapCut itself, adjusting the Shadow slider slightly can help soften visible spill around edges, but CapCut's built-in tools have real limits here, it wasn't built with dedicated spill-suppression controls the way professional compositing software has.
For more thorough spill correction, particularly on hair or fine detail, our Green Screen Remover includes automatic spill detection as part of its removal process, and our detailed guide on fixing green screen spill without Photoshop covers prevention techniques (lighting, screen distance) alongside correction methods that go further than CapCut's native sliders allow.
Can I Remove a Green Screen in CapCut Without an Actual Green Screen?
Yes, but this uses CapCut's separate AI-based background removal feature rather than traditional chroma key. Since AI segmentation identifies your subject directly (using image recognition) rather than detecting a specific color, it works on footage filmed against any background, not just a green or solid-colored screen. Results tend to be more consistent with simpler, less cluttered original backgrounds, but this feature genuinely opens up background removal for anyone without a formal green screen setup at home.
Why Does My CapCut Green Screen Removal Leave Rough Edges?
Rough or jagged edges after chroma key removal usually trace back to a combination of factors: the Intensity setting being too aggressive (which can eat into fine detail like hair), the original footage having compression artifacts along the subject's outline, or uneven screen lighting creating inconsistent color data for CapCut to key against cleanly. If you've adjusted CapCut's sliders and edges still look rough, particularly on hair or fine detail, running the exported clip through a dedicated tool built specifically for edge refinement, like our Green Screen Remover, can clean up what CapCut's native sliders couldn't fully resolve.
CapCut Mobile vs. Desktop Chroma Key: Key Differences
Factor: Menu location
Mobile: Cutout → Chroma Key
Desktop (PC): Video panel → Chroma Key
Factor: Precision of adjustments
Mobile: Touch-based sliders, slightly less precise
Desktop (PC): Mouse-based, generally easier for fine adjustments
Factor: Multi-layer editing
Mobile: Supported, but screen size limits visibility
Desktop (PC): Easier to manage multiple tracks/layers
Factor: Best for
Mobile: Quick edits on the go
Desktop (PC): More detailed, multi-clip compositions
Is CapCut's Chroma Key Feature Free to Use?
Yes, chroma key is included in CapCut's free tier and doesn't require a paid subscription to access. Some advanced effects, templates, or export options elsewhere in the app may sit behind CapCut Pro, but the core chroma key and cutout functionality itself is free across both mobile and desktop versions.
Can I Replace the Background After Removing Green Screen in CapCut?
Yes, this is actually the entire point of the layering step covered earlier. Once your green screen clip has chroma key applied and the background is removed, anything placed on the timeline track directly below it, a video clip, a static image, an animated background, will show through automatically. You can swap out that background track at any point without needing to redo the chroma key settings on your subject clip.
CapCut Green Screen for Different Content Types
- YouTube videos: Longer-form content benefits from taking extra time on the Intensity and Shadow sliders, since viewers are more likely to notice imperfect edges on a larger screen over a longer viewing period.
- TikTok and Instagram Reels: Quick, mobile-shot content generally tolerates minor imperfections better, given shorter watch times and smaller screens, making the mobile chroma key workflow perfectly sufficient.
- Product videos: Clean, consistent edges matter more here, so it's worth taking the extra step of reviewing footage at full screen before finalizing.
- Low-budget/home setups: Since lighting control is often more limited at home, expect to lean more heavily on Intensity/Shadow adjustments, and consider a secondary spill-correction pass if edges still show green tint after CapCut's native settings.
Frequently Asked Questions
How do I remove a green screen in CapCut? Import your green screen clip above a background clip on the timeline, select Chroma Key from the Cutout menu (mobile) or Video panel (desktop), use the eyedropper to select the green color, then adjust Intensity and Shadow sliders until the background is cleanly removed.
Why isn't chroma key working properly in CapCut? Common causes include uneven lighting on the original green screen, Intensity set too high or low, an inaccurate color selection with the eyedropper, or heavily compressed source footage that blurs the edge between subject and background.
Can I remove a green screen in CapCut without an actual green screen? Yes, using CapCut's separate AI-based background removal feature, which identifies your subject through image segmentation rather than detecting a specific color, working on any background rather than requiring a solid-colored screen.
How do I fix green spill after using chroma key in CapCut? Adjusting the Shadow slider can help slightly, but CapCut's native tools have limited spill-suppression capability. For more thorough correction, a dedicated tool with automatic spill detection typically produces cleaner results.
Is CapCut's chroma key feature free to use? Yes, chroma key and cutout functionality are included in CapCut's free tier on both mobile and desktop, with no subscription required for this specific feature.
Can I replace the background after removing green screen in CapCut? Yes. Once chroma key is applied to your subject clip, any clip placed on the track beneath it, video, image, or animation, shows through automatically, and can be swapped without redoing the chroma key settings.
Final Thoughts
CapCut makes green screen removal genuinely accessible without needing professional editing software, whether you're working on mobile or desktop. The core workflow, layering your background beneath your green screen clip, selecting the color with the eyedropper, and dialing in Intensity and Shadow, handles the vast majority of everyday content cleanly. For tougher cases involving green spill or rough edges that CapCut's native sliders can't fully resolve, a dedicated correction tool can pick up where CapCut leaves off.
Need extra help cleaning up spill or edges CapCut couldn't quite fix? Try RemoverHub's Green Screen Remover free, or read our guide on fixing green screen spill without Photoshop for techniques that go beyond what any single editing app offers natively.