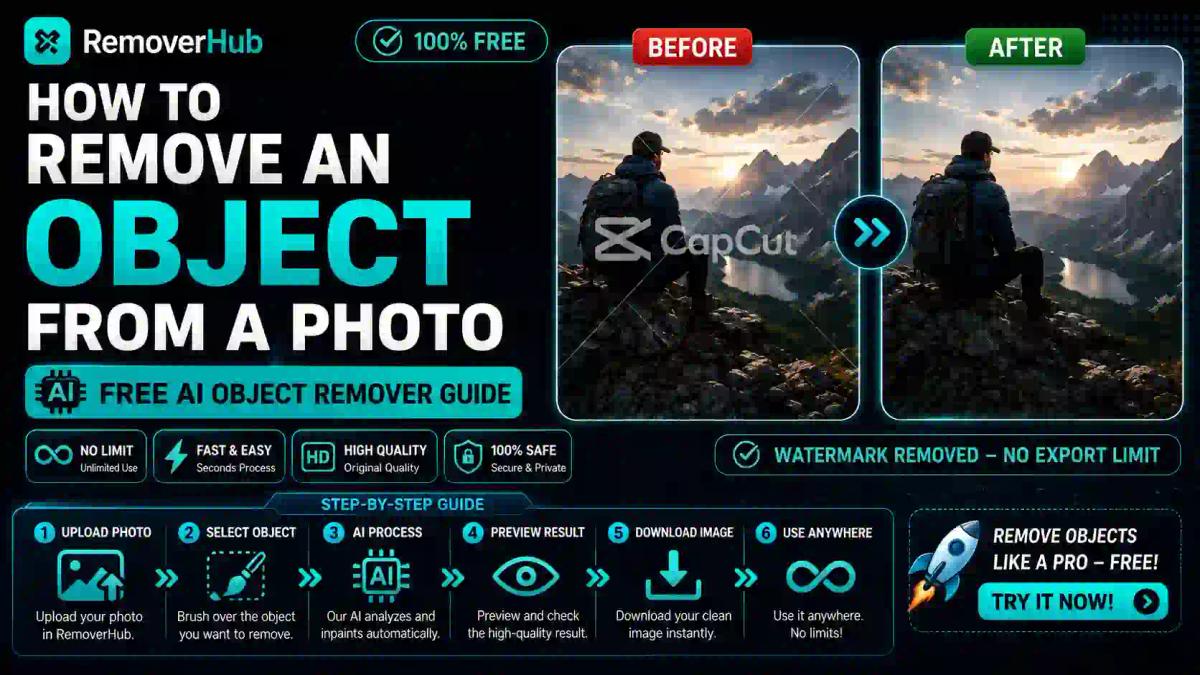
How to Remove an Object From a Photo Free: AI Object Remover Guide
Removing an object from a photo comes down to one core technique: AI-powered inpainting, which analyzes the pixels surrounding the unwanted object and reconstructs that area to match the background seamlessly. Modern free tools handle this automatically — you just mark what you want gone, and the algorithm fills the space using patterns, textures, and colors it detects nearby. No Photoshop license or editing skills required.
Whether it's a stranger who wandered into your vacation photo, a power line cutting through a perfect sunset, or a watermark sitting on top of an image you need clean, this guide walks through exactly how object removal works, how to do it step by step with a free tool, and where the technology genuinely struggles — because being honest about the limits matters as much as showing you the process.
What Object Removal Actually Does to Your Photo
Before touching any tool, it helps to understand what's happening technically, because it explains both why this works so well most of the time and why it occasionally produces odd results.
When you select an object to remove, the software doesn't just delete those pixels and leave a hole. It runs a process called inpainting — a technique where an algorithm examines the color, texture, lighting, and pattern of the area surrounding your selection, then generates new pixel data to fill the gap in a way that blends naturally with everything around it.
Older tools used a simpler method called the clone stamp, which manually copies pixels from one part of an image and pastes them over another. It works, but it requires a human to do the matching by hand, adjusting for lighting and perspective as they go. Modern AI-based tools use generative fill or neural-network-driven inpainting instead, which does this matching automatically and, in most cases, far more convincingly than manual cloning for a beginner.
The practical difference matters: clone stamping is precise but slow and skill-dependent, while AI inpainting is fast and beginner-friendly but occasionally guesses wrong on complex textures. Knowing which situation you're in — a simple background versus a busy, detailed one — helps you set realistic expectations before you start.
Step-by-Step: Remove an Object From a Photo Online Free
Here's the actual workflow using the Free AI Object Remover, a browser-based tool that handles this without any software installation or account requirement.
Upload your photo. Open the AI Object Remover and upload the image directly from your device. Most tools accept JPG, PNG, and WebP files up to a reasonable size limit.
Select the object you want removed. Use the brush or lasso tool to paint over or outline the unwanted object. Be generous with your selection — including a few extra pixels around the edges of the object usually gives the AI cleaner boundaries to work with than a selection that's too tight.
Let the AI process the selection. The tool analyzes the surrounding pixels and generates a reconstruction. This typically takes a few seconds, depending on the size of the selected area and the complexity of the background.
Review the result closely. Zoom in on the edited area. Look for warped patterns, mismatched lighting, or blurry patches — these are the telltale signs of an imperfect inpaint that needs a second pass.
Touch up if needed. If the first pass leaves artifacts, most tools let you re-select the problem area and reprocess it, or manually refine the edges. Sometimes a second, smaller selection over just the flawed section fixes what a single large selection missed.
Download the finished image. Save the result to your device. Check the file format and resolution match what you originally uploaded, since some tools compress on export.
If your object removal task specifically involves a person rather than an inanimate object, a dedicated tool like the AI Person Remover is often tuned more specifically for skin tones, hair edges, and clothing textures than a general-purpose object remover.
Removing Specific Types of Objects: What Changes
Not every "object" behaves the same way during removal, and knowing this upfront saves you from repeated frustration.
People and photobombers. This is the most common request, and modern AI handles it well when the person isn't overlapping complex background detail. A person standing against open sky or a plain wall is a clean removal. A person standing in front of intricate architecture or foliage is harder, since the algorithm has to reconstruct fine detail it never actually saw. The AI People Remover is built specifically for these cases, including group photos where you need to remove more than one person.
Watermarks and logos. Removing a watermark is technically a form of object removal, but it comes with an important caveat covered in the ethics section below. Purely from a technical standpoint, watermarks sitting on simple backgrounds are among the easiest removals, while those layered over detailed photography are trickier. Dedicated tools like the Watermark Remover or Logo Remover are optimized specifically for this pattern rather than general objects.
Text and date stamps. Old photos with a printed date stamp in the corner, or screenshots with overlaid text, need a slightly different approach since text has hard edges and consistent color that plain object removal sometimes struggles to blend cleanly. The AI Text Remover and Date Stamp Remover handle these edge cases more reliably than a general object tool.
Power lines, wires, and thin objects. Thin, high-contrast lines running across varied backgrounds — think telephone wires against a sky with clouds — are deceptively difficult. The line is easy to select, but the reconstruction has to correctly continue multiple different background textures (sky, clouds, maybe a building edge) across a very thin removed area, which is where quality can dip.
Shadows. An often-overlooked detail: removing an object but leaving its shadow behind looks unmistakably artificial. If you're removing a physical object from a photo, check whether it cast a shadow, and use a tool like the Shadow Remover to clean that up as a separate pass.
Why the Background Sometimes Looks Blurry or Wrong After Removal
This is one of the most common frustrations people report, and it comes down to a few predictable causes.
Busy or highly detailed backgrounds. A brick wall with irregular patterns, dense foliage, or a crowd of people behind your subject gives the AI far more complex data to reconstruct than a plain sky or solid wall. The more visual information the algorithm has to "invent," the higher the chance of a soft or slightly off result.
Insufficient surrounding context. If the object you're removing sits near the edge of the frame, the AI has less surrounding pixel data to draw from, which often produces a noticeably weaker reconstruction than an object removed from the middle of an image.
Overly tight selections. Selecting exactly the outline of the object, pixel-for-pixel, sometimes leaves a thin border of the original object's edge behind, which shows up as a faint outline or color fringe. A slightly looser selection generally produces a cleaner result.
Compression after export. Occasionally the removal itself is clean, but the image looks soft after downloading because the tool re-compressed the file on export. If you're noticing quality loss specifically after download rather than during editing, running the result through an image sharpener can recover some of that crispness.
The honest takeaway here: no tool, free or paid, can perfectly reconstruct detail that's genuinely complex and highly specific to what was actually behind the removed object. The AI is making an educated, pattern-based guess — an excellent one in most everyday cases, but a guess nonetheless.
AI Object Removal vs. Manual Editing: Which Should You Use?
People often assume professional results require Photoshop, but that's not the full picture anymore.
AI-based online tools win on speed and accessibility — no learning curve, no software cost, results in seconds. For the vast majority of everyday object removal tasks (a stranger in a vacation photo, a stray object in a product shot, a watermark on a simple background), this is genuinely enough.
Manual editing with content-aware fill or clone stamping in software like Photoshop wins when you need pixel-level control — complex overlapping objects, intricate texture matching, or professional print work where any visible artifact is unacceptable. According to Adobe's own documentation on content-aware fill, the feature gives users manual control over which source pixels the algorithm samples from, something most free online tools don't expose.
The realistic answer for most people: try the free AI tool first. It resolves the majority of everyday object removal needs in under a minute. Reach for manual editing only when the AI result genuinely isn't clean enough for your purpose — a client deliverable, a printed piece, or a highly detailed background.
Free vs. Paid Object Removal Tools
A fair number of people assume paid automatically means better, but with object removal specifically, that's not always true anymore.
Free browser-based AI tools now use the same fundamental inpainting technology that paid software licenses, just with fewer manual controls layered on top. For a single photo or occasional use, a free tool typically gets you a clean result with zero setup cost.
Where paid tools tend to pull ahead:
- Batch processing — running the same removal task across dozens or hundreds of images automatically
- Manual source-point control — telling the software exactly which area to sample from during reconstruction, rather than letting the algorithm decide
- Higher resolution output — some free tools cap output resolution, which matters for print or professional use
- No usage limits — free tools sometimes cap the number of edits per day or session
For a one-off photo cleanup, occasional social media touch-ups, or removing a photobomber from a personal photo, free tools are genuinely sufficient. If you're running a business that regularly processes product photography or client images, the batch capabilities of paid software start to justify the cost through time saved alone.
Is Removing an Object From a Photo Legal or Ethical?
This question comes up often enough that it deserves a direct, honest answer rather than a vague dismissal.
Editing your own photos — removing a stranger who wandered into your vacation shot, cleaning up a personal photo, or tidying a product image you own the rights to — is not a legal issue. You own the image and can edit it freely.
The concerns arise in specific situations:
- Removing watermarks from images you don't own the rights to, particularly stock photos or copyrighted work, can violate the terms of service of the platform the image came from and, depending on jurisdiction and intent, may raise copyright concerns. Removing a watermark from your own purchased or licensed image, where you have rights to the unwatermarked version, is a different matter entirely.
- Removing people from journalistic, evidentiary, or historically significant photos in a way that misrepresents what actually happened raises real ethical questions around photo authenticity, particularly if the edited image is presented as an unaltered original.
- Using object removal to misrepresent a product photo in e-commerce — removing a defect or flaw that's materially relevant to a buyer's purchase decision — can cross into consumer protection issues depending on your local regulations.
For the overwhelming majority of everyday use cases — personal photos, creative projects, product photography of your own inventory, cleaning up screenshots — object removal is a completely normal and unremarkable part of modern photo editing, no different from cropping or adjusting brightness.
Practical Use Cases Where Object Removal Genuinely Helps
Real estate photography. Agents regularly need to remove parked cars, trash cans, or neighboring clutter from listing photos to present a cleaner first impression, without misrepresenting the actual property itself.
E-commerce product photos. A background remover for product photos combined with object removal cleans up shadows, reflections, or stray items in the frame that distract from the product being sold.
Travel and personal photography. Crowds, other tourists, or unwanted background elements are probably the single most common reason people search for object removal tools in the first place.
Wedding and event photography. Photographers often need to remove exit signs, stray cables, or a guest who stepped into frame at the wrong moment — small cleanups that make a genuinely good shot usable.
Social media content. Cleaning up screenshots, removing platform watermarks from your own downloaded content, or tidying a background before posting are everyday, low-stakes edits.
Common Mistakes to Avoid
- Selecting too small an area. As mentioned earlier, a tight selection often leaves a faint outline of the original object. Give the AI slightly more surrounding space to work with.
- Ignoring shadows and reflections. Removing the object but leaving its shadow or a reflection in a nearby window or puddle is one of the most common giveaways of an edited photo.
- Not zooming in to check the result. A removal can look perfect at thumbnail size and reveal warping or blur once you zoom to 100%. Always check before publishing or sending.
- Removing objects from extremely low-resolution source images. Just like resizing, object removal works with the pixel data that exists. A blurry, low-resolution photo gives the AI less accurate information to reconstruct from, so results are noticeably weaker than on a sharp, high-resolution original.
- Skipping a second pass on complex backgrounds. If the first attempt leaves visible artifacts on a detailed background, a smaller, more targeted second selection over just the problem area often cleans it up better than starting over completely.
Frequently Asked Questions
How can I remove an object from a photo for free? Use a browser-based AI object removal tool — upload your photo, select the object with a brush or lasso, and let the AI reconstruct the background automatically. The Free AI Object Remover handles this without any software download.
Is there a free app to remove objects from pictures? Yes, several browser-based tools offer free AI-powered object removal with no account or software installation required, making them accessible directly from a phone or desktop browser.
Does removing an object from a photo reduce quality? Not inherently — a clean removal on a simple background typically preserves quality well. Quality issues usually stem from complex backgrounds, low-resolution source images, or compression during export rather than the removal process itself.
Can I remove a person from a photo without Photoshop? Yes. Dedicated AI tools like the AI Person Remover are built specifically for this and generally require no editing experience, unlike Photoshop's manual content-aware fill workflow.
How does AI object removal work? The AI analyzes the pixels, colors, and patterns surrounding your selected object, then generates new pixel data to fill that area in a way that blends with the background — a process called inpainting.
Is object removal from photos legal? Editing your own photos is legal. Concerns arise specifically around removing watermarks from copyrighted images you don't have rights to, or misrepresenting journalistic or evidentiary photos as unaltered originals.
Final Thoughts
Object removal has moved from a specialist Photoshop skill to something anyone can do in under a minute using free, AI-powered tools. The technology genuinely works well for the vast majority of everyday situations — photobombers, stray objects, watermarks, and background clutter — as long as you understand its real limits around complex, detailed backgrounds and give it slightly generous selections to work with.
If you've got a photo that needs cleaning up, start with the Free AI Object Remover, review the result closely at full zoom, and reach for a targeted second pass or a specialized tool — like the AI People Remover or Watermark Remover — if the first attempt needs refining. For everything else in your photo editing workflow, the full tools collection covers background removal, sharpening, and watermark handling in one place.