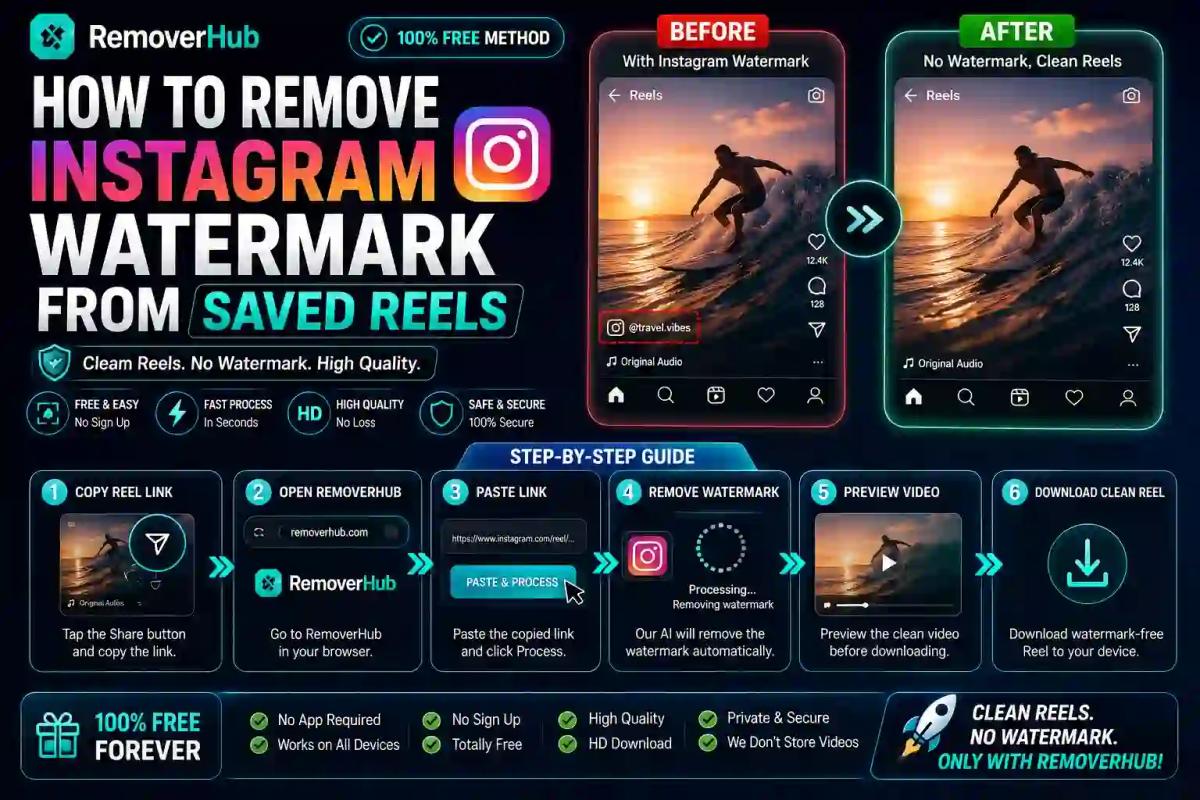
How to Remove an Instagram Watermark from a Reel (2026)
Removing the Instagram watermark from a saved reel comes down to one of two approaches: cropping out the watermark corner with a simple video editor, or running the file through a dedicated watermark-removal tool that intelligently fills in the area underneath. Both work, but they trade off differently on video quality, framing, and how much effort they take — and this guide walks through exactly when to use each one.
Before diving in, it's worth being upfront about something most guides skip: this article focuses specifically on removing the watermark from your own reels — content you created and own the rights to. If you're trying to strip a watermark off someone else's video to repost without credit, that's a different situation entirely, and one this guide won't help you with. More on why that distinction actually matters in a moment.
Why Instagram Adds a Watermark to Downloaded Reels in the First Place
When you save a reel through Instagram's built-in download feature, the app automatically stamps your username and the Instagram logo onto the corner of the video. This isn't a bug or an oversight — it's a deliberate attribution mechanism.
Instagram does this for two reasons. First, it protects creators by making it obvious where a piece of content originated if it gets shared elsewhere, which discourages uncredited reposting. Second, it functions as free brand marketing for Instagram itself — every watermarked reel that circulates on other platforms is a small ad for the app.
The practical result is that even your own reels come out watermarked when you tap "Save Video," which is genuinely frustrating if you're trying to repurpose your own content for a portfolio, a different platform, or a client deliverable that needs to look clean.
Is It Legal to Remove the Instagram Watermark?
This question comes up constantly, and the honest answer depends entirely on whose content you're working with.
Removing the watermark from your own reels — videos you filmed, edited, and posted yourself — is not a legal or ethical problem. You own the underlying content; the watermark is simply an artifact of how Instagram's download feature works, not a separate copyright claim over your video.
Removing the watermark from someone else's reel to repost it as your own, or to strip attribution before sharing it elsewhere, is a different matter. Instagram's Terms of Service prohibit using the platform to infringe on others' intellectual property rights, and removing a creator's identifying watermark before redistributing their work can expose you to copyright claims under frameworks like the Digital Millennium Copyright Act, separate from whatever Instagram's own enforcement might do to your account. If you want to share someone else's reel, the safer and simpler path is reposting through Instagram's native share/repost feature, which preserves attribution automatically.
This guide assumes the first scenario — you're working with your own content for personal archiving, a portfolio reel, cross-posting to another platform you also own, or client work where you hold the rights.
Method 1: Cropping the Video to Remove the Watermark
Cropping is the simplest, most accessible method, and it works because Instagram's watermark typically sits in a fixed corner of the frame rather than floating across the whole video.
How it works:
Open your saved reel in any basic video editing app (CapCut, InShot, or your phone's built-in editor all work).
Locate the crop or resize tool.
Trim the frame edges enough to cut out the corner where the watermark sits — usually the bottom-left area.
Preview the result to confirm the watermark is fully gone, not just partially obscured.
Export the cropped video.
The trade-off: Cropping reduces your video's frame size and shifts the aspect ratio slightly. For a reel meant to fill a 9:16 vertical frame, cropping out even a small corner section means you'll likely need to zoom or stretch the remaining footage to refill the frame — and that zoom introduces a mild quality loss, since you're essentially stretching fewer pixels to cover the same display area.
This method works best when:
- The watermark sits in a corner that doesn't contain important visual content
- You don't mind a slightly tighter or repositioned frame
- You want a fast, no-download-required fix using apps you likely already have
Method 2: Using a Dedicated Watermark Removal Tool
A dedicated watermark remover takes a fundamentally different approach than cropping. Rather than cutting away part of the frame, it analyzes the pixels around the watermark and intelligently reconstructs what should be underneath — essentially painting over the logo using context from the surrounding footage.
How it works:
Upload your saved reel to a watermark remover tool built to handle video files.
Select or mark the watermark area — most tools let you draw a box around the Instagram logo and username stamp.
Let the tool process the video. It analyzes the region frame by frame and fills it in using nearby pixel data and motion patterns.
Preview the output before downloading, since reconstruction quality can vary depending on how much motion and detail sits around the watermark.
Download the finished file.
The trade-off: Unlike cropping, this method preserves your original frame size and aspect ratio completely — nothing gets cut or repositioned. The quality trade-off shows up differently here: because the tool re-encodes the video during processing, you can see a mild resolution or compression difference between the original and the processed output, particularly if the footage behind the watermark had a lot of fine detail or fast motion.
This method works best when:
- You need to preserve the exact original framing (portfolio pieces, client deliverables)
- The watermark sits over an area with visual detail you don't want to lose by cropping
- You're processing multiple reels and want a faster, more consistent workflow than manual cropping each one
Cropping vs. Dedicated Tools vs. Screen Recording: Which Should You Use?
People often ask about a third option too — just screen recording the reel while it plays. It's worth addressing directly, because it's tempting but rarely the right call.
| Method | Preserves Frame Size | Quality Impact | Effort Level | Best For |
|---|---|---|---|---|
| Cropping | No — frame shrinks | Mild, from re-zooming | Low, quick | Fast fixes where the watermark corner has no important content |
| Dedicated watermark remover | Yes — full frame kept | Mild, from re-encoding | Low to moderate | Portfolio use, client work, preserving original composition |
| Screen recording | Yes, but resolution capped by screen | Significant — often visibly worse | Low, but slow to execute | Not generally recommended |
Screen recording seems like an easy workaround, but it introduces its own compression pass on top of Instagram's existing video compression, plus whatever resolution limit your device's screen recorder caps out at. In nearly every practical comparison, screen recording produces a visibly softer, lower-quality result than either cropping or a dedicated tool — it's rarely worth the trade-off unless no other option is available.
Does Removing the Watermark Reduce Video Quality?
Yes, to some degree, regardless of which method you choose — but the type and severity of quality loss differs meaningfully between approaches, which is worth understanding before you pick one.
With cropping, the quality hit comes from re-scaling. Once you cut away part of the frame, you either accept a smaller final video or zoom back in to refill the original dimensions — and that zoom stretches fewer source pixels across the same display area, softening fine detail slightly.
With a dedicated watermark tool, the quality hit comes from re-encoding and pixel reconstruction. The tool has to guess what belongs in the space the watermark occupied, and while modern reconstruction algorithms are genuinely good at this — especially over static or slow-moving backgrounds — footage with lots of fast motion or fine texture behind the watermark can show a subtle blur or smoothing artifact in that specific region.
With screen recording, the quality hit is the most severe, since you're recording a re-compressed version of an already-compressed video through your device's screen capture pipeline, which typically caps resolution and frame rate below the original file.
Practically speaking, for casual reposting or personal archiving, none of these differences are dramatic enough to notice at normal viewing speed on a phone screen. For professional portfolio work or client deliverables, it's worth reviewing your final export closely before calling it finished.
Step-by-Step: Removing the Watermark from Your Own Saved Reel
Here's the complete workflow, combining the practical steps for both main methods into one clear process:
Save your reel from Instagram first. Open your own reel, tap the three-dot menu, and select "Save Video" to download it to your device with the standard watermark applied.
Decide which method fits your use case. If the watermark sits in an unimportant corner and you don't mind a slightly tighter frame, crop it. If you need the full original composition preserved, use a dedicated tool.
For cropping: open the file in a basic video editor, trim the watermark corner, zoom back to refill the frame if needed, and export.
For a dedicated tool: upload the file to a watermark remover, mark the watermark region, let it process, and review the output before downloading.
Compare the result against your original at full screen size, not just a thumbnail preview, to catch any quality issues before you use the file elsewhere.
Save the cleaned file separately from your original download, so you always have the source version to work from again if needed.
Removing Watermarks on iPhone vs. Android
The core process is the same on both platforms, but the specific apps and default tools differ slightly.
On iPhone, the built-in Photos app has basic crop functionality, but it's fairly limited for precise watermark removal — most people find dedicated apps like CapCut or InShot easier for accurate cropping, since they show clearer frame guides. For the reconstruction-based approach, browser-based tools work identically on iPhone through Safari or Chrome, since the processing happens on the tool's server rather than on your device.
On Android, the stock Google Photos editor offers similarly basic cropping, and the same third-party apps (CapCut, InShot) are available and function nearly identically to their iOS versions. Browser-based watermark removal tools also work the same way here — upload through your mobile browser, process, and download the result directly to your device's storage.
Neither platform has a meaningful advantage for this specific task — the workflow and results are essentially identical either way.
Common Use Cases for Watermark-Free Reels
Understanding why people need this helps clarify which method actually fits your situation:
- Building a content portfolio. Freelance video editors, social media managers, and creators often need clean samples of their work without platform branding cluttering the frame — a client reviewing a portfolio wants to see your editing, not Instagram's UI.
- Cross-posting to platforms you also own. If you created a reel and want to also post it to your TikTok, YouTube Shorts, or personal website, a watermark-free version simply looks more polished and platform-agnostic.
- Personal archiving. Some creators keep a clean local archive of their own posted content in case they ever need to re-edit, repurpose, or reference old work without a logo baked permanently into the file.
- Marketing and business use. Brands that produce reels for their own Instagram sometimes need a clean version for use in ads, presentations, or other marketing materials where platform branding isn't appropriate.
- Editing and reuploading. If you're revising or extending your own reel — adding a new intro, adjusting pacing — starting from a clean source file avoids stacking a new watermark on top of an old one.
Troubleshooting: When the Watermark Won't Fully Disappear
A few common issues come up during this process, and most have straightforward fixes.
The reconstructed area looks blurry or smeared. This usually happens when the footage behind the watermark had significant motion or fine detail the tool couldn't confidently reconstruct. Try marking a slightly larger area around the watermark, giving the tool more surrounding pixel data to work from, or switch to the cropping method instead for that particular clip.
Cropping cuts off content you wanted to keep. If the watermark sits close to the center of the frame or near other important visual elements, cropping isn't the right tool — a dedicated reconstruction-based remover will preserve that content instead of cutting it away.
The exported file looks noticeably worse than the original. Check the export settings on whatever tool or app you're using — some default to lower bitrates or resolutions to speed up processing. Look for a "high quality" or resolution setting before exporting, rather than accepting default compression.
The watermark partially remains after processing. This typically means the marked selection area didn't fully cover the watermark's actual boundaries, especially if the username text is longer than expected. Re-select with slightly wider margins and reprocess.
A Note on Instagram's Terms and Responsible Use
It's worth repeating clearly: this entire guide is written around removing a watermark from content you created and own. Instagram's platform rules exist to protect creators from having their work redistributed without credit, and that protection matters — plenty of creators have had their reels stolen, stripped of attribution, and reposted elsewhere without permission or payment.
If you're a business or creator managing content on behalf of a brand, it's worth keeping records showing you own or have licensed rights to whatever reels you're processing this way, particularly if the cleaned footage will be used commercially. For anything beyond straightforward personal use of your own content, a quick read of Meta's official Terms of Service is worth the five minutes it takes.
Frequently Asked Questions
How do I remove the Instagram watermark from a saved reel? You can either crop out the corner of the video where the watermark sits using a basic video editor, or run the file through a dedicated watermark remover tool that reconstructs the pixels underneath the logo without cutting into your frame.
Is it against Instagram's rules to remove the watermark? Removing the watermark from your own content generally isn't a rules violation since you own the underlying video; the concern arises specifically around removing attribution from someone else's content before redistributing it without permission.
Can I download Instagram reels without a watermark for free? Yes — both cropping tools and many dedicated watermark removers offer free tiers suitable for personal, occasional use, though heavier or batch processing sometimes requires a paid plan depending on the specific tool.
Does removing a watermark lower video quality? There's typically a mild quality trade-off regardless of method — cropping requires re-zooming which softens detail slightly, while reconstruction-based tools introduce minor smoothing in the processed area, though neither is usually noticeable at normal viewing size.
Is there a difference between cropping and removing a watermark with a tool? Yes — cropping physically cuts away part of your frame and changes the composition, while a dedicated removal tool reconstructs the watermark area and keeps your original frame size and aspect ratio intact.
Can I remove the watermark from my own reels? Yes, this is the most straightforward and defensible use case, since you own the rights to content you created and posted yourself.
What's the best tool to remove Instagram watermarks? The best choice depends on your priority — a simple crop works fine for quick, low-stakes edits, while a dedicated reconstruction-based watermark remover is better suited for preserving full frame composition in portfolio or client work.
Will Instagram ban me for removing the watermark from a video? Removing a watermark from your own downloaded content and using it outside the platform generally doesn't trigger enforcement action, since it doesn't violate another creator's rights; issues typically arise only when watermark removal is used to strip attribution from someone else's content before redistributing it.
The Bottom Line
Removing an Instagram watermark from your own saved reel is a genuinely simple task once you know which method fits your situation — crop it out quickly if the corner doesn't matter to your composition, or use a dedicated reconstruction tool when you need to keep the full original frame intact for portfolio or client-facing work. Either way, a small, expected quality trade-off comes with the territory, so it's worth reviewing your final export before calling it done.
If you're preparing reels for a portfolio, cross-posting to another platform, or cleaning up your own content library, our watermark remover tool handles the reconstruction method directly in your browser, with no software install required. For a closer look at how different watermark tools compare across accuracy and speed, our breakdown of the best AI watermark removers, tested and ranked is worth a look before you commit to one tool for ongoing use.