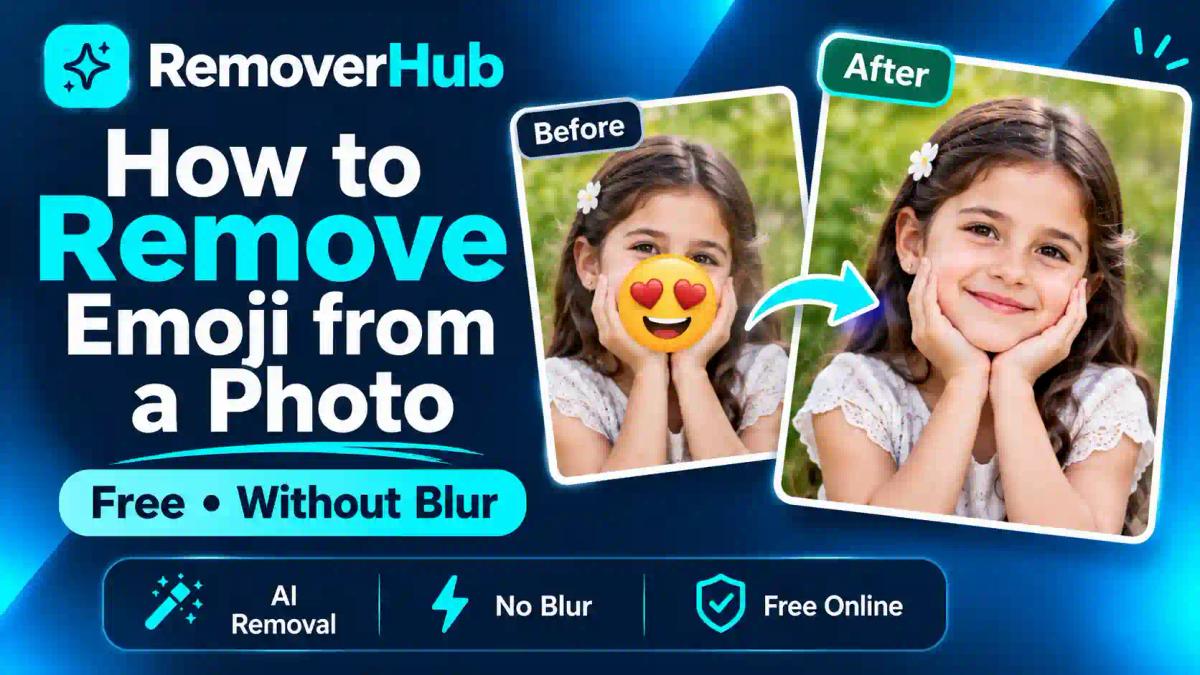
How to Remove Emoji from a Photo Free (Without Blur)
You can remove an emoji from a photo for free in under a minute with an AI emoji remover. Upload the image, paint over the emoji, and let the tool rebuild the pixels behind it. The trick to avoiding blur is choosing a tool that uses AI inpainting rather than a simple smudge, and keeping your selection tight.
This guide shows you how to do it step by step, why some results look flawless while others look smeared, and where the technology honestly runs out of road. You'll also learn how to fix a blurry result, what to do when an emoji sits on a face, and how to protect your original file.
How to Remove an Emoji from a Photo
Open a free online emoji remover such as the RemoverHub Emoji Remover.
Upload your JPG, PNG, or WebP image.
Brush over the emoji, covering it fully but not much more.
Click remove and wait a few seconds.
Zoom in, check the edges, and download the cleaned image.
For best results, use the highest-quality copy of the photo you have and keep the brush slightly larger than the emoji, never far larger.
Why People Want to Remove Emojis from Photos
Emojis end up on photos for all kinds of reasons. Someone adds a smiley over a face for privacy, then later wants the clean version. A friend sends you a snap with a sticker stuck on the best part of the picture. You save an Instagram story and the heart reaction is baked into the pixels. Or you edited a family photo years ago, flattened the layers, and lost the original.
Common situations include:
- A sticker or emoji covering a face in a saved photo
- A reaction emoji on a screenshot you want to reuse
- Decorative stickers added in Snapchat, Instagram, or WhatsApp
- Emojis placed over a product, landmark, or background detail
- An old edit that was saved without the original
The goal is almost always the same: get the picture back to looking natural, with no ghost outline, no smudge, and no loss of sharpness.
Can You Remove an Emoji from a Photo Without Blur?
Yes, in most cases. Blur appears when software fills the emoji area by averaging or stretching nearby pixels. Modern AI tools take a different approach, and the difference shows in the result.
A tool built on image inpainting looks at the texture, color, lighting, and structure around the emoji, then generates new pixels that match. Because it recreates texture rather than smoothing it, the filled area keeps grain, pattern, and edges.
Still, "without blur" depends on three things you can partly control:
- The size of the emoji. Small and medium emojis are far easier to rebuild than ones covering a third of the frame.
- What is underneath. A plain wall or sky is easy. A face, text, or a detailed pattern is hard.
- Your source file. A heavily compressed screenshot gives the AI less to work with than an original photo.
Here's the honest picture. Over a simple background, you can often get a result that is hard to spot at normal viewing size. Over a complex area, expect to need a second pass or a manual touch-up.
How AI Emoji Removal Actually Works
Understanding the process helps you get better results, so here is a short, plain-language version.
What Is Image Inpainting?
Image inpainting is a computer vision technique that fills a masked region of an image with plausible content. The "mask" is the area you brush over. The software treats that area as missing information and predicts what likely belongs there, based on everything around it.
Researchers have worked on this problem for years. The OpenCV inpainting tutorial covers the classic, non-AI methods that spread surrounding colors into a gap. Newer deep learning models go further. For example, the open-source LaMa project was designed specifically to handle large masked areas by recognizing repeating structure across an entire image.
Three Steps Behind the Scenes
Masking. Your brush strokes tell the tool exactly which pixels to replace.
Context analysis. A neural network studies the surrounding texture, lighting, and edges.
Pixel generation. The model creates new pixels and blends them into the original around the mask boundary.
Why Older Methods Leave Blur
Traditional blur-style fills copy or average neighboring pixels. That works for a flat blue sky and fails on grass, hair, brick, or fabric. The result looks like a soft smear because real texture contains random detail, and averaging removes randomness.
Adobe describes a related idea in its documentation for Content-Aware Fill, which samples nearby pixels to replace unwanted objects. AI inpainting extends that concept by generating content instead of only sampling it.
How to Remove Emoji from a Photo Online for Free
Here is the full workflow using a browser-based tool. You don't need to install anything, and it works on a phone or a computer.
Step 1: Prepare Your Image
Start with the best version of the photo you have. If you can choose between a screenshot and the original file, use the original. Less compression means cleaner reconstruction.
Before you upload, make a copy of the file and keep it untouched. If the result isn't right, you can always start again.
Step 2: Open the Emoji Remover
Go to the RemoverHub emoji remover and upload your photo. Supported formats and upload limits can change, so check the tool page for current details before you start a large batch.
Step 3: Mask the Emoji Carefully
This is the step that decides whether your result looks clean or smeared. Follow these rules:
- Zoom in before brushing so you can see the emoji edges.
- Paint over the whole emoji, including its thin outline and any drop shadow.
- Extend the brush only a few pixels past the edge. A tiny margin helps blending.
- Avoid painting large areas of untouched background. The more the AI has to invent, the less accurate it becomes.
Step 4: Run the Removal
Click the remove button and wait. Most tools finish within seconds, though time varies with image size and server load.
Step 5: Inspect and Refine
Zoom to 100% and check four things:
- Does the texture match the surrounding area?
- Are there any faint outlines or color halos where the emoji used to be?
- Do straight lines, such as a doorframe or horizon, continue correctly?
- Does lighting look consistent across the repaired patch?
If something is off, undo and repeat with a slightly different mask. Two small passes often beat one large pass.
Step 6: Download and Save a Copy
Download the result and store it separately from your original. If you plan to share the image online, a PNG preserves quality, while JPG gives you a smaller file. The JPEG vs PNG format guide explains which one suits your situation.
How to Remove Multiple Emojis from One Picture
Some photos carry a pile of stickers, such as a heart on one corner, a star by the face, and a text bubble at the bottom. You have two options:
- Mask them all at once. This is quick, but the AI processes everything in one pass, and results can be uneven.
- Remove them one at a time. This takes longer, but you can check each repair before moving on.
For three or more emojis, a hybrid works well. Remove the easiest ones together, then handle the difficult ones individually. If your image also contains people you'd like to remove, see this guide on removing multiple people from a photo.
How to Remove an Emoji from Someone's Face
This is the most requested scenario, and the one where honesty matters most.
When an emoji covers part of a face, the pixels underneath are gone. No tool can retrieve them. What an AI tool does is generate a face region that looks plausible given the visible parts. That generated detail is an estimate, not the person's real appearance.
What You Can Realistically Expect
- Small emoji over a cheek or forehead: often convincing, because skin texture is relatively predictable.
- Emoji over one eye or the mouth: risky. The tool may produce features that look natural but differ from the real person.
- Emoji covering most of the face: the output becomes an invention rather than a restoration.
Practical Advice
- Don't present an AI-generated face as an authentic original of a real person, especially in any official, legal, or journalistic context.
- If you have the original unedited photo, use that instead. Check cloud backups, your camera roll, and messaging history.
- Ask the person who sent it. Many apps let senders re-share the original.
This isn't a limitation of one tool. It's how the technology works, and any provider claiming perfect recovery of hidden facial detail is overselling.
How to Remove Emojis Without Losing Image Quality
Quality loss usually comes from the workflow around the removal, not the removal itself. These habits protect your photo.
Start With the Largest File Available
Resolution matters. More pixels around the emoji means more context for the AI. If your photo is small or soft to begin with, consider improving it afterward with the image sharpener or by following this guide on how to enhance image quality.
Avoid Repeated JPEG Saving
Every time you save a JPEG, the format applies lossy compression again. After several rounds you may notice blocky patches or fuzzy edges. This is called a compression artifact. Do all your edits first, then save once. If you need several rounds, save intermediate versions as PNG.
The W3C PNG specification describes PNG as a lossless format, which means saving it repeatedly doesn't degrade the image.
Check the Output Resolution
Don't assume the downloaded file matches the original dimensions. Some tools resize or compress free exports. Compare the width and height before and after, and confirm the details on the tool's page.
Keep an Untouched Original
This one habit saves more photos than any technique. Store the original in a separate folder before you upload anything.
Why Does a Photo Look Blurry After Removing an Emoji?
If your repaired patch looks soft, one of these causes is usually responsible.
Mask too large
What it looks like: Wide, smooth patch with no grain
Fix: Redo with a tighter brush
Complex background
What it looks like: Distorted lines or warped patterns
Fix: Remove in smaller sections
Low-resolution source
What it looks like: Whole image looks soft
Fix: Use the original file or enhance first
Heavy JPEG compression
What it looks like: Blocky, muddy fill
Fix: Start from a less compressed copy
Blur-style algorithm
What it looks like: Smudge that looks airbrushed
Fix: Switch to an AI inpainting tool
A Simple Repair Sequence
Undo the result and re-mask more tightly.
Remove the emoji in two or three smaller passes.
If the patch is still soft, apply the AI blur remover to that area.
For general softness across the whole image, try this walkthrough on how to fix an out-of-focus picture.
Best Practices for Natural-Looking Results
Small decisions separate a believable edit from an obvious one.
Match the Background Type to Your Expectations
- Flat or gradient backgrounds (sky, wall, studio backdrop): excellent results.
- Organic textures (grass, foliage, sand): usually good, sometimes needs a second pass.
- Patterns and architecture (tiles, windows, fences): hardest, because the AI must continue exact geometry.
- Text and logos: unreliable. Use a dedicated tool such as the AI text remover.
Work in Layers of Difficulty
Remove the easy parts first. When you've cleaned the simple areas, the remaining emoji has more clean context around it, which improves the AI's guess.
Zoom Before You Judge
Many repairs look perfect at thumbnail size and show flaws at 200%. Decide where the image will be used. A social post can tolerate more imperfection than a print.
Don't Chase Perfection in One Pass
Two light passes nearly always beat one heavy one. If you find yourself brushing a huge area, step back and reconsider.
Removing Emojis from Specific Platforms
Where the emoji came from changes how you approach the job.
Snapchat, Instagram, and WhatsApp Stickers
Stickers from these apps are flattened into the image when you save it. They behave like any other overlay, so the same mask-and-remove workflow applies. Animated stickers are different: if you've saved a video or GIF, you'd need a video-capable tool, since a photo remover only handles still images. If you're curious about going the other way, here is a guide to making a WhatsApp sticker from a photo.
Screenshots
Screenshots are tricky because they often contain flat UI colors, text, and sharp edges. A solid background removes cleanly. Text underneath does not, because the AI can't know what the words said.
Phone Photos with Built-In Markup
On iPhone and Android, markup tools can place emojis over a photo. If you haven't closed the editor or saved a flattened copy, you may be able to simply revert the edit in your photo app. Always check that option first, since it restores the original perfectly.
AI Emoji Remover vs. Manual Photo Editing
Both approaches work. Which one is right depends on your skill level, patience, and the photo itself.
Manual Tools (Clone Stamp, Healing Brush)
These tools give you precise control. You pick the source area and decide how it blends. In skilled hands, the results can be excellent, especially for repeating patterns. The downside is time and learning curve. For a deeper comparison, read this breakdown of AI object remover vs. clone stamp.
AI Inpainting Tools
These automate the reconstruction. You mask, click, and review. They shine on irregular textures and are far faster for beginners. Their weakness is occasional strange guesses, especially on faces, text, and geometric detail.
Which Should You Use?
- Use AI first for nearly every emoji. It's fast and free.
- Switch to manual if the AI repeatedly distorts a pattern or straight line.
- Combine both for important photos: let AI do the heavy lifting, then retouch small flaws by hand.
Emoji Remover vs. Sticker Remover vs. Object Remover
These terms overlap, and people often wonder whether they need three separate tools.
- Emoji remover: optimized for small, colorful, flat graphics that sit on top of a photo.
- Sticker remover: similar, but handles larger, more irregular overlays like cartoon art or decorative frames.
- Object remover: designed for real things in a scene, such as a bin, a cable, or a stranger in the background.
For emojis, the dedicated emoji tool is the simplest starting point. If the overlay is large or irregular, try the AI object remover. For a deeper look at that workflow, see this guide on how to remove an object from a photo.
Free Emoji Removers: What to Check Before You Upload
"Free" can mean very different things. Before you commit, spend two minutes checking:
- Pricing page: is it genuinely free, or free with limits?
- Watermarks: does the free download carry a mark?
- Resolution: is the output the same size as your upload?
- File limits: what is the maximum size and which formats are supported?
- Privacy policy: how long are uploads stored, and are they deleted?
- Commercial use: can you use the edited image in business content?
Privacy deserves particular attention. If your photo contains faces, children, documents, or anything personal, read the tool's privacy policy before uploading. A reputable service explains what happens to your images after processing.
For a wider look at how free options compare, see the guide on magic eraser tools online for free.
Limitations of AI Emoji Removal
Trust grows when you know what a tool can't do. Here are the honest limits.
It can't recover the exact hidden pixels. AI estimates what was likely there. It doesn't see through the emoji.
Large emojis are harder. The bigger the covered area, the more the AI invents.
Complex detail is unreliable. Faces, text, logos, and precise patterns can come out distorted.
Results vary between images. The same tool may do brilliantly on one photo and poorly on another.
Low-quality sources limit quality. A tiny, compressed image gives the model little to learn from.
Not every tool preserves resolution. Always verify.
None of this means AI removal isn't worth using. It means you should treat the output as a very good reconstruction, not a time machine.
Responsible Use and Content Authenticity
Editing your own photos is routine. Still, a few points are worth keeping in mind.
- Only edit images you own or have permission to modify.
- Be transparent when authenticity matters. If an image will be used in news, legal, or identification contexts, undisclosed AI changes can mislead.
- Respect privacy. If someone placed an emoji over their face intentionally, think twice before removing it and sharing the result.
The industry is also moving toward better provenance tracking. The C2PA Content Credentials standard provides a way to record how a piece of media was created and edited, which helps audiences understand what they're seeing.
Real-World Examples
These scenarios show how the advice plays out.
Example 1: A Heart Sticker on a Beach Photo
A small heart sits over the sand next to a pair of sandals. Sand is a forgiving texture, so a tight mask and one pass produce a natural result. The only thing to check is whether the sand grain matches at 100% zoom.
Example 2: A Smiley Over a Brick Wall
The emoji covers part of a brick pattern. The first pass restores the color but misaligns two bricks. Re-masking in two smaller sections lets the AI continue the pattern more accurately. If one brick still looks wrong, a quick manual fix finishes the job.
Example 3: A Face Sticker on a Group Photo
A friend placed a star emoji over a person's eye. The AI generates a believable eye, but it doesn't look quite like the real one. The best solution here is to find the original photo. If that's impossible, use the repaired version for casual sharing only and avoid presenting it as authentic.
Example 4: A Screenshot with a Reaction Emoji
The emoji sits on a flat gray interface panel. This removes cleanly, because the background is a single color. The risk is accidentally brushing over nearby text, so keep the mask snug.
Mobile Tips: Removing Emojis on iPhone and Android
You don't need a computer. A modern browser handles the whole process.
- Use two fingers to zoom in before brushing. Precision on a small screen matters.
- Rotate to landscape for a bigger working area.
- Keep your browser updated, since older versions may struggle with large images.
- On slower connections, large photos can take longer to upload. Wait for the progress indicator to finish before leaving the page.
- Save the result to your gallery and check it at full size, not just in the preview.
If the emoji came from a built-in markup tool, open the edit menu in your photo app first. Reverting is often one tap and gives a perfect result.
When to Use Other Tools Alongside an Emoji Remover
An emoji often isn't the only thing wrong with a photo. These related tools can finish the job:
- Leftover watermark or stamp: try the watermark remover or the image watermark remover.
- Date on an old photo: the date stamp remover handles that.
- Faded or damaged originals: see this guide to restoring old photos online.
- A stranger in the background: use the AI person remover or read how to remove a person from a photo without blur.
You can browse the full collection on the RemoverHub tools page.
Why Choose RemoverHub for Emoji Removal
If you want a practical, browser-based option, here's what to consider.
- Dedicated emoji tool. Instead of a general-purpose editor, there's a focused emoji remover built for this one job.
- Connected toolkit. If an image needs more than emoji removal, related tools for objects, text, watermarks, and sharpening sit in the same place.
- Learning resources. The RemoverHub blog offers step-by-step tutorials for each tool, so you aren't left guessing.
- No installation. Everything runs in your browser.
To learn more about the team behind the platform, visit the About page. As with any online tool, confirm current limits and policies on the site before relying on it for important work.
Quick Checklist Before You Hit "Remove"
- [ ] I saved an untouched copy of the original.
- [ ] I'm using the highest-quality version available.
- [ ] I zoomed in to mask accurately.
- [ ] My brush covers the whole emoji and a few extra pixels only.
- [ ] I know whether faces or text are involved.
- [ ] I checked the privacy policy if the photo is sensitive.
- [ ] I'll save the result as PNG if I plan to edit further.
Frequently Asked Questions
Can I remove an emoji from a photo for free?
Yes. Free online emoji removers let you upload a photo, mask the emoji, and download the result without installing software. Check each tool's pricing page for limits on file size, watermarks, or daily use before you start.
How can I remove an emoji without making the picture blurry?
Use an AI inpainting tool rather than a basic blur or smudge fill, and keep your brush tight around the emoji. Start with a high-resolution original, remove large emojis in smaller sections, and zoom in to check the edges. If a patch looks soft afterward, redo it or sharpen that area.
Is it possible to remove an emoji from someone's face?
You can generate a replacement, but not recover the real pixels. The AI estimates what the covered area probably looked like, so it may not match the person's true appearance. For accuracy, find the original unedited photo instead.
Can AI recover the original image behind an emoji?
Not exactly. The pixels under an emoji are permanently replaced in a flattened image. AI reconstructs a plausible version from the surrounding context, which works very well on simple backgrounds and less reliably on faces, text, and detailed patterns.
Does removing an emoji reduce image quality?
It shouldn't reduce the quality of the untouched areas, but the repaired patch may differ slightly in texture, and some tools compress or resize exports. Save a PNG when possible, avoid repeated JPEG saves, and confirm the output resolution matches your original.
Can I remove several stickers or emojis at once?
Yes. You can mask multiple emojis in one pass, which is fast, or remove them one by one for more control. For three or more, removing the easiest first often improves the result on the harder ones.
Conclusion:
Removing an emoji from a photo is easy when you know what the tool is doing. AI inpainting rebuilds the covered area from surrounding context, and your job is to give it a clean mask, a good source file, and realistic expectations.
Here's your short action plan:
Save an untouched copy of your photo.
Upload the image to the free emoji remover.
Mask tightly, run the removal, and zoom in to inspect.
Fix any soft spots with a second pass or a related tool.
Download as PNG for the cleanest result.
Ready to try it? Book a seat at Advance Free Tools offered by RemoverHub, and explore the advanced RemoverHub tools for object, text, watermark, and blur fixes in one place. For more tutorials like this one, browse the RemoverHub blog.