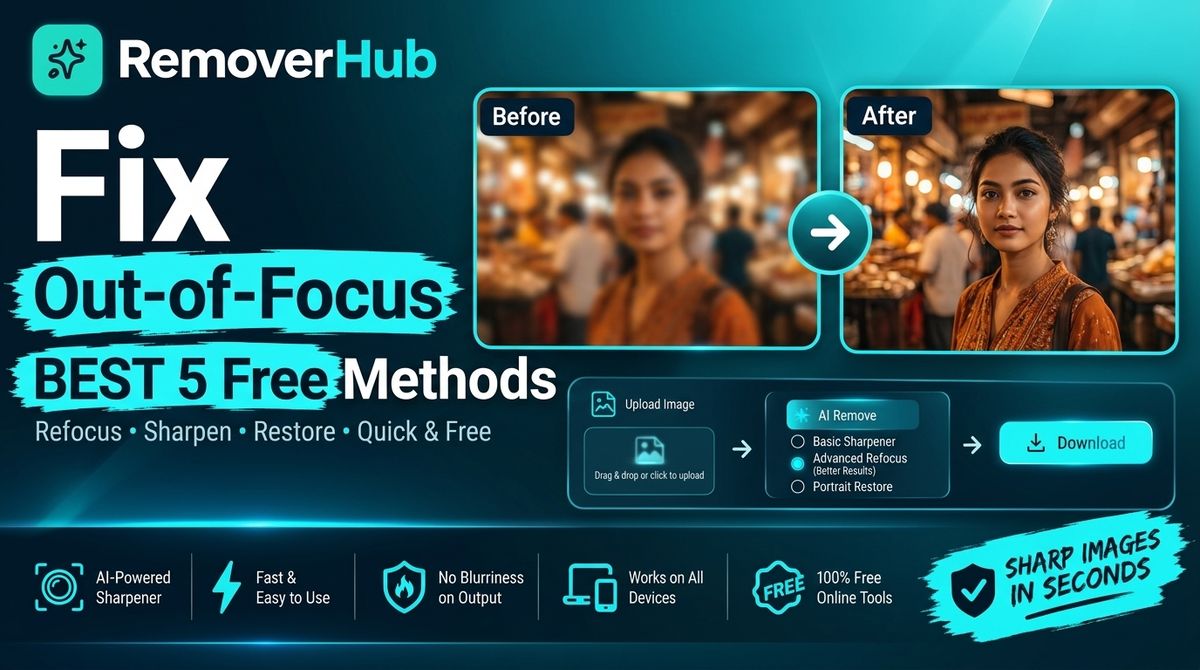
How to Fix an Out-of-Focus Picture: 5 Free Methods
The good news is that you can fix unfocused pictures, within limits. Mild softness often responds well to sharpening, and modern AI tools can rebuild believable detail in moderately blurry images. Severe blur is different: some detail was never captured, and no tool can truly bring it back.
This guide ties five free methods to five types of blur, so you pick the right fix the first time. You'll also learn how to diagnose your photo, avoid ugly sharpening halos, and prevent the problem next time.
Can You Fix an Out-of-Focus Photo?
Yes, partly. Mild blur or softness can often be improved with sharpening, deconvolution, or AI enhancement. Severe out-of-focus blur may have permanently lost detail, so tools can only approximate what was there.
The fastest free route for most people:
Open the photo in a browser-based tool such as the removerhub Image Sharpener.
Apply moderate sharpening or AI enhancement.
Zoom in to 100% and check for halos, noise, or a plastic look.
Dial the effect back if it looks harsh, then export.
What Is an Out-of-Focus Picture?
An out-of-focus picture is a photo where the camera's focal plane landed somewhere other than your intended subject. Light from the subject spreads across several sensor pixels instead of landing on a sharp point. That spread is what you see as softness.
Photographers sometimes call this soft focus or lens blur. It's a different problem from camera shake, and the difference matters because the fix changes with it.
Out-of-Focus Blur vs. Motion Blur
- Out-of-focus (lens) blur: Everything at the wrong distance looks evenly soft. Edges lose definition in all directions, like a smooth haze.
- Motion blur: Detail smears in one direction, usually because the camera shook or the subject moved. You'll see streaks or ghosted edges.
- Gaussian-style softness: Often caused by heavy compression, resizing, or low resolution. It looks like a gentle, uniform blur.
Adobe's documentation says Smart Sharpen is designed to reduce Gaussian, lens, and motion blur. That's a useful reminder that these blur types behave differently under the hood.
Why Fixing Blurry Photos Matters
A soft photo is rarely just an aesthetic problem. It can cost you something real:
- Memories: A once-in-a-lifetime family photo with a soft face still matters.
- Business credibility: Blurry product images lower buyer trust. If you sell online, see how sharp images support print catalogs and product photography.
- Professional profiles: A fuzzy headshot looks careless on LinkedIn or a resume.
- Content performance: Social posts, thumbnails, and blog images with crisp detail hold attention longer.
Repairing a decent but imperfect image is usually faster than reshooting, and sometimes reshooting isn't possible at all.
How to Diagnose Your Blurry Photo Before You Fix It
Skipping diagnosis is the biggest reason people get bad results. Spend 30 seconds on it.
Step 1: Zoom to 100%
Open the image at actual pixel size. Judge sharpness there, not in a thumbnail.
Step 2: Look at the Direction of the Blur
- Soft in every direction? That's likely focus blur.
- Streaked in one direction? That's likely motion blur.
- Blocky or smeared with odd color patches? That's likely JPEG compression or low resolution.
Step 3: Check What's Sharp
If the background is sharp and the subject is soft, the camera focused behind your subject. If everything is soft, suspect shake, a smudged lens, or heavy compression.
Step 4: Check the Resolution
A 600-pixel-wide image will never behave like a 6000-pixel one. Low resolution limits how much any tool can recover.
| What you see | Likely cause | Best starting method |
|---|---|---|
| Slight, even softness | Minor focus miss or camera softness | Method 1 (basic sharpening) |
| Soft but with a clear subject | Moderate focus error | Method 2 (smart sharpening) |
| Directional streaks | Camera shake or moving subject | Method 3 (motion-blur correction) |
| Pixelated or low-resolution look | Small file or heavy compression | Method 4 (AI enhancement) |
Method 1: Basic Sharpening for Slightly Soft Photos
Best for: Mild softness where the subject is still recognizable and edges just look a little tired.
Basic sharpening increases edge contrast. It makes the light side of an edge lighter and the dark side darker, so your eye reads the boundary as crisper. It doesn't add new detail. It makes existing detail easier to see.
The Unsharp Mask Technique
The unsharp mask is the classic approach. Despite the name, it sharpens. It works by blurring a copy of the image, then subtracting that blur to emphasize edges.
You'll usually see three controls:
- Amount: How strong the effect is.
- Radius: How wide the edge enhancement spreads.
- Threshold: How different neighboring pixels must be before sharpening kicks in. A higher threshold protects smooth areas like skin and sky from added noise.
Free Ways to Apply Basic Sharpening
- GIMP (free desktop): Go to Filters > Enhance > Sharpen (Unsharp Mask).
- Photopea (free, browser-based): Go to Filter > Sharpen > Unsharp Mask.
- Snapseed (free mobile): Open Tools > Details, then raise Sharpening.
- Apple Photos (Mac or iPhone): Use the Sharpness and Definition controls in Edit mode. Apple documents these on its Photos support pages.
- Microsoft Photos (Windows): Use the built-in editing tools. Microsoft's support site lists which enhancement features your Windows version supports.
Practical Tips
- Sharpen last, after cropping, color correction, and resizing.
- Start at roughly half the strength you think you need.
- For portraits, protect skin by raising the threshold or masking the effect to the eyes, lashes, and hair.
Mistake to Avoid
Over-sharpening creates sharpening halos, bright or dark outlines around edges. If you see glowing rims around a head or building, reduce the amount and radius. Adobe's guidance also recommends applying sharpening gradually rather than in one heavy pass, since stacking effects amplifies noise.
Method 2: Smart Sharpening for Controlled Detail Recovery
Best for: Moderately soft photos where you want more control than a basic unsharp mask gives you.
Smart sharpening adds options beyond edge contrast. Depending on the software, it can target a specific blur type and reduce noise at the same time. Photoshop's Smart Sharpen is the best-known example, with settings for Gaussian blur, lens blur, and motion blur removal.
Unsharp Mask vs. Smart Sharpen
| Feature | Unsharp Mask | Smart Sharpen |
|---|---|---|
| Control level | Basic (amount, radius, threshold) | Advanced (blur type, noise reduction, shadow/highlight fade) |
| Best for | Quick, light fixes | Targeted, controlled fixes |
| Halo risk | Moderate to high if overdone | Moderate to high if overdone |
| Speed | Very fast | Slightly slower |
A Practical Free Workflow With Photopea
Photopea runs in your browser and mimics Photoshop's layout, which makes it a good free option.
Open your photo and duplicate the layer (Ctrl/Cmd + J).
Convert the duplicate to a Smart Object if you want to keep the sharpening editable.
Go to Filter > Sharpen > Smart Sharpen.
Set Amount low (try 60–100%) and Radius around 1–2 pixels for a standard web-sized photo.
Use the noise reduction slider to keep grain under control.
Compare before and after by toggling the layer on and off.
The High Pass Alternative
High Pass sharpening is a favorite among retouchers because it's easy to blend:
Duplicate the layer.
Go to Filter > Other > High Pass and set a small radius (1–3 pixels).
Change the layer's blend mode to Overlay or Soft Light.
Lower the layer's opacity until the result looks natural.
Because it's a separate layer, you can erase the effect from areas where it looks harsh, such as skin or smooth backgrounds.
Sharpen Only the Focus Area
Don't sharpen the whole frame. Sharpen the focus area, the eyes in a portrait or the label on a product. Out-of-focus backgrounds are meant to look soft, and sharpening them adds noise and fake texture.
Method 3: Motion-Blur Correction for Shake and Movement
Best for: Photos with directional streaks from camera shake or a moving subject.
Motion blur is a trickier fix. The image was smeared along a path, so recovery requires estimating that path. In technical terms, this is deconvolution: the software estimates a blur kernel (the pattern of the smear) and mathematically reverses it.
The research behind this is well established. Academic work on blind deblurring, which tries to recover both the blur kernel and the sharp image, is hosted openly by the Computer Vision Foundation. Those papers describe the problem as ill-posed, meaning many different sharp images could produce the same blurry one. That's why results vary and why expectations should stay realistic.
Free Ways to Reduce Motion Blur
- GIMP with G'MIC: The free G'MIC plugin includes deconvolution-style filters you can experiment with.
- Photopea or Photoshop's Smart Sharpen: Choose the Motion Blur removal option, then set the angle to match the direction of the streak.
- Online AI deblurring tools: Many browser tools detect and correct motion blur automatically. The removerhub AI Blur Remover is built for this kind of correction.
How to Set the Angle by Eye
Zoom into a high-contrast edge, such as a window frame, a sign, or a bright highlight.
Notice which direction it's smeared.
Set the motion blur angle to match.
Increase the distance or radius slowly. Stop when streaks tighten but before rings appear around edges.
What to Expect
Light shake can improve noticeably. Heavy shake, where a point of light has become a long trail, usually can't be fully reversed. You can make the photo look better, but not perfect.
Method 4: AI Enhancement and Upscaling for Low-Resolution or Moderately Soft Images
Best for: Small files, old scans, compressed images, and photos that are soft because of low resolution rather than a pure focus error.
Traditional sharpening only boosts contrast at edges. AI enhancement works differently. A trained model has seen millions of image pairs, sharp and blurred, and learns to predict plausible detail. This is often called super resolution.
How AI Enhancement Differs From Sharpening
- Sharpening amplifies what's already in the image.
- AI enhancement predicts and generates detail that fits what it recognizes, such as eyelashes, fabric texture, or text edges.
That second point carries an honest caveat. The detail an AI adds is inferred, not recovered. For a family photo, that's usually fine. For forensic or documentary purposes, it's not appropriate, because the added detail may not match reality.
When AI Beats Manual Sharpening
- Faces and portraits that are moderately soft
- Old or scanned photos with low resolution
- Images with JPEG artifacts (blocky compression damage)
- Photos you need to enlarge for printing or display
When AI Struggles
- Extremely out-of-focus faces, where the model has too little information
- Heavy motion blur
- Tiny faces in large group photos
- Text that's too blurred to read
Where AI Enhancement Shows Up in Mainstream Software
Major platforms have added machine-learning enhancement. Adobe offers Neural Filters and Super Resolution features within its ecosystem, Microsoft documents Super Resolution in Photos for supported Copilot+ PCs, and Apple continues to expand enhancement controls in Photos. Feature names, availability, and device requirements change often, so check the official Adobe, Microsoft, and Apple pages before relying on a specific feature.
For a broader comparison of what's available, read the removerhub guide to the best AI image sharpener tools.
A Safe AI Enhancement Workflow
Start with the highest-resolution version you have. Don't enhance a screenshot of a photo if the original exists.
Run the AI enhancer once at a moderate setting.
Zoom to 100% and check faces, text, and fine patterns for distortion.
If skin looks waxy or eyes look odd, reduce the strength or blend the result with the original at 50–70% opacity.
Method 5: Free Online Editing for People Who Don't Want Desktop Software
Best for: Quick fixes on any device, without installing anything or learning layers and filters.
Browser-based tools are the fastest path for most people. You upload, the tool processes, and you download. No software, no learning curve.
What to Look for in a Free Online Photo Fixer
- Clear output quality: No forced downscaling of your file.
- Transparent limits: The tool should state upfront what's free and what isn't.
- Reasonable privacy practices: Read the privacy policy before uploading personal photos.
- Simple controls: A strength slider or automatic mode beats a confusing panel.
- Fast results: Processing should take seconds, not minutes.
Free-tool terms change quickly, so always confirm current limits on the tool's own page before you build a workflow around it.
Step-by-Step: Fixing a Blurry Photo Online
Open the removerhub Image Sharpener in your browser.
Upload your photo (JPG or PNG works for most tools; if you're unsure which format to keep, see this JPEG vs. PNG guide).
Choose a sharpening or enhancement mode that matches your blur type.
Preview the result and compare it with the original.
Download the improved image.
For a detailed tutorial focused on this exact workflow, see the removerhub walkthrough on how to sharpen a blurry image online for free.
Mobile Options
On a phone, the built-in editors in Apple Photos and Google Photos handle mild softness well. Snapseed's Details tool offers finer control. For stronger fixes, use a browser tool. Most work fine in a mobile browser.
Why Choose removerhub for Blurry Photo Fixes
Plenty of tools promise to unblur a photo. Here's what makes removerhub a practical option, and what to check for yourself.
Why choose removerhub:
- Focused toolset: The platform groups related tools in one place, from the Image Sharpener and AI Blur Remover to background, object, and watermark tools. Browse the full tools directory to see what's available.
- Browser-based convenience: Nothing to install, and it works on desktop and mobile.
- Educational guides: The blog library explains the "why" behind each tool, not just which button to press.
- Workflow continuity: After sharpening, you can move straight to related jobs, such as removing a background in HD without pixelation or cleaning up a distracting object.
Explore Advanced removerhub: Once you're comfortable with basic sharpening, try advanced removerhub tools for tasks like AI object removal, HD background cleanup, and product photo preparation. Our free product photo editing tools roundup is a good next read.
Key Tools and Terms You Should Know
You don't need to be a technical expert, but a little vocabulary helps you choose the right setting.
Core Terms
- Image sharpening: Increasing edge contrast so details look crisper.
- Deblurring: Attempting to reverse the actual blur, usually through deconvolution.
- Deconvolution: A mathematical method that estimates and reverses a blur pattern.
- Blur kernel: The pattern that describes how a point of light was smeared.
- Super resolution: AI-based enlargement that predicts extra pixel detail.
- Pixel interpolation: How software estimates new pixels when resizing an image.
- Local contrast: Contrast within small regions, which affects perceived sharpness.
- Sharpening artifacts: Unwanted side effects like halos and noise caused by over-sharpening.
- Image noise: Random grain, often more visible after sharpening.
Sharpening vs. Deblurring: The Difference That Matters
This is the most common point of confusion, and it's worth stating plainly.
- Sharpening makes edges look crisper. It doesn't restore lost information.
- Deblurring tries to reverse the blur itself, which can recover some real structure when the blur type is known and the damage is modest.
Both have limits. Neither can recreate detail that was never recorded by the sensor.
Noise Reduction vs. Sharpening
These two work against each other. Sharpening makes noise more visible, and noise reduction softens fine detail. The best results come from reducing noise first at a gentle level, then sharpening carefully, or using a tool that balances both.
Real-World Examples: What Each Method Can and Can't Do
These scenarios show realistic outcomes. Results always depend on the original file.
Example 1: The Slightly Soft Portrait
A portrait taken at a wide aperture with the focus landing slightly on the nose instead of the eyes. Eyes look a touch soft.
Best approach: Method 1 or 2. Mask the sharpening to the eyes, lashes, and eyebrows. Leave skin untouched.
Realistic outcome: Noticeably better. It reads as a sharp, natural portrait at normal viewing size.
Example 2: The Shaky Night Shot
A handheld street photo at night where a slow shutter speed streaked the lights horizontally.
Best approach: Method 3. Set the motion blur angle to match the streaks and increase gently.
Realistic outcome: Moderate improvement. Signs and storefronts become readable, but light trails won't fully collapse into points.
Example 3: The Old Scanned Family Photo
A small, soft scan of a decades-old print with visible compression and low resolution.
Best approach: Method 4, then a light touch of Method 1.
Realistic outcome: Faces gain clarity and the image can be enlarged. Some detail will be AI-inferred, which is acceptable for personal restoration.
Example 4: The Product Photo for an Online Store
A product image that's slightly soft because it was shot on a phone in dim light.
Best approach: Method 5 for a quick fix, then a clean background. Marketplaces have strict image standards, so check the Amazon product image requirements or the Walmart image requirements before uploading.
Realistic outcome: Often good enough to meet marketplace expectations, though a reshoot with steadier light is better when feasible.
Example 5: The Hopelessly Out-of-Focus Shot
A group photo where the camera focused on the background tree. Faces are smooth blobs.
Best approach: Try Method 4, but set expectations low.
Realistic outcome: Slight improvement at best. If the information isn't there, tools can only guess, and guessed faces can look uncanny or wrong.
Common Mistakes When You Fix Blurry Pictures
Avoid these, and your results will improve immediately.
Sharpening a downsized thumbnail. Always work from the largest original.
Cranking the strength slider. Several gentle passes beat one heavy one.
Sharpening before resizing. Resizing softens the image again. Sharpen after you've set your final size.
Ignoring noise. Sharpening makes grain pop. Reduce noise first if the photo was shot in low light.
Applying one effect everywhere. Sharpen the subject, not the background.
Trusting AI blindly. Always zoom in and check faces, hands, and text for invented detail.
Judging at small zoom levels. Check at 100%, and also at the size people will actually see it.
How to Sharpen Without Making Photos Look Fake
The goal is a photo that looks natural, not one that screams "edited."
- Use masks. Apply sharpening to eyes, texture, and edges. Leave skin and sky alone.
- Lower opacity. If an effect looks great at 100%, try 60% and compare.
- Sharpen for output. Photos for print often need slightly different sharpening than photos for screens.
- Keep the original. Work on a copy so you can start over.
- Step away. Look at your edit after a short break. Over-sharpening is easier to spot with fresh eyes.
How to Prevent Blurry Photos in the First Place
Fixing is useful, but prevention is faster. A few habits solve most focus problems.
Camera and Phone Habits
- Tap to focus on your subject's eyes (phones) or use a single focus point (cameras).
- Clean the lens. A fingerprint smudge creates a soft, hazy look that no setting will fix.
- Hold steady. Brace your elbows against your body, or rest the phone against a surface.
- Use faster shutter speeds for moving subjects. A common rule of thumb is a shutter speed of at least 1 divided by your focal length for handheld shots.
- Add light. More light allows faster shutter speeds and lower ISO, which reduces both blur and noise.
- Take several shots. Burst mode often yields one sharp frame out of five.
- Check focus immediately. Zoom in on the screen after taking an important shot, while you can still retake it.
How to Learn Photo Fixing: Free and Paid Resources
If you want to go beyond one-click tools, here's a practical learning path.
Free Resources
- Official documentation: Adobe Help, Apple Support, and Microsoft Support explain features directly.
- Open-source software: GIMP and Photopea are free and capable. Both have large communities and tutorials.
- YouTube tutorials: Search for the specific tool plus "sharpen" or "deblur" for step-by-step visual walkthroughs.
- Technical background: If you're curious about the science, the OpenCV project documents image filtering concepts, and the Computer Vision Foundation hosts free research papers on image restoration.
- Practice libraries: Download a few deliberately blurry images and practice each method side by side.
Paid Resources
- Online courses: Platforms such as Coursera and Udemy offer photo editing and digital imaging courses.
- Professional software: Subscription editors and dedicated AI enhancers offer deeper control and batch workflows.
- Workshops and mentoring: Useful if you plan to edit photos professionally.
For most readers, free tools plus an hour of practice are more than enough.
Who Benefits From These Skills, and Why Demand Is Growing
Photo repair is no longer a niche skill. It supports many everyday and professional needs:
- E-commerce sellers who need clean product images
- Social media creators who need crisp thumbnails and posts
- Photographers who want to rescue near-miss shots
- Real estate and travel marketers who rely on sharp visuals
- Families digitizing old albums
- Small business owners who handle their own marketing graphics
Because visual content drives so much online attention, the ability to quickly improve image quality is a practical, transferable skill. Freelancers who offer photo retouching and restoration can build steady work from it, though income varies widely by market and experience.
The Future of Fixing Blurry Photos
Image repair is moving quickly, and a few trends are worth watching.
- Smarter AI models: Research on blind deblurring keeps improving at estimating blur patterns and reconstructing faces and text.
- On-device processing: More phones and PCs now run enhancement locally, which improves speed and privacy.
- Automatic enhancement at capture: Cameras increasingly fix softness before you ever see it.
- Better honesty about AI: Expect clearer labels showing when detail was generated rather than captured.
The core limit won't disappear, though. Information that was never recorded can only be estimated. The smartest approach is still to capture a sharp image and use tools for rescue, not as a replacement for good technique.
Frequently Asked Questions
How can I fix an out-of-focus picture?
Start by diagnosing the blur. For mild softness, apply an unsharp mask or Smart Sharpen at low strength. For low-resolution images, use AI enhancement. For quick results without software, upload the photo to a free online tool like the removerhub Image Sharpener, then check the result at 100% zoom.
Can an unfocused photo really be fixed?
Partly. Slightly soft photos often improve a lot. Severely out-of-focus photos can only be improved to a limited degree because the sensor never captured the missing detail. AI tools can add believable detail, but that detail is inferred rather than recovered.
What's the best free way to sharpen a blurry photo?
The best method depends on the blur. Free browser tools are fastest for everyday fixes, Photopea and GIMP offer more control, and Snapseed works well on phones. For step-by-step help, read this guide to sharpening blurry images online for free.
Does sharpening fix blurry photos?
Sharpening makes existing edges look crisper, but it doesn't restore detail that was lost. It works well for slight softness. For stronger blur, deblurring or AI enhancement usually gives better results. Overdoing it creates halos and noise.
How do I fix motion blur in a picture?
Use a tool with motion blur correction, such as Smart Sharpen's motion blur option or an AI deblurring tool. Match the correction angle to the direction of the streaks and raise the strength gradually. Light shake improves noticeably, while heavy shake rarely reverses fully.
Why does my photo still look blurry after sharpening?
Common reasons include severe original blur, low resolution, heavy compression, or sharpening applied before resizing. Sharpening can't invent detail the camera never captured. Try starting from the original file, reducing noise first, and testing an AI enhancer for low-resolution images.
Conclusion:
Fixing unfocused pictures comes down to matching the method to the problem:
- Slight softness: Use basic sharpening with an unsharp mask.
- Moderate softness: Use Smart Sharpen or High Pass for controlled detail.
- Directional streaks: Use motion-blur correction and match the angle.
- Low resolution or compression: Use AI enhancement, and check the results carefully.
- No software or little time: Use a free online editor.
Always diagnose first, sharpen last, and zoom in to check your work. Be honest about what's recoverable, because that judgment saves more time than any slider.
Ready to try it? Open the removerhub Image Sharpener on your blurriest photo and compare the before and after. Then explore the AI Blur Remover for tougher cases.