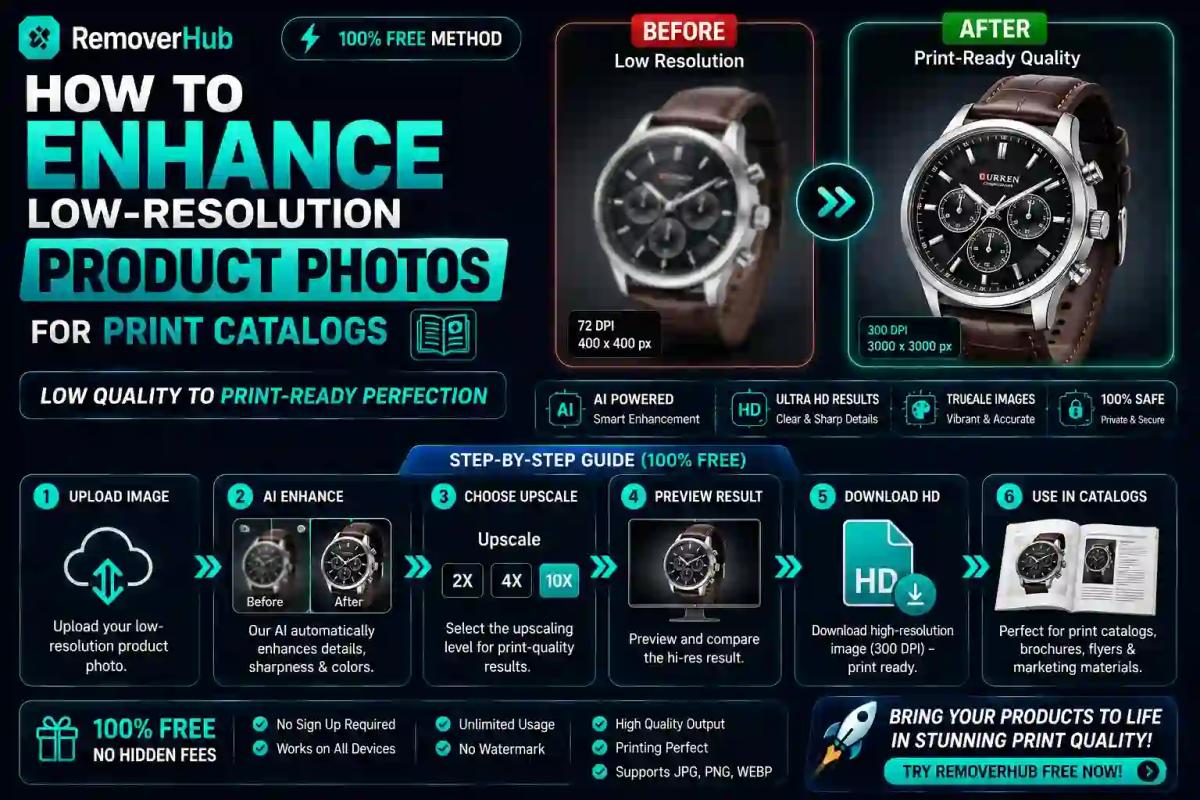
How to Enhance Low-Resolution Product Photos for Print Catalogs
Print catalogs need images at 300 DPI at their final printed size — a full-page product shot printed at 8x10 inches requires roughly 2400x3000 pixels to look sharp on paper. If your product photo falls short of that, AI-based upscaling can meaningfully improve it, but it's worth setting realistic expectations upfront: enhancement tools can sharpen and enlarge existing detail, but they can't invent detail a camera never captured in the first place.
This guide walks through exactly how much resolution you actually need for different catalog formats, how AI upscaling works and where its limits are, and a practical step-by-step workflow for getting supplier photos, phone shots, and older archive images print-ready without disappointing results at the printer.
DPI vs. PPI: Getting the Terminology Right
Before anything else, it's worth clearing up a distinction that gets muddled constantly, even in professional design contexts — because getting it wrong leads to genuinely wrong resolution decisions.
PPI (Pixels Per Inch) describes the resolution of a digital image — how many pixels are packed into each inch of the image file itself. This is the number that actually determines print quality, since it reflects how much actual image data you have to work with.
DPI (Dots Per Inch) technically refers to how many physical ink dots a printer lays down per inch on paper — a property of the printing hardware and process, not the image file. In casual usage, "DPI" and "PPI" get used interchangeably to mean the same thing (image resolution), and for most practical catalog-printing purposes, that casual usage is fine. But understanding the technical difference matters if you're ever troubleshooting quality issues with a print vendor, since a print shop technically responding to your "DPI" question is talking about their press, not your file.
The practical standard to remember: 300 PPI at final print size is the widely accepted benchmark for sharp, professional print output. Some print processes can get away with slightly less, and some premium fine-art printing wants more, but 300 is the number you'll see referenced constantly across print production workflows, and it's the safe target for catalog work.
How Much Resolution Do You Actually Need?
The resolution requirement isn't a single fixed number — it depends entirely on how large the image will actually appear on the printed page. Here's a practical breakdown for common catalog formats:
| Print Use Case | Typical Final Size | Minimum Resolution Needed (at 300 PPI) |
|---|---|---|
| Full-page catalog photo | 8" x 10" | 2400 x 3000 pixels |
| Half-page product feature | 8" x 5" | 2400 x 1500 pixels |
| Product grid thumbnail | 2" x 2" | 600 x 600 pixels |
| Small catalog index photo | 1" x 1" | 300 x 300 pixels |
Notice how much the requirement drops for smaller placements — a small product grid thumbnail only needs 600x600 pixels, which is well within reach of even a modest smartphone photo, while a full-page hero shot needs considerably more actual pixel data. This is genuinely useful to know before assuming every image in your catalog needs the same aggressive enhancement treatment; small thumbnails often need little to no upscaling at all.
Why Web Photos Often Fail for Print
If your product photos originally came from a website, a supplier's online listing, or social media, there's a specific reason they frequently fall short for print: web images are typically saved at 72 PPI, since screens don't benefit from higher pixel density the way printed paper does. A web image that looks perfectly crisp on a monitor can look genuinely blurry or pixelated once printed at catalog size, simply because it was never built with that much pixel data to begin with.
This is the single most common reason catalog production teams end up needing to enhance and upscale images pulled from suppliers or existing web assets — the images were fine for their original purpose, but that purpose wasn't print.
What AI Upscaling Actually Does (and Doesn't Do)
This is worth being genuinely honest about, since overselling AI upscaling sets people up for disappointment right before a print deadline.
What AI upscaling does well: Modern AI upscaling tools use trained models to intelligently add pixels between existing ones, informed by patterns learned from millions of real images — this produces meaningfully better results than old-style simple interpolation, which just duplicated or averaged nearby pixels. AI upscaling can sharpen edges, reduce some compression artifacts, and produce a noticeably cleaner enlarged image than traditional resizing methods.
What AI upscaling can't do: It cannot recover detail that was never captured in the first place. If a product photo was shot out of focus, or compressed so heavily that fine texture and edges were destroyed, AI upscaling can smooth and sharpen what's there, but it's working with fundamentally limited source information — it can't reconstruct a crisp logo or fine fabric texture that simply doesn't exist in the original pixels. A tiny, heavily compressed thumbnail generally won't become genuine magazine-quality output, no matter how good the upscaling algorithm is.
A useful mental model: think of AI upscaling as a skilled restoration process, not a generation process. It's genuinely excellent at cleaning up and enlarging a moderately low-resolution but otherwise reasonably sharp photo. It's much less effective — and sometimes produces visibly artificial results — when pushed to recover detail from something that was severely blurry, tiny, or heavily compressed to begin with.
Step-by-Step: Enhancing a Low-Resolution Product Photo for Print
Here's the practical workflow, in order, for taking a supplier photo or phone shot from web-ready to print-ready.
Check your starting resolution first. Open the image and check its pixel dimensions before doing anything else — this tells you exactly how much upscaling you actually need, rather than guessing.
Calculate your target pixel dimensions. Using the table above, work out what pixel dimensions you need at 300 PPI for the final printed size the image will occupy in your catalog layout.
Run the image through an AI upscaler. Our Image Sharpener handles both enlarging and sharpening in one pass, which is typically the fastest route from a low-res source to a print-ready file.
Clean up the background if needed. Product photos from suppliers frequently have inconsistent, cluttered, or low-quality backgrounds that become even more noticeable once enlarged. Our background remover built specifically for product photos strips out distracting backgrounds so your enlarged product sits on a clean, catalog-appropriate backdrop.
Address blur separately from resolution. If the source image has genuine motion blur or focus issues rather than just low pixel count, our AI Blur Remover is a distinct tool worth running before or alongside upscaling, since blur and low resolution are different problems that benefit from different correction approaches.
Zoom in and inspect at actual print size. Before sending anything to a printer, view the enhanced image at 100% zoom, or better yet, print a test page on a home or office printer to see how it actually looks on paper rather than trusting how it looks on a screen.
Export in the correct color mode. Most consumer image tools output in RGB by default, but professional print production typically requires CMYK — check with your specific print vendor about their preferred format and color profile before final submission.
RGB vs. CMYK: A Quick Note for Print
This trips up a surprising number of people producing their first print catalog, so it's worth flagging directly. RGB (Red, Green, Blue) is how screens display color, using light. CMYK (Cyan, Magenta, Yellow, Black) is how most commercial printing reproduces color, using ink. Colors that look vibrant on your monitor in RGB can shift — sometimes noticeably — when converted to CMYK for printing, particularly bright blues, greens, and certain oranges.
Most print vendors will handle RGB-to-CMYK conversion as part of their production process, but if color accuracy matters critically for your catalog (matching a specific brand color, for instance), it's worth requesting a physical proof before a full print run, and discussing with your printer whether they'd prefer files delivered already converted to CMYK.
Enhancing Product Photos From Different Sources
Different source situations call for slightly different approaches, since the underlying problem varies.
Supplier-provided product photos are often the most common source of low-resolution catalog images, since suppliers frequently only provide web-optimized images intended for online listings rather than print. These images are usually reasonably sharp at their native size — the fix here is typically pure upscaling rather than blur correction, making this one of the more reliable use cases for AI enhancement.
Photos taken with a phone camera can actually be a genuinely good starting point for print, since modern phone cameras often capture at resolutions well above what web use requires — the issue is more frequently that the photo was later compressed or resized down for web use before you received it. If you have access to the original, unresized phone photo, use that as your starting file rather than a version that's already been shrunk for a website.
Old or archived product photos, sometimes needed when reprinting a catalog with legacy products, present the toughest enhancement challenge, since older cameras and scanning processes often produced genuinely lower base resolution and different compression artifacts than modern sources. Expect more variable results here, and budget time to reshoot products where enhancement genuinely can't reach an acceptable print standard.
Screenshots or images extracted from PDFs or presentations tend to be particularly low-resolution and heavily compressed, since these formats aren't designed to preserve full image fidelity. These are honestly the hardest starting point for print-quality enhancement — if a genuine high-resolution original exists somewhere, it's almost always worth tracking down rather than relying on enhancement alone.
Common Mistakes When Preparing Photos for Print Catalogs
A few recurring issues account for most of the print-quality disappointments catalog producers run into:
- Enlarging in a page layout program instead of upscaling the source file first. Simply stretching a small image larger inside InDesign or a similar layout tool doesn't add any actual pixel data — it just spreads the existing pixels over more printed area, making the quality problem worse, not better. Always upscale the actual image file before placing it in your layout.
- Checking resolution on screen instead of at actual print size. An image can look perfectly sharp zoomed to fit your monitor while being genuinely too low-resolution for its intended print dimensions — always verify against the specific pixel-per-inch math for your actual final size.
- Over-sharpening after upscaling. AI upscaling tools already apply intelligent sharpening as part of the enlargement process; stacking additional heavy sharpening on top frequently introduces visible artifacts, halos around edges, and an unnatural, over-processed look that's often more noticeable in print than on screen.
- Ignoring color mode until the final export. Waiting until the last minute to think about RGB versus CMYK can produce unpleasant color-shift surprises in your final printed catalog — address this earlier in your workflow.
- Assuming every enhancement tool produces equal quality. Different upscaling tools use different underlying models, and results genuinely vary — it's worth testing your specific source images across a couple of tools rather than assuming any single tool will handle every photo equally well.
When to Reshoot Instead of Enhance
Enhancement genuinely has limits, and knowing when to stop trying to fix a bad source photo and simply reshoot the product saves time and produces a better final catalog. Consider reshooting rather than enhancing when:
- The source image is smaller than roughly 400x400 pixels and needs to appear at full-page size — this gap is generally too large for even good AI upscaling to close convincingly
- The original photo has severe motion blur or is significantly out of focus, rather than simply being low-resolution
- Heavy JPEG compression has created visible blocky artifacts throughout the image, which upscaling tends to enlarge and emphasize rather than eliminate
- The product itself is still available and reshooting is genuinely feasible within your catalog production timeline
For products where the item no longer exists, has been discontinued, or reshooting genuinely isn't practical, enhancement is worth pursuing even with imperfect source material — a moderately improved image is usually better for a catalog than no image at all, provided expectations about the final quality stay realistic.
Frequently Asked Questions
What resolution do I need for print catalog photos? The standard benchmark is 300 pixels per inch at the image's final printed size — a full-page 8x10 inch photo needs roughly 2400x3000 pixels, while a small 2x2 inch product thumbnail only needs about 600x600 pixels.
Can AI upscale a low resolution photo for print? Yes, AI upscaling can meaningfully enlarge and sharpen a moderately low-resolution image for print use, though it works best starting from a reasonably sharp source and has real limits when the original photo is severely blurry or tiny.
How do I convert a web image to print quality? Start by checking the image's current pixel dimensions, calculate your target dimensions at 300 PPI for the intended print size, then run the image through an AI upscaling tool before placing it into your catalog layout.
What is the difference between DPI and PPI? PPI (Pixels Per Inch) describes the resolution of a digital image file, while DPI (Dots Per Inch) technically refers to how many ink dots a printer physically produces per inch — the terms are often used interchangeably in casual conversation, though they describe different things.
Will upscaling a blurry photo make it printable? Not necessarily — upscaling primarily addresses low resolution, while genuine blur from focus or motion issues is a separate problem that benefits from dedicated blur-correction tools rather than upscaling alone.
How much can you enlarge a low resolution image? This depends heavily on the source quality and the upscaling tool used, but as a rough guide, doubling or even tripling dimensions from a reasonably sharp source often produces acceptable results, while attempting to enlarge a tiny, heavily compressed image by 8x or more typically shows visible quality limits.
What's the best free tool to enhance product photos for print? A dedicated AI-based image sharpener designed specifically for enlarging and sharpening product photos, like our Image Sharpener, generally outperforms basic resizing tools that don't use intelligent upscaling models.
Does image upscaling reduce sharpness? Good AI upscaling tools should increase apparent sharpness through intelligent detail enhancement, though poor-quality or overly aggressive upscaling can sometimes introduce soft or artificial-looking results, which is why checking output at actual print size before finalizing matters.
The Bottom Line
Getting low-resolution product photos genuinely print-ready comes down to understanding what you're actually working with — check your starting pixel dimensions, know your target size at 300 PPI, and treat AI upscaling as a genuine quality improvement tool rather than a guaranteed fix for any bad photo. The honest reality is that some source images will enhance beautifully, and some genuinely need a reshoot — knowing the difference before your print deadline saves both time and disappointment.
Start by running your supplier or archive photos through our Image Sharpener to see how much genuine improvement is possible, clean up inconsistent backgrounds with our product photo background remover, and address any real blur issues separately with our AI Blur Remover before your files head to the printer.