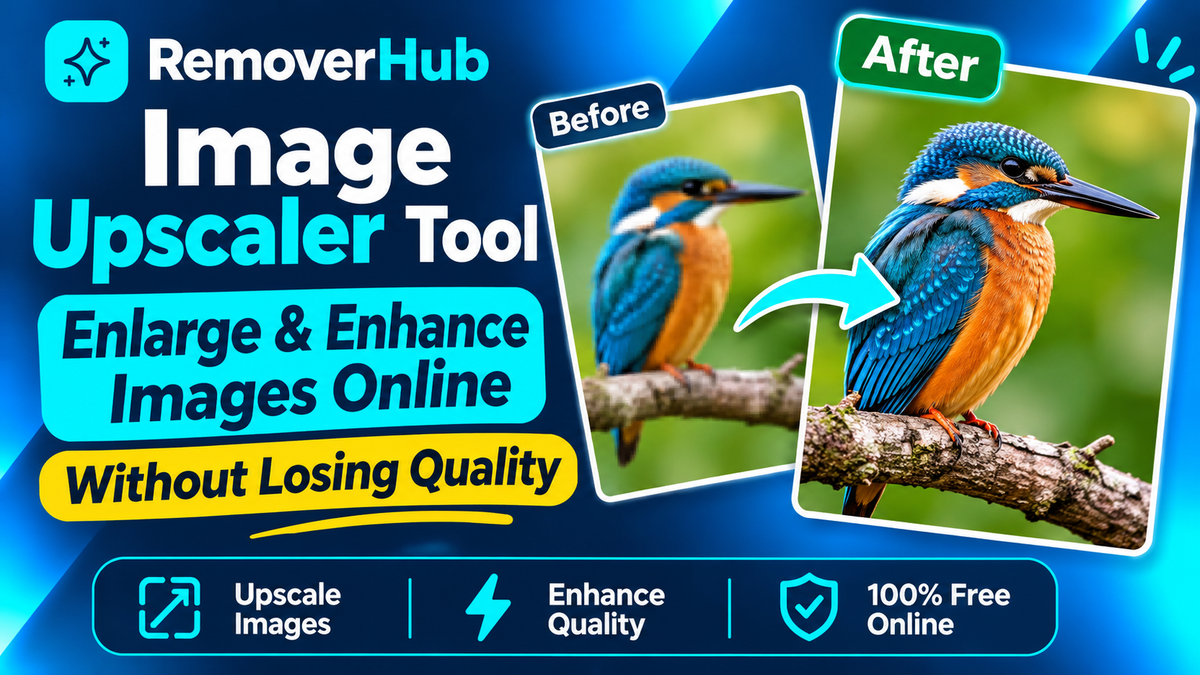
AI Image Upscaler Tool: Enlarge and Enhance Images Online
You have a product photo that looks fine on your phone and falls apart on a client's banner. Or a family portrait scanned years ago, now too small to print. Or an AI-generated image that came out at a size nobody can use.
Dragging the corners to make it bigger just gives you a bigger blur. That is the problem an AI image upscaler solves.
This guide explains how upscaling works, where it helps, where it fails, and how to get natural results instead of that waxy, over-processed look. You can try it as you read with the removerhub AI image upscaler.
What Is an AI Image Upscaler?
An AI image upscaler is software that enlarges an image and uses a trained neural network to add believable detail. It does not just spread existing pixels over a bigger canvas. It predicts what edges, textures and fine lines probably looked like, then draws them in.
The research field behind this is called single image super-resolution (SISR). The goal is to turn one low-resolution image into one high-resolution image.
You will see the same idea sold under many names: AI image enlarger, AI photo enhancer, resolution booster, HD converter. They overlap heavily. In practice, "upscaling" means more pixels, "enhancing" means better-looking pixels, and most modern tools do both in one pass.
The Key Distinction: Recovered Detail vs Generated Detail
This is the single most important idea in the whole article.
If a camera never captured a detail, no software can truly recover it. What AI does is generate a likely guess. For a brick wall or a sky, the guess is usually excellent. For a face, a street sign or small text, the guess can be wrong.
A good upscaler gives you a sharper picture. It does not give you evidence. Keep that in mind for anything legal, medical, forensic or documentary.
Upscaling vs Enhancing vs Sharpening
| Term | What it changes | Typical use |
|---|---|---|
| Upscaling | Pixel dimensions (for example 800 px to 3200 px) | Printing, banners, large screens |
| Enhancing | Overall quality: noise, softness, compression damage | Old or compressed photos |
| Sharpening | Edge contrast only; pixel count stays the same | Slightly soft photos |
| Restoration | Damage: scratches, fading, tears | Old prints and scans |
If your photo is only a little soft, you may not need an upscaler at all. Our image sharpener and the guide on how to sharpen images online are the lighter option.
How AI Image Upscaling Works
You do not need a computer science degree to understand the process. Here is the short version, then the slightly deeper one.
Step 1: Traditional Resizing Estimates Pixels with Math
When you enlarge an image the old way, software has to invent new pixels between the existing ones. Methods like bicubic interpolation and Lanczos resampling do this by averaging nearby pixel values.
The result is smooth, predictable, and soft. It cannot add detail because it has no idea what the image shows. That is why a 4x stretch looks blurry.
Step 2: AI Models Learn What Images Look Like
An AI upscaler is trained on huge sets of image pairs: a high-quality original and a degraded, shrunken copy. The model learns the relationship between them, such as how hair strands, fabric weave or leaf edges usually look when sharp.
Academic benchmarks like the DIV2K dataset were built for exactly this kind of training and testing.
When you upload a new image, the model applies what it learned. It rebuilds textures, straightens edges and reduces noise based on patterns, not just neighboring pixels.
Step 3: Different Model Families Behave Differently
You will see these names in technical articles and tool descriptions:
- Convolutional neural networks (CNNs): early, fast approaches that learn to map small image patches to sharper versions.
- GAN-based models: generative adversarial networks, such as ESRGAN and Real-ESRGAN. One network generates detail, another judges whether it looks real. They produce crisp, convincing textures and are built for messy real-world images, not just clean test files.
- Transformer-based models: such as SwinIR, which use attention to model relationships across a larger part of the image.
- Diffusion and generative models: newer systems that regenerate the image with more creative freedom. They can add striking detail, and they are also the most likely to change things.
That last point matters. A "faithful" model keeps the original look. A "creative" model may invent new texture. Pick based on the job.
Step 4: Cleanup Happens Alongside Enlargement
Most upscalers also handle image denoising, artifact reduction (especially blocky JPEG compression artifacts) and edge preservation in the same pass. This is why an AI result can look cleaner than the original, not just bigger.
How Do You Judge Whether an Upscale Is Good?
Researchers use numbers. You mostly use your eyes. Both have limits, and it helps to know why.
The Common Metrics
- PSNR (Peak Signal-to-Noise Ratio): measures pixel-level difference from a reference image. Higher is "closer."
- SSIM (Structural Similarity Index): compares structure, contrast and luminance patterns.
- LPIPS (Learned Perceptual Image Patch Similarity): uses a neural network to estimate how different two images look to a person.
- NIQE and BRISQUE: no-reference scores that estimate quality without needing an original.
Why a High Score Can Still Look Worse
PSNR and SSIM reward safe, smooth output. A blurry image that averages everything can score higher than a sharp one with slightly different texture. A human usually prefers the sharp one.
That is why researchers also use perceptual measures such as LPIPS, and why the best judge is you, zoomed in at 100%. Do not trust a single number, and be wary of any tool that advertises one.
A Quick Visual Checklist
Zoom to 100% and check:
Edges: clean, not outlined with a bright halo.
Skin: textured, not plastic or waxy.
Text and logos: letters still read correctly, not melted into near-letters.
Repeating patterns: bricks, fences and fabric should not look tiled or warped.
Background: no strange new shapes or mushy patches.
How to Upscale an Image Online (Step by Step)
Here is a practical workflow that works with most online tools, including ours.
Start with the best source file you have. A copy from a messaging app is usually heavily compressed. Find the original if you can.
Fix big problems first. If the photo is badly blurred, try fixing the focus or use the AI blur remover before enlarging.
Open the upscaler. Upload your JPG, PNG or WebP file to the removerhub AI image upscaler.
Choose the scale. Start with 2x. Only go to 4x if you need it (more on this below).
Pick the right mode, if offered. Choose a faithful mode for people and products, a creative mode for illustrations and AI art.
Preview at 100%. Check faces, text and edges, not just the thumbnail.
Download as PNG if you plan to edit further, or as a high-quality JPG for the web.
Light sharpen last, only if needed. Over-sharpening an already enhanced image creates halos.
Choosing the Right Scale Factor
More is not always better.
| Scale | Best for | Risk |
|---|---|---|
| 2x | Most photos, web images, social posts | Very low |
| 3x | Slightly larger prints, banners | Low to moderate |
| 4x | Small sources that must become large | Higher chance of invented texture |
| 8x or more | Rare cases, and often chained steps | High; inspect closely |
A smart trick: if you need 4x, try two passes of 2x and compare. Sometimes the result is cleaner, sometimes it is worse. Test both on your own image.
What Features Should a Good AI Upscaler Have?
Features that matter more than marketing copy:
- Clear scale options (2x and 4x at least) and a stated maximum output size.
- A real before/after preview you can zoom into.
- Format support for JPG, PNG and WebP, ideally with PNG output.
- No forced account for basic use, if you only need a quick job.
- Plain privacy terms: what happens to uploads, how long they stay, who can see them.
- Batch handling if you process catalogs.
- Honest limits: daily caps, size caps and watermark rules stated up front.
Why Choose removerhub
If you are wondering why choose removerhub for image work, the short answer is focus. The site is built around practical, single-purpose image tools: backgrounds, watermarks, text, blur, sharpening and now upscaling. They work together, so you can clean an image and then enlarge it without bouncing between five different sites.
Check the tool page for the current scale options, supported formats and free limits, because those are the details most likely to change.
AI Upscaling vs Traditional Resizing
AI Upscaling vs Traditional Resizing
Method
Traditional resizing (bicubic, Lanczos): Math on neighboring pixels
AI upscaling: Learned patterns from training data
Added detail
Traditional resizing: None
AI upscaling: Plausible new texture and edges
Speed
Traditional resizing: Instant
AI upscaling: Seconds to minutes
Faithfulness to original
Traditional resizing: Very high (it adds nothing)
AI upscaling: Usually high, sometimes creative
Typical flaw
Traditional resizing: Blur
AI upscaling: Over-smoothing or invented detail
Best for
Traditional resizing: Small enlargements, exact technical work
AI upscaling: Large enlargements, soft or compressed sources
Neither is always right. For a 10 to 20 percent enlargement, normal resizing is often fine. For 2x and above on a soft source, AI almost always looks better.
If your goal is only a smaller or differently sized file, read our guide on how to resize an image without losing quality. For a broader look at the enlarging side, see how to upscale an image without losing quality.
Supported Image Formats and Which to Choose
Input Formats
Most upscalers accept JPG/JPEG, PNG and WebP. HEIC (common on iPhones) is less consistently supported, so convert it first if a tool rejects it.
Output: JPG, PNG or WebP?
- PNG: lossless. Best when you will edit or upscale again, and when the image has sharp text or transparency.
- JPG: smaller files. Fine for photos going online, but each save adds compression. Use a high quality setting.
- WebP: efficient for websites, often smaller than JPG at similar quality.
For a deeper comparison, see our JPEG vs PNG format guide.
One thing people forget: a lossy JPG that already has blocky compression artifacts will not become clean just because it is bigger. AI can reduce those artifacts, but starting from a cleaner file always helps.
Color Profiles and Metadata
Processing can alter embedded color profiles (managed by standards from the International Color Consortium) and EXIF metadata such as camera info and dates. If color accuracy matters, for example print work, compare the output against the original on a calibrated screen.
Best Use Cases for an AI Image Upscaler
1. Ecommerce Product Photos
Marketplaces often want large, clean images that zoom well. A supplier photo that is only 600 px wide will look soft on a product page.
Upscale it, then check requirements. Our guides on Amazon product image requirements, Walmart image requirements and eBay product photos cover size and background rules.
A good order of work is:
Remove the background with the AI background remover or HD background remover.
Upscale.
Export at marketplace size.
If cut-outs look jagged after enlarging, see how to remove backgrounds in HD without pixelation. For shop owners on Etsy or Shopify, the background remover guide for Etsy and Shopify is a useful companion.
2. Print Catalogs and Posters
Print needs far more pixels than a screen. As a rough guide, an 8 x 10 inch print at 300 PPI needs about 2400 x 3000 pixels. A 24 x 36 inch poster viewed from a distance can look fine at around 150 PPI, which is 3600 x 5400 pixels.
If your image is much smaller than that, upscaling helps. Read more in our guide to enhancing product photos for print catalogs.
A reminder: PPI and DPI are not the same. PPI describes pixel density in a digital image. DPI describes printer ink dots. Printers and print shops have their own requirements, so ask them for specs. A high-resolution output does not automatically guarantee a good print.
3. Old Family Photos
Scanned prints are often small, faded and scratched. Upscaling plus restoration can bring them back.
Start with scan quality: scan at a higher resolution if you still have the print. Then use the steps in our guide to restore old photos online for free. If you want to add color to black-and-white images, see the photo colorizer guide.
One honest warning: faces in tiny old photos are where AI guesses most. The result may look nice and look slightly like a different person. Compare against the original and consider keeping both versions.
4. Social Media and Web Images
Platforms recompress uploads, so starting sharp matters. Use the right canvas size first: our Instagram post and story sizes for 2026 guide lists them. Upscale small sources before uploading so the platform's compression has more to work with.
5. AI-Generated Images
Image generators often output modest sizes. Upscaling is the standard way to get a print-ready or wallpaper-sized version. Creative modes can work well here since there is no "real" original to stay faithful to.
If you want to extend the canvas rather than enlarge it, see how to expand an image with AI.
6. Video Frames and Stills
Upscaling a still frame is the same job as upscaling a photo. For moving footage, you need a video-specific tool. See our guides on fixing pixelated or blurry video with free AI tools and enhancing video quality with AI.
Benefits and Limitations
What AI Upscaling Does Well
- Makes soft, small photos usable at larger sizes.
- Reduces noise and compression blocks.
- Saves time compared with manual retouching.
- Works on many image types in seconds.
What It Cannot Do
- It cannot restore truly missing information. More pixels do not mean more real detail.
- It can invent details. Generative models may create plausible but inaccurate textures, facial features or text.
- It cannot fix a bad composition, severe motion blur or a heavily overexposed photo.
- It can look over-processed when pushed too far: plastic skin, "painted" foliage, repeated patterns.
- It may change color and metadata slightly.
Why Upscaled Images Sometimes Look Unnatural
The usual causes are a scale factor that is too high, a source that is too small or too compressed, a creative model used on a photo that needs fidelity, or sharpening applied on top. The fix is almost always to go back, lower the scale, switch to a gentler mode, and compare at 100%.
Common Mistakes (and How to Avoid Them)
Starting from a compressed screenshot. Find the original file.
Jumping straight to 4x or 8x. Try 2x first.
Judging at thumbnail size. Always zoom in.
Sharpening after a strong upscale. This causes halos.
Using a creative model on a portrait. It may change the face.
Ignoring the print requirement. Check pixel dimensions against the output size you need.
Overwriting your original. Always keep the untouched file.
Is It Safe to Upload Personal Photos to an Online Upscaler?
It depends on the tool, so read the privacy policy before uploading anything sensitive. Look for:
- How long uploads are stored.
- Whether images are used to train models.
- Where files are processed.
- Whether you can delete uploads.
- Who can access them.
For private family photos, ID documents or client work under NDA, consider a local, offline tool such as Upscayl, an open-source desktop app, so the file never leaves your device. For everyday product and social images, a reputable online tool is usually fine.
You can read how we handle data in the removerhub privacy policy.
Can You Use Upscaled Images Commercially?
Upscaling does not change who owns an image. If you did not have the right to use the original, enlarging it does not give you that right. If the image is yours, or licensed for your use, an upscaled version is generally yours to use under the same terms.
Two other things to check: the tool's own terms (some free tiers limit commercial use or add watermarks) and any licence attached to the source image. When in doubt, read the provider's official terms.
A Note on Provenance and AI Labels
Standards like C2PA Content Credentials exist to record where an image came from and how it was edited. If you publish AI-modified images, being open about that is good practice, especially for news, education or product claims. Never use upscaling to make an image appear more authentic or more detailed than it really is.
AI Image Upscaler Tools Compared
This is a practical overview, not a ranking. Specifications change frequently, so verify on each official site.
AI Image Upscaler Tools Compared
removerhub AI Image Upscaler
Type: Online
Known for: Quick browser upscaling alongside cleanup tools
Verify before use: Scale options, formats, limits
Adobe Photoshop
Type: Desktop and web
Known for: Generative Upscale with 2x and 4x options
Verify before use: Credits, model limits
Topaz Gigapixel
Type: Desktop
Known for: Detail-preserving enlargement
Verify before use: Pricing, scale limits
Canva
Type: Online design app
Known for: Upscaling inside a design workflow
Verify before use: File type and size limits
Upscale.media
Type: Online
Known for: Simple web-based enlargement
Verify before use: Free limits, watermarks
Let’s Enhance
Type: Online
Known for: Enhancement and enlargement workflows
Verify before use: Credits, pricing
Upscayl
Type: Desktop, open source
Known for: Free, local processing
Verify before use: Hardware needs, model choices
What Adobe Documents
Adobe's help pages state that Generative Upscale in Photoshop offers 2x and 4x output. The page lists the Firefly Upscaler (up to 6144 x 6144 px), Topaz Gigapixel (up to 56 megapixels, premium) and Topaz Bloom (up to 9 megapixels, premium). It also explains that credit use depends on the model and output size. The web version has its own limit: its help page notes a 4096 px maximum output.
That is a good example of why limits matter: the same brand has different caps in different apps.
How to Choose
- Quick, occasional jobs: an online tool.
- Private or sensitive images: a local, offline tool.
- Professional print or archival work: a premium desktop tool and manual review.
- Already living in a design app: use its built-in option for convenience, then check the output.
How to Test Fairly
If you want to compare tools yourself, use the same three images in each: a face, a product with text, and a landscape. Upscale all at the same factor, then compare at 100% on the same screen. Note price, limits and privacy terms too. The best tool is the one that gives natural results on your kind of image.
A Smart Workflow: What to Do First, Second, Third
The order matters more than most people think.
Crop and straighten the image first, so you do not pay to enlarge pixels you will throw away.
Remove unwanted elements: backgrounds, text or objects, using tools like the AI object remover.
Fix noise and blur if they are severe.
Upscale.
Light sharpening and color check, only if needed.
Export in the right format and size for where the image will live.
Doing this in a different order, such as sharpening first and upscaling second, usually amplifies flaws.
Real-World Examples
Example 1: Supplier Photo for an Online Store
A seller receives a 700 x 700 px supplier image. The marketplace wants a larger image with a clean background. The seller removes the background, upscales 2x to 1400 x 1400, checks the edges at 100%, and exports a PNG. Total time: a few minutes, and no reshoot.
Example 2: A Small Wedding Photo for Print
A 1200 x 800 px photo needs to become an 8 x 10 print. At 300 PPI, that print needs about 2400 x 3000 px, so the seller crops to the right ratio and upscales about 2x to 3x. Faces get a careful zoomed-in check before sending the file to the printer.
Example 3: Regional Use
Searches for photo enhancers come from all over the world, for example people looking for a free AI image upscaler in Pakistan, India, the UK, the USA or the UAE, often for the same few jobs: shop product photos, school and passport-style images, social media and old family prints. The tool works the same everywhere, and the privacy and licence checks apply equally.
Future Trends in AI Image Enhancement
Expect three directions. First, models will get better at keeping faces and text faithful, because those are the failure points people notice. Second, more tools will offer both "faithful" and "creative" modes with simple sliders. Third, provenance labels will matter more as AI editing becomes routine.
For you, the practical takeaway is stable: start with a good source, change one thing at a time, and always inspect the result.
Frequently Asked Questions
What is an AI image upscaler?
An AI image upscaler is a tool that uses machine learning to increase an image's dimensions and improve its apparent detail. Unlike traditional resizing, it can reconstruct plausible textures and edges, so the enlarged image looks sharper.
How does AI image upscaling work?
A neural network trained on pairs of low-quality and high-quality images learns what sharp detail usually looks like. When you upload a new image, it predicts that detail, enlarges the image and cleans up noise and compression artifacts.
Can AI increase image resolution?
Yes, it can increase pixel dimensions and improve perceived sharpness. It cannot recover real information the camera never captured, so the added detail is a prediction.
How can I enlarge an image without losing quality?
Start with the best original file, use an AI upscaler at 2x first, preview at 100%, and export as PNG or high-quality JPG. Avoid repeatedly saving lossy JPGs.
Does AI upscaling make blurry images clearer?
It can make mildly soft images look clearer. Severely blurred images are harder, and results may look artificial. Fix the blur first with a focus tool if needed.
Is there a completely free AI image upscaler?
Several tools offer free tiers, but most limit size, daily uses or add watermarks. Check each tool's pricing and terms page, including ours.
Can I upscale images without creating an account?
Some tools allow it for basic use. Others require sign-up for higher limits. Look at the tool page for current rules.
What image formats do AI upscalers support?
Most accept JPG, PNG and WebP. HEIC support varies, so convert it first if the tool rejects it.
How much can AI enlarge an image?
Many tools offer 2x and 4x, and some go further. Quality tends to drop as the factor rises, and tools set maximum output sizes, so check the official limits.
Is it safe to upload personal photos to online upscalers?
It depends on the provider. Read the privacy policy for storage, deletion and training use. For highly private images, use a local offline tool.
Can AI upscaling make images suitable for printing?
It can help a lot, but you still need enough pixels for the print size and a check by eye. Ask your print shop for their exact requirements.
Does enlarging an image reduce its quality?
Traditional enlargement softens it. AI enlargement can keep or improve apparent sharpness, but it may introduce invented detail.
Conclusion:
An AI image upscaler is one of the most useful tools in a modern image workflow, as long as you treat it as a skilled guess rather than a magic fix. The recipe is simple: find the best source, fix major problems first, upscale at 2x, inspect at 100%, and keep your original.
Here is your action plan:
Pick one image that needs to be larger and try the removerhub AI image upscaler.
Compare 2x against 4x at 100%.
Check faces, text and edges, then export in the right format.
For related jobs, explore advanced removerhub tools such as background, watermark and sharpening tools.