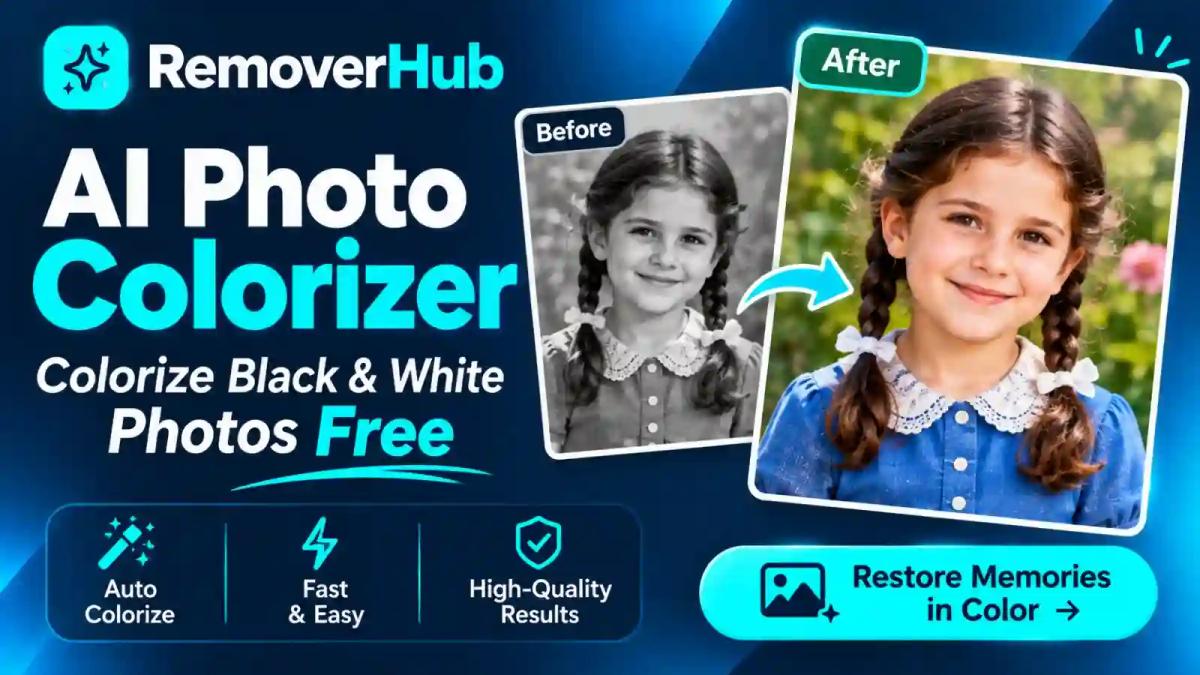
AI Photo Colorizer: Colorize Black & White Photos Free
Most families have at least one shoebox of black and white photographs. The faces are precious, but the grayscale makes them feel distant, like a different world. An AI photo colorizer can close that gap by adding believable color to an old picture in a few seconds. You don't need Photoshop skills, a paid subscription, or hours of manual painting.
This guide explains what the technology does, how to colorize black and white photos free in your browser, and why the results are educated predictions rather than exact recreations. You'll also get practical tips for preparing scans, a recommended workflow, and honest answers about accuracy and privacy.
An AI photo colorizer is an online tool that uses a trained neural network to predict realistic colors for a grayscale image. You upload a black and white photo, the AI estimates colors for skin, sky, clothing, and objects, and you download the color version. The colors are plausible predictions, not a recovery of the original colors.
What Is an AI Photo Colorizer?
An AI photo colorizer is software that adds color to black and white or sepia photographs automatically. Instead of an artist painting each region by hand, a machine learning model looks at the image and decides which colors are most likely to belong there.
A simple definition for beginners
A grayscale photo stores only brightness. It tells you how light or dark each pixel is, but nothing about whether a dress was red or green. The AI fills in that missing information based on patterns it learned from millions of color photographs. It knows that grass is usually green, daytime skies are usually blue, and human skin falls within a predictable range of warm tones.
Colorization, recoloring, and restoration are different jobs
People often mix these terms up, and the confusion leads to disappointing results. Here is how they differ:
| Task | What it does | Example |
|---|---|---|
| Colorization | Adds color to a grayscale image | Turning a 1950s portrait into color |
| Recoloring | Changes colors that already exist | Changing a red car to blue |
| Restoration | Repairs damage such as scratches, tears, and fading | Removing creases from a scanned print |
| Upscaling | Increases pixel dimensions and detail | Making a small scan larger and sharper |
| Color correction | Adjusts brightness, contrast, and white balance | Fixing a yellowed print |
A colorizer does only the first job. It will not automatically repair a torn corner or sharpen a soft face. If your photo needs those fixes, handle them before or after colorizing. The workflow section below explains the best order.
How to Colorize Black and White Photos Free Online
You can colorize an old photo in a few minutes. The preparation matters more than the upload button, so start there.
Step 0: Prepare your photo
Good input gives good output. Before you upload anything, do these three things:
- Scan the original, don't photograph it. A flatbed scan at 300 DPI or higher captures far more detail than a phone picture taken at an angle.
- Keep the original safe. Work only on a digital copy and store the physical print flat, away from sunlight and moisture.
- Check the contrast. If the photo looks washed out or muddy, a small brightness and contrast adjustment will help the AI "read" the scene.
Step-by-step: colorize in your browser
Open the colorizer. Go to the RemoverHub photo colorizer. Nothing needs to be installed, and it runs in a modern browser on desktop or mobile.
Upload your image. Drag and drop a JPG, PNG, or WebP file, or select it from your device.
Let the AI process it. The model analyzes faces, objects, textures, and scenery, then predicts a color for each region.
Compare before and after. Check skin tones first, then sky, foliage, and clothing.
Download the result. Save the colorized image and keep the original file separate.
If you're unsure which file format to save in, the JPEG vs PNG format guide explains when each one makes sense. JPEG is fine for sharing. PNG keeps more quality for further editing.
What if the result looks off?
Don't judge the result on the first try. A slightly brighter or higher-contrast version of the same scan can produce noticeably different colors. Try two or three versions of your scan and keep the one that looks most natural. That is the same approach professional restorers use.
How Does AI Photo Colorization Work?
You don't need a computer science degree to use a colorizer, but understanding the basics will help you judge the results more intelligently.
Grayscale, luminance, and chrominance
A color image can be split into two parts: luminance (how bright each pixel is) and chrominance (the color information). A black and white photo contains luminance only. Colorization is therefore a prediction problem: given the brightness, estimate the missing color channels.
Many research models work in the CIE L*a*b* color space rather than standard RGB. In Lab, the "L" channel is brightness and the "a" and "b" channels hold the color. That fits the problem well, because the AI takes the "L" channel as input and predicts the "a" and "b" channels. The result is then converted to the RGB format your screen displays.
Neural networks learn from millions of examples
Modern colorizers rely on deep learning, mostly convolutional neural networks (CNNs) and, more recently, transformer architectures. These models are trained on large image collections such as ImageNet. During training, color images are converted to grayscale and the network tries to guess the original colors. Each wrong guess teaches it something. After millions of rounds, it learns relationships such as:
- Skies sit above landscapes and are usually blue or gray.
- Skin tones cluster in a narrow range, shaped by lighting.
- Foliage is green, while brick, wood, and soil lean toward browns and reds.
- Certain objects, like fire trucks or taxis, have strongly associated colors.
This is also called image-to-image translation: the network translates a grayscale image into a color one.
Why the colors are "plausible," not "correct"
This is the single most important concept in the whole topic. Researchers at UC Berkeley addressed it in their well-known paper, Colorful Image Colorization by Richard Zhang, Phillip Isola, and Alexei Efros. They point out that colorization is inherently ambiguous, because many different colors can produce the same shade of gray. A red shirt and a green shirt can look identical in black and white.
Their approach predicted a distribution of likely colors instead of a single average, which helped avoid dull, desaturated results. The core lesson is that the AI chooses a believable answer, not necessarily the true one.
Transformers and newer approaches
Google Research took a different route with the Colorization Transformer, which builds the color image in stages: a coarse color prediction first, then refinement and upsampling to full resolution. The researchers evaluated their results against human judgment. Newer models continue to improve, but the fundamental ambiguity of the problem remains.
DeOldify, the open-source favorite
You may have heard of DeOldify, an open-source colorization project created by Jason Antic with support from Fast.ai. An academic review in Image Processing On Line, DeOldify: A Review and Implementation of an Automatic Colorization Method, describes it as a CNN-based method and analyzes its steps critically. You can also explore the original code on the DeOldify GitHub repository. Many online colorizers are built on similar principles, though each tool uses its own model and settings.
User-guided colorization
Fully automatic colorization isn't the only option. Berkeley researchers also published Real-Time User-Guided Image Colorization with Learned Deep Priors, a system where the user adds small color hints and the AI spreads them naturally across the image. This idea shows up in professional software today. If you know your grandmother's dress was blue, a hint can steer the result toward the truth instead of leaving it to chance.
How Accurate Is AI Photo Colorization?
Accurate enough to be convincing, and not accurate enough to be historical evidence. Here is what that means in practice.
What the AI does well:
- Skin tones in clear, well-lit portraits
- Skies, grass, trees, and water
- Common materials like wood, brick, and denim
- Overall mood and atmosphere
Where it struggles:
- Clothing colors, because many shades are equally plausible
- Uniforms, flags, and logos with specific historical colors
- Unusual objects the model rarely saw during training
- Very dark, overexposed, or low-contrast photos
- Heavily damaged areas where detail is missing
A fair way to think about it is this: the AI is an artist with excellent taste and no access to the original scene. If a colorized photo of your great-grandfather shows a navy suit, that is a reasonable guess, not a fact. If accuracy matters, such as for a museum, a genealogy record, or a publication, verify key colors against written records, surviving objects, or family memory.
Colorization does not fix damage
Colorizing a scratched, faded print does not repair it. Scratches, tears, stains, and missing areas are still there afterward, and sometimes the new color makes them more visible. Our guide to restoring old photos online for free covers the repair side in detail.
Why Choose RemoverHub for Photo Colorization?
There are plenty of colorizers online, so it's fair to ask why you would use this one. Here is what Why choose RemoverHub comes down to in practical terms:
- Browser-based convenience. Nothing to download, no plugins, no GPU. It works on Windows, macOS, Linux, iOS, and Android.
- Part of a complete photo toolkit. Colorization rarely happens alone. You may also want to sharpen a soft face, remove a date stamp, or clean up a stain. Everything lives in one place, so you don't hop between five different websites.
- Privacy-minded handling. Uploaded files are processed over encrypted connections and automatically deleted from the servers within 24 hours, as described on the RemoverHub tools page. You can read the full details in the privacy policy.
- Simple process, no design experience needed. Upload, wait, compare, download.
Free usage limits, supported formats, and file-size rules can change over time. Check the colorizer page for the current details before you plan a large batch of photos.
If you want more than colorizing, you can Explore Advanced RemoverHub tools for sharpening, object removal, background tools, and more.
How to Get Realistic Colors in Old Photos
Two photos run through the same AI can look completely different, and the difference usually comes from the input. Use these tips before and after you colorize.
1. Start with a high-quality scan
Scan at 300 DPI or more, save as PNG or high-quality JPEG, and avoid heavy compression. Fine detail like eyelashes, fabric texture, and leaf edges gives the model more clues to work with.
2. Fix contrast and exposure first
Adobe's own guidance for its Colorize feature in Photoshop recommends images with good contrast and proper exposure for more reliable results. You can read more in Adobe's Neural Filters documentation. The same principle applies to any AI colorizer: a muddy, flat photo gives the model less to work with.
If your photo looks soft or out of focus, address it before colorizing. Our guides on how to fix an out-of-focus picture and how to sharpen images online walk through both cases. You can also use the AI Image Sharpener directly.
3. Remove distractions first
Date stamps, scratches, and dust specks can confuse a colorizer. A scanned snapshot with an orange timestamp in the corner, for example, may produce a strange color patch. The Date Stamp Remover and our tutorial on removing a date stamp from an old photo cover that cleanup.
4. Check skin tones first
Faces are where viewers notice mistakes immediately. If skin looks gray, orange, or oddly pink, try a slightly brighter or higher-contrast version of the scan and run it again.
5. Use color hints when available
Tools that support user-guided hints, such as the color pins in Adobe's Colorize filter, let you correct individual regions. If your tool doesn't offer that, you can still adjust hue and saturation afterward in an editor.
6. Don't over-saturate
Real photographs from the mid-20th century often had soft, muted color. If the AI output looks like a modern postcard, reduce the saturation a little. A subtle result tends to feel more authentic and more believable.
7. Keep a record of what you did
Save the original scan, the preprocessed version, and the final colorized image. If you ever share the photo with relatives or a historical society, you can note that the colors are AI-generated estimates.
Colorize Different Types of Old Photographs
Different kinds of photos need slightly different handling. Here is what to expect.
Vintage Family Portraits
Portraits are the best-case scenario for AI colorization. Faces occupy a large part of the frame, lighting is usually controlled, and skin tones are well represented in training data.
What to watch for: hair color, eye color, and clothing. Eye color is rarely visible in grayscale, so the AI guesses based on the overall palette. If you know the true color, note it and adjust afterward.
Tip: If the portrait has a painted studio backdrop, expect the AI to pick a neutral color. You can leave it alone or change it later.
Historical Photographs
Street scenes, landmarks, and documentary images are more challenging. They contain many small objects such as signs, vehicles, and uniforms, and the AI has no way of knowing the exact shades.
What to watch for: vehicle colors, flags, advertisements, and military or institutional uniforms. If historical accuracy matters, research the period and adjust specific elements manually.
Tip: Treat the colorized version as an interpretation. If you publish it, label it as "AI-colorized" so viewers understand it is not an original color photograph.
Old Wedding Pictures
Wedding photos combine high-contrast clothing (a dark suit and a white dress), flowers, and formal backdrops. The tonal range is wide, which helps the AI separate regions.
What to watch for: white dresses can pick up a slight color cast, and bouquet colors are guesses. Try to find any surviving detail, such as the original bouquet, a color description in a family album, or a relative's memory, to guide corrections.
Scanned Prints, Sepia Photos, and Faded Pictures
Sepia and faded prints contain a yellow or brown cast that can influence the AI. Converting the scan to true grayscale before colorizing often produces cleaner results. If the print is badly faded, improve contrast first and consider restoration before colorization.
Group and School Photos
Many small faces mean each face has fewer pixels. Scan at a higher resolution and use an upscaler if needed. Our article on upscaling an image without losing quality explains how.
Colorization vs Restoration vs Upscaling: What to Do First
Colorization is only one step in bringing an old photo back to life. The order matters, because each step builds on the last.
The recommended workflow
Scan the original at high resolution.
Clean up dust, scratches, stains, and date stamps.
Correct brightness, contrast, and exposure.
Sharpen or enhance if the image is soft.
Colorize with the AI.
Fine-tune colors, saturation, and skin tones.
Upscale only if you need a larger print or a bigger file.
Save the master file and a web-sized copy.
Colorizing before cleanup is a common mistake. If a scratch is colorized, you end up with a colored scratch, which is harder to remove than a gray one.
Useful companion tools
- AI Object Remover for stains, marks, or unwanted items
- AI Text Remover for captions and handwriting added to the print
- Shadow Remover for harsh shadows (see also how to remove shadows from photos)
- AI Blur Remover for soft or shaky images
- Image Sharpener for extra clarity
For general improvements after colorizing, see how to enhance image quality and how to convert a photo to HD.
Colorization is not upscaling
These are separate operations. Colorization adds color but keeps the same number of pixels. Upscaling adds pixels and detail but does not add color. If you need both, the usual order is colorize first (or sharpen first, then colorize), then upscale last so the larger file benefits from the final color.
AI Photo Colorization vs Manual Editing
Both approaches have a place. The right choice depends on how much control, time, and accuracy you need.
| Factor | AI photo colorizer | Manual colorization (Photoshop, etc.) |
|---|---|---|
| Speed | Seconds | Hours per photo |
| Skill needed | None | Intermediate to advanced |
| Cost | Often free to start | Software subscription plus time |
| Control | Limited | Complete |
| Color accuracy | Plausible, may be wrong | As accurate as your research |
Which one should you choose?
For most people, the AI route is the practical answer. It gets you 80 to 90 percent of the way there in seconds. If a particular photo matters a lot, run it through the AI first, then correct the few colors you know are wrong in an editor. That hybrid approach saves hours and still respects the facts.
Free tools vs paid restoration services
A professional restorer can repair severe damage, research historical colors, and hand-paint details. That's valuable for irreplaceable or publication-grade work, but it costs money and time. A free online colorizer is ideal for exploration, family sharing, and photos in decent condition. Many people start with the free option and only pay for a professional when a photo truly deserves it.
Is It Safe to Upload Old Family Photos?
It's a reasonable concern. These pictures are personal and often irreplaceable. Before uploading to any online colorizer, check these things:
- A clear privacy policy that explains how long files are stored and whether they're used for training
- Encrypted connections (the page should load over HTTPS)
- Automatic deletion of uploaded files
- Terms of use that explain what you may do with the output, especially for commercial use
RemoverHub states that uploads are handled over encrypted connections and automatically deleted within 24 hours. Review the privacy policy and terms for the full picture. As a general habit, keep your original scans backed up in two places, such as an external drive and a cloud folder, so you never depend on one online tool to hold your only copy.
Real-World Examples: Where Colorization Helps
Here are practical situations where an AI photo colorizer is genuinely useful.
A grandchild's school project. A student wants to bring a great-grandparent's 1940s portrait into a family history presentation. The colorized version makes the person feel real to classmates.
A family reunion slideshow. Someone scans 40 old prints, colorizes the best ones, and shows them on a big screen. Relatives often start sharing stories as soon as the photos appear in color.
A local history blog or society newsletter. A volunteer colorizes streets and storefronts from the 1930s to help readers picture the town. Labeling them "AI-colorized" keeps the post honest.
A memorial or anniversary gift. A wedding portrait from decades ago is colorized and framed. The colors are an interpretation, but the emotional effect is real.
A creative project. Designers and illustrators use colorized vintage images as a starting point for posters, album art, and social media content.
In each case the value comes from the connection, not from perfect color accuracy.
The Future of AI Photo Colorization
Colorization models are getting better at consistency, detail, and respecting user guidance. Expect more tools that let you describe or pin the colors you know, better handling of faces and clothing, and smoother results for video. At the same time, ethical norms are forming. Many archivists and historians recommend clearly labeling AI-colorized images so they are never mistaken for original color photographs. That is a sensible habit, and a good one to adopt now.
Frequently Asked Questions
How can I colorize black and white photos for free?
Upload your photo to a free online AI photo colorizer, wait a few seconds while the AI predicts colors, compare the result with your original, and download it. For best results, use a high-quality scan and fix contrast before uploading. Try the RemoverHub photo colorizer.
Can AI automatically add color to old photographs?
Yes. An AI colorizer analyzes the shapes, textures, and brightness in a grayscale image and predicts the most likely colors. The result is realistic but not guaranteed to match the original scene.
How accurate are AI-generated photo colors?
They are plausible, not exact. Grayscale doesn't record the original colors, so the AI chooses likely options based on training data. Skies, grass, and skin tones are usually convincing. Clothing, uniforms, and objects can be wrong.
Does colorizing an old photo reduce its quality?
It shouldn't reduce the resolution, but results depend on the tool and the input. Always work on a copy and keep your original scan. If the photo is small or soft, sharpen or upscale it as a separate step.
Can an AI colorizer fix damaged or faded photographs?
Colorization alone does not repair scratches, tears, or missing areas. Restore or clean the image first, then colorize. See our guide to restoring old photos online.
What image formats can I upload?
Most online colorizers accept JPG, PNG, and WebP. Check the tool page for the latest supported formats and file-size limits.
Can I colorize old family photos without Photoshop?
Yes. A browser-based AI colorizer does the job without any desktop software. Photoshop offers more manual control, but it takes more time and skill.
Are free online photo colorizers safe for personal pictures?
It depends on the service. Look for a clear privacy policy, encrypted uploads, and automatic file deletion. Never upload images you are not allowed to share.
Conclusion:
An AI photo colorizer is the fastest way to turn a distant grayscale memory into something that feels present. The technology is impressive, but it works best when you understand its limits: the colors are well-informed guesses, and the quality of your scan matters as much as the model.
Here is a simple plan you can follow today:
Scan one favorite black and white photo at 300 DPI or higher.
Clean it up and fix the contrast.
Run it through the free AI photo colorizer.
Check the skin tones, adjust anything you know is wrong, and save both versions.
Share it with your family and ask what they remember about the day.
Ready to go further? Start with the colorizer, then Explore Advanced RemoverHub tools to sharpen, clean, and enhance the rest of your collection.