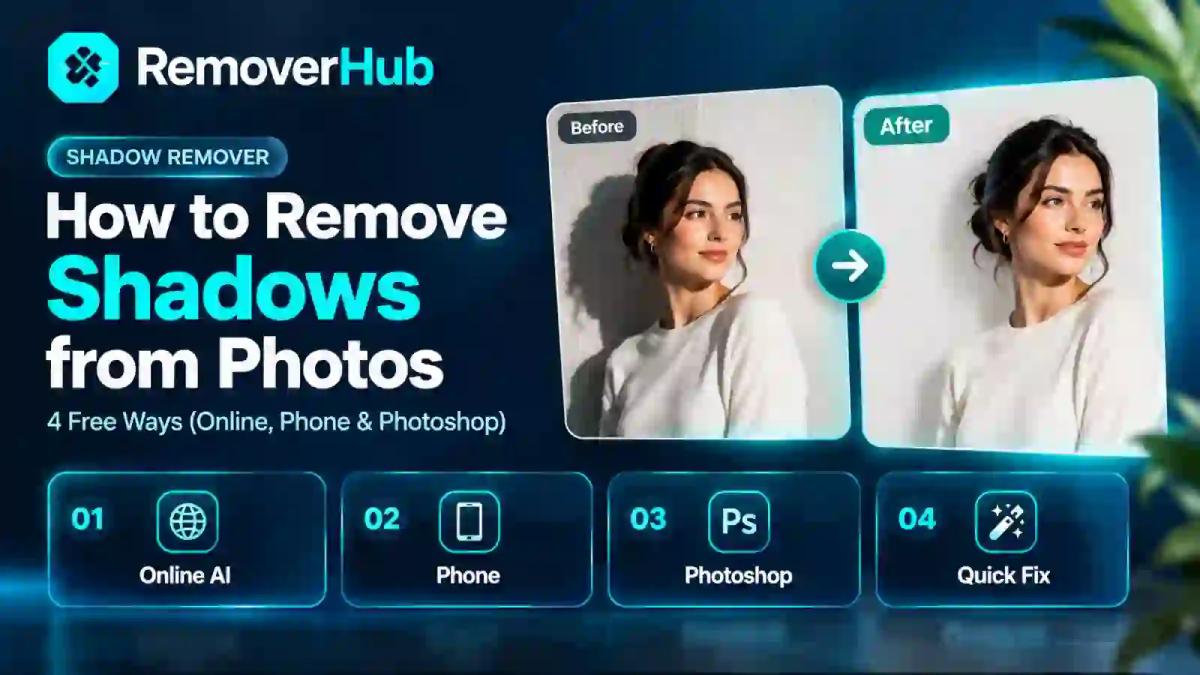
How to Remove Shadows from Photos: 4 Free Ways
You take a photo that should be perfect. The product is sharp, the smile is natural, the background is clean. Then you notice a dark patch under the chin, a hard edge across the table, or your own shadow stretching into the frame.
The good news is that most shadow problems can be fixed in a few minutes without paying for anything. This guide shows you how to remove shadows from photos using four methods: an online shadow remover, your phone, Photoshop and AI object removal. You will also learn how to choose the right method, avoid the mistakes that make edits look fake, and prevent shadows before you press the shutter.
What Does "Removing a Shadow" Actually Mean?
Before picking a tool, it helps to know that "remove shadows" describes two different jobs.
Quick answer: Shadow brightening lifts dark areas so detail becomes visible. Shadow removal erases the shadow shape entirely and rebuilds what was underneath.
- Brightening (shadow reduction). The shadow stays, but softer. This works best for underexposed faces, dark corners and uneven lighting.
- True removal. The shadow shape disappears. This is needed for hard-edged cast shadows on floors, walls, tables and product backgrounds.
Many free tools only do the first job, even when their marketing says otherwise. If you have a defined shadow with a clear edge, brightening alone will leave a gray ghost. Adobe's own documentation treats adjusting shadow tones and removing unwanted shadows as separate workflows, and that distinction is a good rule to follow.
The main types of shadows you will meet
| Shadow type | Typical example | Best approach |
|---|---|---|
| Soft, low-contrast shade | Dim face in backlit portrait | Brighten shadows |
| Harsh face shadow | Noon sun under eyes and nose | Brighten plus local retouching |
| Cast shadow on a surface | Object shadow on a floor or table | Object removal or patching |
| Photographer shadow | Your own silhouette in the frame | Content-aware removal |
| Product-photo shadow | Dark edge behind a white-background item | Online remover or masking |
| Document shadow | Phone shadow across a scanned page | Brightness and contrast correction |
Why It's Worth Fixing Shadows the Right Way
A clumsy fix can be worse than the shadow itself. Overbrightened shadows look gray, flat and noisy. Poorly cloned areas repeat obvious patterns. Here is why getting it right matters:
- Product photos sell better when clean. Marketplaces often prefer even, distraction-free backgrounds, so stray shadows can make listings look less professional.
- Portraits look more natural. Harsh shadows under the eyes can age a face or hide expression.
- Detail is preserved. Shadowed areas often contain texture that can be recovered rather than lost.
- Documents become readable. A shadow across a scanned page can make text harder to read.
For the same reason, better resolution helps too. If your photo is small or soft, tools like an image upscaler can give you more pixels to work with before you retouch.
The Four Methods at a Glance
| Method | Best for | Skill level | Cost |
|---|---|---|---|
| 1. Online shadow remover | Product photos, quick fixes | Beginner | Free tier available |
| 2. Phone editing | Portraits, casual photos | Beginner | Free |
| 3. Photoshop | Precise, high-quality control | Intermediate | Free trial or paid |
| 4. AI object removal | Complex cast shadows | Beginner to intermediate | Often limited free use |
Pricing and free limits change often, so check each tool's official page before you commit. Now let's go through each method.
Method 1: Use a Free Online Shadow Remover
An online shadow remover is the fastest option if you want to remove a shadow from an image without installing software. Most work in your browser: upload, process, download.
Best for
- Product photos on white or plain backgrounds
- Quick, low-effort fixes
- People who do not want to learn an editor
Step-by-step
Open your online tool. Try removerhub's shadow remover, or a browser editor such as Pixlr or Photopea.
Upload your image. JPG and PNG are the most widely supported formats. Check the tool's file-size limit first.
Select the shadow area if the tool asks. Brush over the shadow or let the AI detect it automatically.
Run the removal. Wait a few seconds for processing.
Zoom in and inspect. Look at edges, textures and skin tones at 100%.
Download the result. Save as PNG if you want maximum quality or transparency, or JPG for a smaller file.
What to check before you trust the result
- Is the shadow removed or just lightened? A faint gray outline means it was only lightened.
- Did the tool blur the background? Smearing across texture is a common flaw.
- Are there watermarks or size limits? Free tiers sometimes cap resolution or add marks.
- Where does your image go? For private photos, read the privacy policy.
Pros and cons
Pros: Fast, no installation, works on any device with a browser.
Cons: Less control, results depend on the algorithm, and free plans may limit exports.
Method 2: Remove Shadows on Your Phone (iPhone and Android)
Your phone is often the quickest place to fix a photo, especially a portrait or a snapshot you want to post today. Most shadow problems on phones are really exposure problems, so the built-in editors handle them well.
On iPhone (Photos app)
Open the photo and tap Edit.
Tap the Adjust dial icon.
Slide Shadows to the right to lift dark areas.
Use Brilliance to gently open up midtones.
Lower Highlights slightly if bright areas start to wash out.
Try Black Point to keep contrast from going flat.
Tap Done.
Apple's Clean Up tool can also remove distracting objects and imperfections, but availability depends on your device, operating system, language and region. Check Apple Support for the current requirements rather than assuming your phone has it.
On Android (Google Photos)
Open the photo in Google Photos and tap Edit.
Choose Adjust (or the tuning icon).
Move Shadows or Light sliders until detail returns.
Reduce Highlights if the brightest parts blow out.
Save as a copy so you keep the original.
Google adds new editing features regularly, and some, such as Magic Editor, depend on device and account. See Google Photos Help for what is available to you.
A stronger free option: Snapseed
Snapseed (free, from Google, on both iPhone and Android) gives you local control:
- Tune Image → Shadows for global lifting.
- Selective to brighten only one patch of a face.
- Healing to erase small dark marks.
Phone-editing tips that save your photo
- Edit in small steps. Push Shadows up by small amounts, then reassess.
- Protect skin tones. Strong shadow lifts can turn skin gray or orange.
- Fix noise. Brightened shadows show grain, so add a touch of noise reduction if your app has it.
- Work from the original. Repeated edits on an already edited image degrade quality.
Pros and cons
Pros: Free, private, instant, no upload required.
Cons: Best for brightening, not for erasing hard cast shadows.
Method 3: Remove Shadows in Photoshop
When you need precise results, Photoshop gives you the most control. It also has several tools that suit different shadow types. Adobe offers a free trial, which makes this method effectively free for a limited time. Photopea and GIMP offer similar tools if you would rather avoid a subscription.
Step 0: Set up for non-destructive editing
Duplicate your background layer (Ctrl/Cmd + J) so you never edit the original directly. Use adjustment layers and layer masks whenever you can. That way you can undo any part of the edit later.
Technique A: Shadows/Highlights (for dark, underexposed areas)
Go to Image → Adjustments → Shadows/Highlights.
Increase Shadows Amount to lift dark areas.
Adjust Tonal Width to control which tones are affected.
Use Radius to control how local the correction is.
Click OK.
Note that this changes the whole layer. For a targeted edit, convert the layer to a Smart Object first or apply it through a mask so only the shadowed area is affected. Adobe documents this feature in its guide to Shadows/Highlights adjustments.
Technique B: Curves with a mask (for cleaner, more natural lifts)
Add a Curves adjustment layer.
Pull the lower-left part of the curve up slightly to brighten shadows.
Invert the layer mask (Ctrl/Cmd + I) so the effect is hidden.
Paint with a soft white brush over only the shadow.
Lower opacity until it looks natural.
This often beats Shadows/Highlights for portraits because you control exactly where the light goes.
Technique C: Patch tool (for hard cast shadows on textured surfaces)
Select the Patch Tool (grouped with the Healing tools).
Draw a selection around the shadow.
Drag the selection to a clean area with similar texture and lighting.
Release, then zoom in to check the blend.
Repeat in small sections for large shadows.
The Patch tool's content-aware mode helps blend texture, though very uneven backgrounds may still need cleanup.
Technique D: Clone Stamp and Healing Brush (for fine control)
Choose the Clone Stamp or Healing Brush.
Alt/Option-click a clean source area.
Paint over the shadow edge in short strokes.
Change your source point often to avoid visible repetition.
Clone Stamp vs. Healing Brush: Clone Stamp copies pixels exactly, so it keeps texture but not lighting. Healing Brush copies texture and blends tone and color with the destination, which usually suits shadows better.
Technique E: Remove Tool and Generative Fill (AI inside Photoshop)
Newer versions of Photoshop include an AI-based Remove Tool for painting over unwanted things, plus Generative Fill for rebuilding larger areas. Availability, credits and limits depend on your plan and version, so verify in Adobe's documentation. Use these for cast shadows that pass across complicated textures.
Which Photoshop tool should you use?
| Situation | Tool |
|---|---|
| Face too dark overall | Curves or Shadows/Highlights with a mask |
| Hard shadow on a wall or floor | Patch tool or Remove Tool |
| Shadow edge on a pattern | Clone Stamp plus Healing Brush |
| Large complex shadow | Generative Fill or Content-Aware Fill |
| Product shadow on white | Selection plus layer mask |
Pros and cons
Pros: Maximum precision, non-destructive, professional results.
Cons: Learning curve and paid software after the trial.
Method 4: Use AI Object Removal for Complex Cast Shadows
AI object removal works by analyzing the surrounding pixels and generating a plausible replacement. It is especially useful when a shadow falls across a busy background, such as grass, gravel, tile or fabric, where manual patching takes ages.
When AI is the right choice
- The shadow crosses multiple textures
- You need a fast fix on many photos
- You are not confident with manual retouching
Step-by-step
Choose an AI editor. Options include removerhub, Photoshop's Remove Tool, Apple's Clean Up and Google's Magic Editor.
Upload or open your photo.
Brush over the shadow, including a small margin around the edge. Tools often work better when the mask covers the soft edge of the shadow.
Run the removal.
If the first result leaves traces, undo and mask again in smaller pieces.
Compare with the original by zooming in on the fill area.
What AI does well and where it fails
Works well: Simple textures, blurry backgrounds, small shadows, repeating patterns.
Struggles with: Faces, text, straight architectural lines and very large removals. AI may invent details that were never there, so avoid it for evidence, documentation or anything that must remain factually accurate.
A note on honesty
If you edit photos that will be used in news, legal, insurance or product-condition contexts, keep the original and disclose edits where appropriate. Retouching for looks is normal. Retouching to mislead is not.
How to Remove Specific Kinds of Shadows
Face and portrait shadows
Harsh shadows under the eyes, nose and chin are the most common portrait problem.
Brighten shadows lightly using a mask or Selective tool.
Warm the shadow slightly. Cool, blue shadows look unnatural after brightening.
Avoid removing all shadows. Some shading gives the face shape.
Zoom out often. What looks fine at 200% may look flat at normal size.
Product photography shadows
Try an online shadow remover for a fast, clean background.
For a professional look, cut out the product and place it on a pure white layer.
Add a soft, subtle shadow back in if the item seems to float. A tiny natural shadow can look more realistic than none.
Export at the size your marketplace requires.
Your own shadow in a photo
Use AI object removal or Patch for the cast area.
Work in sections along the shadow edge.
Match the surface texture, such as pavement or grass, using Healing Brush for final touches.
Shadows on documents and scans
Increase Exposure and Shadows slightly.
Raise Contrast to make text darker.
Use a document-scanning app that flattens lighting automatically.
Shadows on a white background
Use levels or curves to push the background toward white.
Protect the subject with a mask so edges do not blow out.
Check edges for a halo.
Automatic vs. manual retouching
Automatic tools save time but can guess wrong. Manual editing takes longer but gives you control over every pixel. Many professionals combine both: let AI do the bulk of the work, then clean up edges by hand.
Common Mistakes That Make Shadow Removal Look Fake
Pushing Shadows to the maximum. This flattens depth and adds noise.
Ignoring color. Shadows carry color. Brightened areas can look gray or blue.
Leaving a ghost edge. Always inspect the boundary of the old shadow.
Cloning repeated patterns. Change your source point often.
Editing a compressed JPG many times. Each save loses quality.
Removing every shadow. Objects with no shadow can look like they are floating.
Not zooming out. Check the full picture, not just the close-up.
How to Prevent Shadows Before You Shoot
The easiest edit is the one you never need.
- Shoot in soft light. Overcast days and open shade avoid harsh shadows.
- Face the light. Position your subject so light falls on the face.
- Use a reflector. A white board or foam sheet bounces light into shadows.
- Turn on fill flash carefully. A gentle flash can lift face shadows.
- Use a light tent for products. Diffused light from several sides removes hard shadows.
- Move your own body. Check where your shadow falls before shooting.
- Shoot RAW when possible. RAW files keep more detail in dark areas, which makes shadow recovery easier.
- Avoid noon sun. Early morning and late afternoon light is gentler.
Real-World Examples
These are illustrative scenarios based on common editing situations.
The online seller. A small shop owner photographs handmade candles on a white sheet near a window. Each photo has a gray shadow on the right. She uploads the images to an online shadow remover, checks the edges at 100%, and re-exports. Her listings look consistent without any studio equipment.
The graduation portrait. A student's photo was taken at midday, leaving deep shadows around the eyes. He opens it in Snapseed, uses Selective on the eye area, and lifts brightness slightly. He keeps a little shadow so the face still looks natural.
The family photo. A photographer's long shadow falls across the grass in front of a family. AI object removal handles most of it, but a few blades of grass look repeated. A quick Healing Brush pass in Photoshop fixes them.
The scanned recipe. A phone shadow covers half a handwritten recipe card. Raising exposure and contrast makes the ink readable again.
Why Choose removerhub
If you want to remove a shadow without learning a complicated editor, removerhub is built to make that simple.
- Fast, browser-based tools with no installation
- Clear controls for beginners
- Related tools in one place, including object removal and an image upscaler
- A straightforward workflow: upload, edit, download
No tool is perfect for every photo. If your image has a very complex shadow or an important face, you may still want to finish it in a full editor. You can explore advanced removerhub tools to see what fits your project.
Paid or structured learning
- Online courses on Photoshop or Lightroom from platforms such as Coursera, Udemy or Skillshare
- Adobe Creative Cloud plans, which include professional tools and tutorials
- Photography workshops that teach lighting, which prevents shadow problems at the source
Choose courses with recent update dates, as editing software changes quickly.
What's Next for Shadow Removal?
Shadow removal is changing quickly. Generative AI can now rebuild large parts of an image, phone cameras apply computational photography as you shoot, and editors are adding one-tap cleanup features. Expect tools to get better at understanding light direction, so edits look more natural.
Two things will probably not change. First, good light at capture will always beat good editing after the fact. Second, you will still need to check the result yourself, because AI can make confident mistakes.
For related editing skills, it may help to learn how to increase image resolution and how to remove objects from photos, since both often go hand in hand with shadow cleanup.
Frequently Asked Questions
How can I remove a shadow from a photo?
Choose a method based on the shadow. For dark areas, lift the Shadows slider in a photo editor. For a hard cast shadow, use an online shadow remover, an AI object remover or Photoshop's Patch or Remove tools. Then check the edges at full size.
Can I remove shadows from photos for free?
Yes. Free options include browser-based editors, your phone's built-in Photos app, Snapseed, Google Photos, GIMP and Photopea. Some AI features have limits or require an account, so check each tool's current terms.
How do I remove shadows without Photoshop?
Use an online shadow remover, a phone editor or a free desktop editor like GIMP. For quick brightening, adjust Shadows and Exposure. For hard shadows, try an AI object remover.
Can AI automatically remove shadows from images?
Often, yes, but results vary. Some AI tools remove the shadow completely, while others only lighten it. Always zoom in to check for gray outlines, blurring or invented details.
How do I remove shadows from a product photo?
Use an online shadow remover or cut out the product and place it on a clean white background. You can add a soft, subtle shadow back if the product looks like it is floating.
How do I remove a face shadow from a portrait?
Brighten the shadowed area with a mask or a selective tool. Keep a little shading so the face keeps its shape, and avoid pushing the edit so far that skin turns gray.
Conclusion:
You do not need expensive software to fix a shadow. You need the right method for the type of shadow you have.
Here is a quick plan:
Identify your shadow. Is it dark and soft, or a hard cast shape?
Brighten soft shadows with your phone or a curves adjustment.
Remove hard shadows with an online remover, AI object removal or Photoshop's Patch tool.
Zoom in and out to check edges, texture and skin tone.
Keep the original file so you can always start again.
Shoot in softer light next time to avoid the problem altogether.
Ready to try it? Book a seat at Advance Free Tools offered by removerhub, and explore advanced removerhub tools to clean up your next photo in minutes.