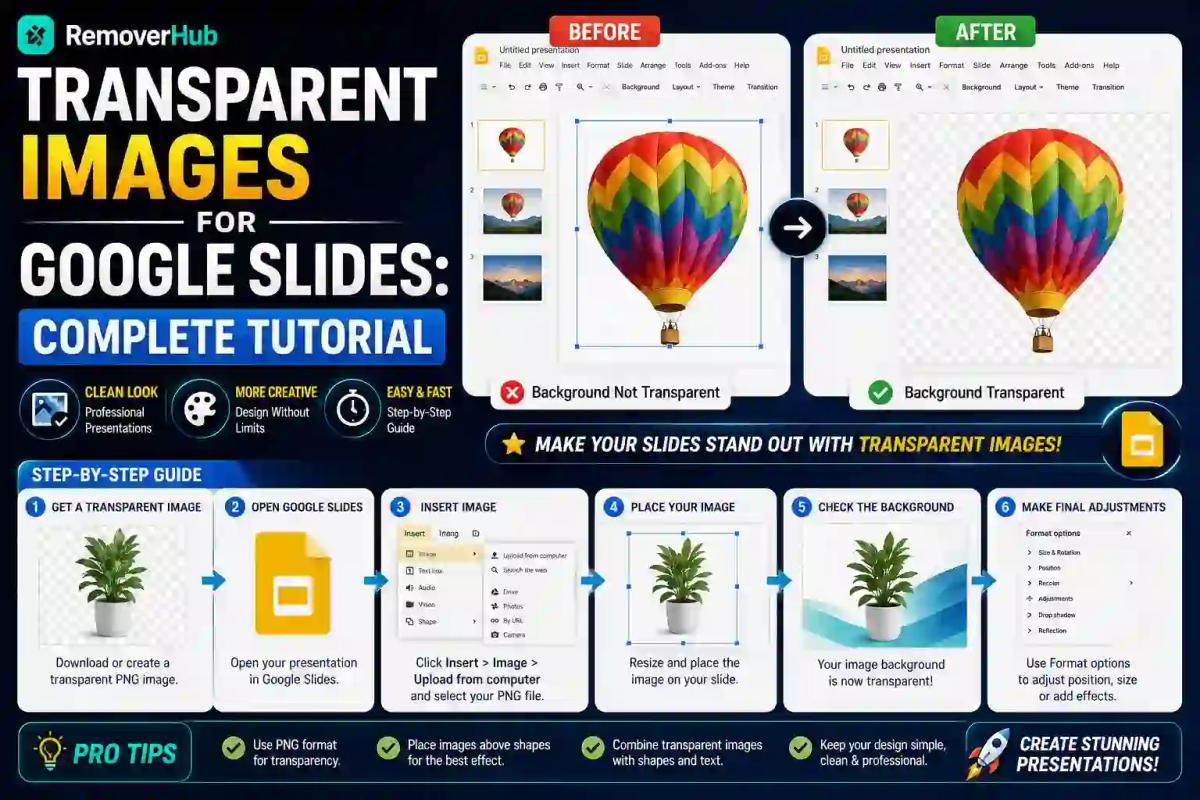
How to Make an Image Transparent in Google Slides
If you've ever tried to place a logo over a photo in Google Slides and ended up with an ugly white box instead of a clean overlay, you're not alone. The good news: Google Slides has a built-in transparency slider that handles this in seconds, and it's completely different from "removing a background," which is a separate task altogether. This tutorial covers both — how to adjust transparency natively inside Slides, and how to actually strip a background out of a photo before you ever upload it.
By the end, you'll know exactly which method to use depending on whether you want a see-through image, a transparent logo, or a photo with its background completely gone.
Two Different Problems: Transparency vs. Background Removal
This is the single biggest point of confusion people run into, so it's worth clearing up first.
Image transparency (also called opacity) makes the entire image partially see-through — like a sheet of tinted glass laid over your slide. Google Slides does this natively, no extra tools needed.
Background removal makes only the background disappear while keeping your subject fully solid — like cutting a photo out with scissors. Google Slides cannot do this on its own. You need a pre-made transparent PNG, or a tool that strips the background before the image ever touches your slide.
Mixing these two up is why so many people get frustrated. They drag the transparency slider expecting their photo's white background to vanish, and instead the whole image — subject included — starts fading out. Once you understand the distinction, the rest of this becomes much easier.
Method 1: Adjusting Image Transparency Natively in Google Slides
This is the fastest option and requires zero external tools. Here's exactly how it works, based on Google's current Format Options panel.
Open your presentation and go to Insert > Image to add your picture to the slide.
Click the image once to select it — you'll see blue handles appear around its edges.
Right-click the image and choose Format Options (or click Format in the top menu, then Format Options).
In the panel that opens on the right, expand the Adjustments section.
Drag the Transparency (sometimes labeled Opacity) slider to the right to increase see-through effect, or left to make it more solid.
Watch the change apply live on your slide, and stop wherever it looks right.
This process is officially documented on Google's own support page for cropping and adjusting images, which confirms that the Adjustments panel controls transparency, brightness, and contrast for any image, presentation, or video in Docs Editors.
A few things worth knowing before you do this:
- It's non-destructive. If you don't like the result, right-click the image and select Reset image to undo every adjustment and return to the original.
- It works on PNG and GIF files too, so transparency effects apply consistently regardless of your image format.
- Mobile apps don't have this feature. If you're on the Google Slides app for iOS or Android, the Transparency slider simply isn't there. The workaround is to open Slides in your phone's browser, request the desktop site, and then access Format Options normally.
Where This Technique Actually Helps
Reducing image transparency isn't just a cosmetic trick — it solves real layout problems:
- Text-over-image slides. Instead of placing a photo behind text and hoping for readability, drop the image's opacity to 20–30% so it becomes a subtle backdrop rather than a competing visual.
- Watermarking a logo. Insert your company logo, reduce opacity to around 70–80%, and send it to the back of the slide for a professional, non-intrusive brand mark.
- Layering design elements. Overlapping two images with adjusted transparency creates depth without needing any design software.
Method 2: Making a Shape Transparent (Different Menu Entirely)
Here's something almost every tutorial skips, and it trips people up constantly: shapes in Google Slides do not use the Format Options panel for transparency. If you click a shape and open Format Options looking for a Transparency slider, you won't find one there — it simply doesn't exist for shapes.
Instead, here's the correct path:
Click the shape to select it.
Click the Fill color icon (the paint bucket) in the toolbar.
At the bottom of the fill color menu, click Custom.
In the custom color window, use the Transparency slider to adjust opacity.
This is a common trap: someone selects an image sitting close to or overlapping a shape, opens Format Options, and gets confused when the Adjustments panel appears empty of a transparency option — because they actually needed to click the shape, not the image, or vice versa. If your Adjustments panel isn't showing a Transparency slider at all, double-check exactly what's selected.
Method 3: True Background Removal (Making a Solid Background Disappear)
If what you actually want is to remove the white or colored background behind your subject — not just dim the whole image — Google Slides' native tools won't get you there. You need one of these approaches instead.
Option A: Use a Pre-Made Transparent PNG
The cleanest solution is to start with an image that already has its background removed and saved as a PNG with an alpha channel. PNG is the format that supports true transparency (JPEG does not), so any transparent logo, icon, or product photo you insert into Slides will keep its see-through background automatically — no adjustment needed on your end.
Option B: Remove the Background Before Uploading
If your image still has a solid background, you'll need to strip it out first using a dedicated tool, then upload the result as a PNG. Removerhub's AI background remover handles this automatically — upload your photo, and it isolates the subject while making the background fully transparent, ready to drop straight into Slides.
This matters more than people expect for presentation quality. A product photo with a clean, removed background looks dramatically more polished sitting on a slide than the same photo with its original studio backdrop still attached. For a side-by-side breakdown of when this native-Slides route beats manual editing, our comparison on Photoshop vs. Removerhub for transparent images walks through the trade-offs in detail.
Comparison Table: Which Method Should You Use?
| Method | Steps Required | Cost | Best For |
|---|---|---|---|
| Native Transparency Slider | 4 clicks inside Slides | Free | Dimming a whole image or logo watermark |
| Pre-Made Transparent PNG | Just upload | Free (if you already have one) | Icons, logos, product shots you already own |
| AI Background Remover | Upload → download → insert | Free/Paid tiers | Removing a busy or solid background entirely |
How to Fix a Transparent PNG That Shows a White Box in Slides
This is one of the most common frustrations people search for, and it usually comes down to one of three causes:
The image wasn't actually saved as a transparent PNG. If the original file was a JPEG converted to PNG without background removal, there's no alpha channel to make transparent — JPEGs cannot store transparency data at all, so converting the file extension alone changes nothing.
A white background was added during export. Some editing tools flatten transparency onto a white layer by default when saving. Re-export the file and confirm "transparent background" or "PNG-24 with alpha" is selected before downloading.
The image was inserted as a Google Drawing instead of a direct image upload. Drawings sometimes flatten transparency during conversion. Try re-inserting the file directly via Insert > Image > Upload from computer instead of building it inside a Drawing canvas first.
If you're troubleshooting this from scratch, our guide on turning a photo into a transparent PNG covers the export settings that actually preserve the alpha channel correctly.
Layering Transparent Images With Text and Shapes
Once you have a transparent image — whether adjusted via the slider or background-removed beforehand — layering it correctly makes the difference between a slide that looks intentional and one that looks accidental.
- Send images to the back by right-clicking and choosing Order > Send to back, so text boxes and shapes sit visibly on top.
- Use a semi-transparent shape as a scrim between a busy background image and your text. A dark rectangle set to 40–50% transparency, placed behind the text box, dramatically improves readability without hiding the image entirely.
- Group layered elements together (select all, right-click, Group) once you're happy with the arrangement, so you don't accidentally shift one piece while presenting or editing later.
Google Slides vs. PowerPoint vs. Canva: Transparency Compared
If you regularly move between platforms, it helps to know the differences aren't cosmetic — they affect what's actually possible:
- Google Slides offers native transparency adjustment through Format Options, but no true background removal without an external PNG or tool.
- PowerPoint includes a "Remove Background" feature built directly into the ribbon, letting you erase backgrounds without leaving the app — something Slides genuinely lacks.
- Canva provides one-click background removal as a premium feature, plus transparency sliders similar to Slides, making it a middle ground between the two.
If your workflow depends heavily on background removal specifically, doing that step in Removerhub or a similar tool before uploading into Slides will consistently get you cleaner results than trying to work around Slides' native limitations.
Frequently Asked Questions
Can you make an image transparent in Google Slides? Yes. Select the image, open Format Options, expand Adjustments, and drag the Transparency slider. This reduces the opacity of the entire image but does not remove any specific part of it, like a background.
How do I remove a background in Google Slides without add-ons? You can't remove a background using Slides' native tools alone. The practical workaround is to remove the background using an external tool like an AI background remover, save the result as a transparent PNG, and then insert that file into your slide.
Does Google Slides support PNG transparency natively? Yes. PNG files with an alpha channel display their transparent areas correctly when inserted into Slides, with no additional steps required on your part.
Why does my transparent image show a white box in Slides? This usually means the file wasn't saved with true transparency — often because it was originally a JPEG, or the export process flattened the transparent areas onto a white layer. Re-export as a genuine transparent PNG to fix it.
Is there a free tool to make images transparent for Slides? Yes. Google Slides' built-in transparency slider is free and requires no extra software. For actual background removal, free tiers of tools like Removerhub's background remover can generate a transparent PNG ready to upload.
How do I adjust transparency percentage in Google Slides? Right-click your image, select Format Options, expand Adjustments, and drag the Transparency slider — moving right increases transparency, moving left restores opacity. There's no numeric input field; it's slider-based only.
Final Takeaway
The confusion around transparent images in Google Slides almost always comes down to using the wrong tool for the job. If you want to soften or dim an entire image, the built-in Transparency slider under Format Options handles it in seconds. If you need the background gone entirely — for a logo, product photo, or clean overlay — that has to happen before the image reaches your slide, using a transparent PNG or a background remover.
Start with a properly prepared transparent PNG using Removerhub's background remover, then layer it into your slide using the native transparency and ordering tools covered here. That combination — clean source file plus correct in-app adjustments — is what actually produces professional-looking slides, not just technically "transparent" ones.