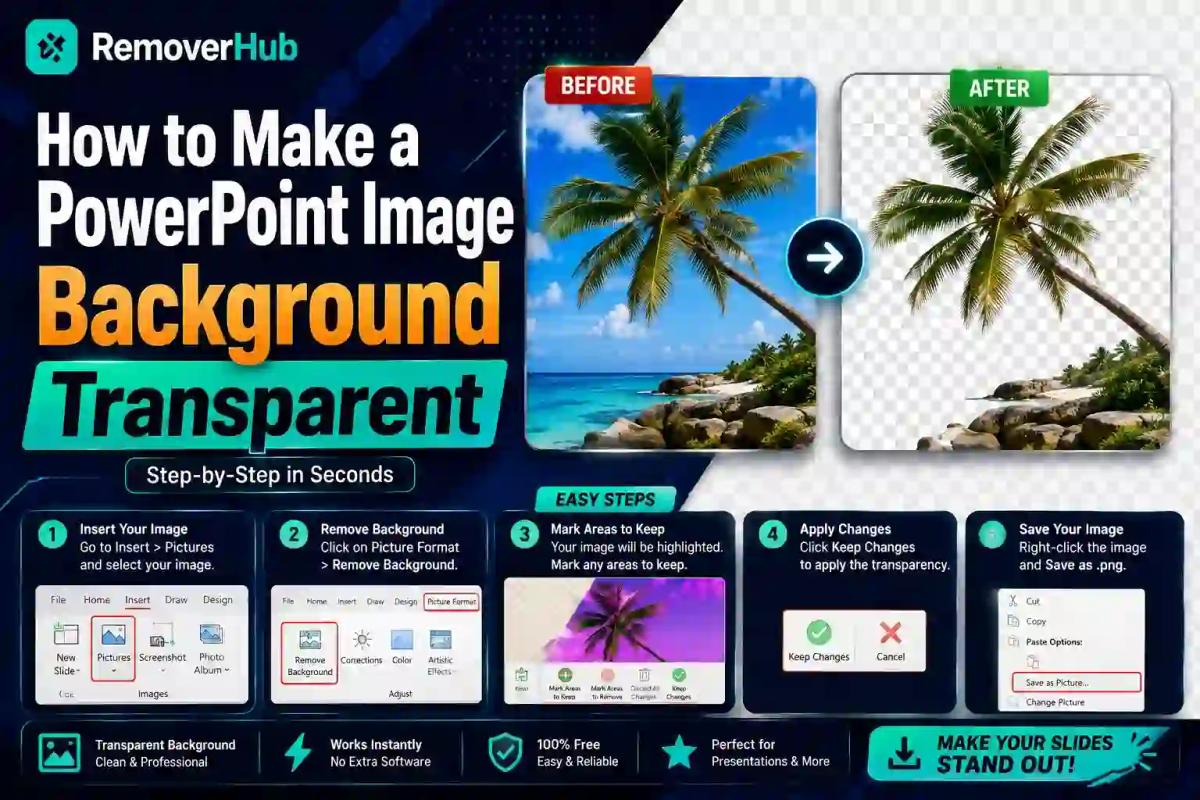
How to Make a PowerPoint Image Background Transparent
You've got a logo, a headshot, or a product photo, and it's sitting on a slide with an ugly white or colored box around it instead of blending naturally into your design. To make an image background transparent in PowerPoint, select the image, open the Picture Format tab, click Remove Background, use the mark areas to keep or remove tools to refine the selection, and confirm. For simple, solid-colored backgrounds, the Set Transparent Color tool under Color offers an even faster one-click alternative. Both methods work without any external software, though each has real limitations worth understanding before you rely on them for anything client-facing or polished.
This guide walks through every built-in method PowerPoint offers, where each one falls short, and what to do when PowerPoint's native tools simply can't produce a clean result.
Why Background Transparency Matters in a Presentation
A white or colored box sitting behind a logo or photo is one of the fastest ways to make a slide look unfinished. It breaks visual flow, clashes with your slide's actual background color, and signals, whether fairly or not, that the deck wasn't put together carefully. Transparent images let logos sit naturally over branded backgrounds, product photos blend into layouts without a visible seam, and headshots integrate into team slides without an awkward rectangular frame.
This matters more than it might seem for something as "small" as image styling. In professional decks, pitch materials, and anything shared externally, these visual details are often the difference between a presentation that looks put-together and one that looks rushed.
Method 1: PowerPoint's Built-In Remove Background Tool
This is PowerPoint's main tool for background removal, and it's been part of the Picture Tools ribbon since PowerPoint 2010, with steady improvements to accuracy in more recent versions.
Step-by-Step: Using Remove Background in PowerPoint
Click the image on your slide to select it.
Go to the Picture Format tab (this appears automatically once an image is selected; in some older versions it may be labeled simply "Format").
Click Remove Background, found on the far left of the ribbon.
PowerPoint will automatically guess which areas to keep (shown in natural color) and which to remove (shown shaded in magenta or purple, depending on version).
Use "Mark Areas to Keep" to click on any parts of the subject PowerPoint incorrectly marked for removal.
Use "Mark Areas to Remove" to click on any background pixels PowerPoint left behind.
Click "Keep Changes" (or press Enter) to finalize.
The image will now display with a transparent background directly on your slide. If you need to export it as a standalone transparent file, right-click the image and select Save as Picture, then choose PNG as the file format, since PNG is the only common format that actually preserves transparency data.
Where This Tool Works Well
PowerPoint's Remove Background tool performs reliably on:
- High-contrast subjects against a plain, single-color background
- Product photos shot on a white or solid backdrop
- Simple logos with clean, defined edges
- Headshots with reasonably even lighting and a plain background
Where This Tool Struggles
The same tool becomes noticeably less reliable with:
- Fine hair or fur detail, where PowerPoint's edge detection tends to either cut off wispy strands or leave a rough, jagged outline
- Busy or textured backgrounds, since PowerPoint's algorithm relies on contrast between subject and background to guess the boundary
- Semi-transparent or reflective objects, like glass or fabric with sheen, which confuse the tool's binary "keep or remove" logic
- Low-resolution or heavily compressed source images, where PowerPoint has less clean pixel data to work from
If you're working with any of these harder cases, a dedicated background remover built specifically for edge accuracy will typically outperform PowerPoint's built-in tool considerably. Our AI Background Remover is designed to handle exactly this kind of detail, including hair, fur, and complex edges, and produces a ready-to-use PNG you can drop straight into your slide without needing any manual touch-up inside PowerPoint at all.
Method 2: Set Transparent Color
For a specific, narrower use case, removing a single solid background color, PowerPoint offers a faster one-click alternative that skips the manual mark-area process entirely.
Step-by-Step: Using Set Transparent Color
Select the image on your slide.
Go to Picture Format → Color.
Click Set Transparent Color near the bottom of the dropdown menu.
Your cursor changes to a special selection tool. Click directly on the background color you want removed.
PowerPoint instantly makes every pixel matching that exact color transparent throughout the image. This is genuinely the fastest method available, but it only works cleanly when the background is a single, flat, uniform color, a solid white or plain colored backdrop, for instance. It will not work well on gradients, shadows, or backgrounds with any color variation, since it removes one specific color value, not a "background region" the way Remove Background attempts to.
Set Transparent Color vs. Remove Background
Method
Best For
Steps Required
Set Transparent Color
Single flat-color background (solid white, solid color)
3 clicks, no manual refinement
Remove Background
Photos with more visual complexity, subjects with varied edges
Selection + manual mark-area refinement
Insert pre-made transparent PNG
Any image, especially complex ones (hair, fur, busy backgrounds)
Prepare PNG externally, then insert
| Method | Best For | Steps Required |
|---|---|---|
| Set Transparent Color | Single flat-color background (solid white, solid color) | 3 clicks, no manual refinement |
| Remove Background | Photos with more visual complexity, subjects with varied edges | Selection + manual mark-area refinement |
Method 3: Insert a Pre-Made Transparent PNG
For anything with genuine complexity, hair, fur, intricate product shapes, cluttered original backgrounds, the most reliable approach isn't to fight with PowerPoint's built-in tools at all. Instead, remove the background using a dedicated tool first, then simply insert the finished transparent PNG into your slide like any other image.
This sidesteps every limitation covered above. You get clean edge detection on complex subjects, no leftover background fringe, and full control over the result before it ever touches your presentation. Once the transparent PNG is ready, inserting it is identical to inserting any image: Insert → Pictures → This Device, then position and resize as needed.
For product photography specifically, where clean, consistent edges matter across every slide in a catalog-style deck, our Background Remover for Product Photos is tuned for exactly this use case, producing uniform results across multiple images rather than requiring you to manually adjust mark areas on each one individually inside PowerPoint.
How to Make a Logo Background Transparent in PowerPoint
Logos are one of the most common reasons people search for this specific task, and they deserve a slightly different approach than photos.
- If your logo already has a solid, uniform background (most simple, flat-color logos do), Set Transparent Color is usually the fastest, cleanest option.
- If your logo has gradients, shadows, or fine detail, Remove Background will need manual refinement, and even then may leave soft artifacts around curved or thin elements.
- If you have access to the logo as a vector file (AI, EPS, or SVG), exporting it directly as a PNG with transparency built in, rather than trying to key out a background from a raster version, avoids the whole problem entirely.
A poorly executed transparent logo, with a faint white halo or jagged edge, often looks worse than simply leaving the original background in place, since it draws attention to the flaw rather than blending seamlessly. If Set Transparent Color and Remove Background both leave visible artifacts on a logo you'll be reusing across multiple slides or documents, it's worth the extra step of running it through a dedicated background removal tool once and reusing that clean PNG everywhere going forward.
Does PowerPoint's Transparency Tool Work the Same on Mac and Windows?
Largely, yes, but with some interface differences worth knowing about. Both platforms include Remove Background and Set Transparent Color under the Picture Format tab, and the underlying functionality is comparable. The differences tend to be cosmetic: slightly different ribbon layouts, occasional differences in keyboard shortcuts for confirming changes, and in some older Mac versions, marginally less refined edge detection compared to the Windows equivalent at the time. PowerPoint Online (the browser-based version) has historically had more limited image editing capability than the desktop apps, so if you're working in a browser and the Remove Background option isn't appearing, that's a known limitation rather than something you're doing wrong.
How Do I Adjust Image Transparency in PowerPoint (Not Just Background Removal)?
It's worth distinguishing between two different things people often mean by "transparency" in PowerPoint:
Removing the background (covered above), making the area around your subject see-through.
Adjusting the overall transparency of the entire image, making the whole picture partially see-through, useful for watermarks, subtle background images behind text, or layered design effects.
For the second case:
Select the image.
Right-click and choose Format Picture, or use the Picture Format tab.
Under Picture Format pane → Picture, look for a transparency slider (in newer PowerPoint versions, this sits directly in the Picture Format ribbon; in older versions, it's inside the Format Picture side panel under Picture Corrections or a dedicated transparency control).
Drag the slider to set an overall transparency percentage for the whole image.
This is the tool to reach for if you want a faded background photo behind text on a title slide, or a subtle watermark-style logo, rather than a fully transparent cutout background.
Can I Make Part of an Image Transparent in PowerPoint?
To a limited degree, yes, using the Mark Areas to Remove tool within Remove Background, which lets you manually click on specific internal regions of an image (not just the outer background) to make them transparent as well. This works reasonably well for simple internal removals but isn't designed for precise, pixel-level partial transparency the way dedicated photo editing software handles it. For more complex partial-transparency effects, layering a separately prepared transparent PNG, edited outside PowerPoint, generally produces a cleaner result than trying to achieve it entirely within PowerPoint's native tools.
Why Does PowerPoint's Background Removal Leave Rough Edges?
This is one of the most common frustrations, and it comes down to how the tool's detection algorithm actually works. PowerPoint's Remove Background relies on contrast analysis, essentially guessing where your subject ends and the background begins based on color and brightness differences. When that contrast is weak (similar colors between subject and background), or when the boundary itself is inherently complex (hair strands, fur, semi-transparent fabric), the algorithm has to make judgment calls that often produce a slightly rough, stair-stepped, or incomplete edge.
Manually refining with Mark Areas to Keep/Remove helps, but it's a genuinely tedious, click-by-click process for anything with fine detail, and even careful manual refinement in PowerPoint won't match the smoother, more natural edge quality that AI-based segmentation tools built specifically for this task can produce. If you've spent several minutes manually clicking around a hairline in PowerPoint and the result still looks rough, that's not a sign you're doing it wrong, it's a genuine limitation of the tool.
Is PowerPoint's Background Removal Free to Use?
Yes. Both Remove Background and Set Transparent Color are included in every standard PowerPoint license, desktop and Microsoft 365 subscription versions alike, with no additional cost or separate add-in required. This makes PowerPoint's native tools a genuinely reasonable first option for quick, simple removal tasks, even if they fall short on more complex images.
Troubleshooting: PowerPoint Background Removal Not Working Properly
A few common issues and their likely causes:
- The Remove Background button is greyed out or missing. This typically means you're working in PowerPoint Online rather than the desktop app, or the file format/image type isn't fully supported. Try the desktop application instead.
- PowerPoint marks nearly the entire image for removal (or keeps nearly everything). This usually indicates very low contrast between your subject and background. Manual mark-area corrections become essential in this case, or consider a different source photo with better contrast if one's available.
- Transparency disappears after saving or exporting. Confirm you're saving as PNG specifically, not JPG, since JPG has no mechanism to store transparency data at all and will flatten it to a solid color on save.
- Edges look pixelated after export. This is often a resolution issue rather than a transparency issue specifically. If you need genuinely crisp, high-resolution transparent output, our guide on removing a background in HD quality without pixelation covers exactly what causes this and how to avoid it.
PowerPoint vs. Photoshop vs. a Dedicated Online Tool
For readers weighing whether PowerPoint's built-in tools are "good enough" or whether it's worth reaching for something else, here's a realistic breakdown:
- PowerPoint's native tools are free, fast, and require no additional software, ideal for simple images and quick internal use where perfection isn't critical.
- Photoshop offers precise, professional-grade manual control, ideal for the hardest cases (fine hair, complex reflections), but requires both a subscription and genuine editing skill to use well.
- A dedicated online background remover splits the difference: no software installation, no subscription required for basic use, and meaningfully better automatic edge detection than PowerPoint's built-in algorithm, particularly on complex subjects. For a closer look at how a dedicated tool stacks up against Photoshop specifically for transparency work, our comparison on Photoshop vs. RemoverHub for transparent images breaks down where each genuinely excels.
Practical Workflow: Getting Clean Transparent Images Into Your Deck
Based on what actually produces reliable results across different image types, here's a sensible decision path:
Simple logo on a flat, solid background? Use Set Transparent Color directly in PowerPoint. Fastest option, no downsides.
Product photo or headshot with decent contrast against a plain background? Try PowerPoint's Remove Background first; it'll likely handle it acceptably with minor manual touch-up.
Anything with hair, fur, complex edges, or a busy original background? Skip PowerPoint's native tool entirely and prepare the transparent PNG externally first, then insert it. This saves time and produces a noticeably cleaner result.
Need the same transparent image across multiple slides or future decks? Prepare it once as a clean transparent PNG and reuse the file, rather than repeating the removal process inside PowerPoint every time you need it.
Frequently Asked Questions
How do I make an image background transparent in PowerPoint? Select the image, go to Picture Format, click Remove Background, refine using the mark areas to keep/remove tools, then confirm. For simple solid-color backgrounds, Set Transparent Color under Color offers a faster one-click alternative.
Does PowerPoint have a built-in remove background tool? Yes. It's called Remove Background, located in the Picture Format tab, and has been available since PowerPoint 2010, with steadily improved accuracy in more recent versions.
How do I adjust image transparency in PowerPoint? For overall image transparency (not background removal), select the image, open Format Picture or the Picture Format pane, and use the transparency slider to set an overall percentage, useful for watermarks or faded background photos.
Can I make part of an image transparent in PowerPoint? To a limited extent, using Mark Areas to Remove within the Remove Background tool. For precise partial transparency, preparing the image externally generally produces better results.
Why does PowerPoint's background removal leave rough edges? PowerPoint's tool relies on contrast-based detection, which struggles with low-contrast boundaries, fine hair or fur, and complex backgrounds, producing rough or incomplete edges in these cases.
Is PowerPoint's background removal free to use? Yes, both Remove Background and Set Transparent Color are included in all standard PowerPoint licenses at no additional cost.
Does PowerPoint's transparency tool work the same on Mac and Windows? Largely yes, with the same core functionality on both, though interface layout differs slightly, and PowerPoint Online has historically offered more limited image editing capability than the desktop apps.
Final Thoughts
PowerPoint's built-in transparency tools, Remove Background and Set Transparent Color, handle simple, high-contrast images well and cost nothing extra to use. Where they consistently fall short is on genuinely complex images: fine hair, busy backgrounds, and fine edge detail, where the contrast-based detection simply isn't equipped to produce a clean result no matter how much manual refinement you attempt. For anything in that harder category, preparing a transparent PNG externally with a tool built specifically for accurate edge detection, then inserting it into your slide like any other image, will save you time and produce a noticeably more polished result.
Working with a tricky image PowerPoint can't handle cleanly? Try our AI Background Remover to get a clean, ready-to-insert transparent PNG in seconds, or explore the full toolkit at RemoverHub for related tasks like sharpening or watermark removal on the same images.